Cheesy Sourdough Bread Recipe-Deliciously Simple Bake
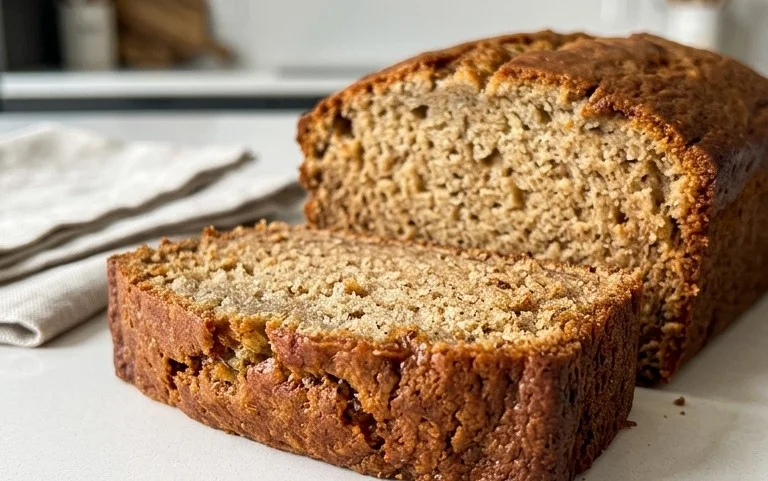
Sourdough Cheese Bread, a name that evokes warmth, comfort, and an irresistible aroma that fills the entire kitchen. There’s a reason why this delightful creation has captured the hearts (and stomachs!) of so many. It’s more than just bread; it’s an experience. The magic lies in the tang of the sourdough, its naturally leavened crum extractb providing a chewy, satisfying texture that’s simply unmatched. When you combine that with the glorious, melty goodness of cheese baked right into every bite, you create something truly spectacular.
What Makes Our Sourdough Cheese Bread So Special?
This isn’t your average cheese bread. We’ve perfected a recipe that balances the complexity of a vibrant sourdough starter with a generous, yet harmonious blend of cheeses. The long, slow fermentation of the sourdough not only develops its signature flavor but also contributes to a beautifully airy interior, studded with pockets of molten cheese that stretch and delight with every tear. Imagin extracte the golden-brown crust, the soft, yirum extracting crumb, and that incredible, savory cheese punch. It’s the perfect accompaniment to a hearty soup, a delightful appetizer, or simply enjoyed on its own. Get ready to fall in love with Sourdough Cheese Bread all over again!

Ingredients:
- 1 cup milk (244 g)
- 1/2 cup active sourdough starter (113 g)
- 1 large egg
- 1 tablespoon sugar (12 g)
- 1 teaspoon salt (5 g)
- 1 teaspoon garlic powder (3 g)
- 3 cups all-purpose flour (420 g)
- 4 tablespoons unsalted butter, softened (56 g)
- 2 cups shredded cheddar cheese
- Optional: 1 egg yolk mixed with 1 tablespoon water for egg wash, and a pinch of flaky sea salt for topping
Preparing the Dough
Mixing the Wet Ingredients
The journey to delicious Sourdough Cheese Bread begin extracts with combining our wet ingredients. In a large mixing bowl, or the bowl of your stand mixer fitted with a dough hook, pour in the 1 cup of milk. This can be whole milk, 2%, or even skim. If you’re out of milk, don’t worry, 1 cup of water (244 g) works perfectly as a substitute, though milk will lend a slightly richer flavor and softer crum extractb. Next, gently pour in the 1/2 cup of active sourdough starter. Ensure your starter is bubbly and active – this is key for a good rise and that signature sourdough tang. Crack in your large egg and add the 1 tablespoon of sugar. The sugar will not only add a touch of sweetness but also helps to feed the yeast in the sourdough starter, promoting a better fermentation. Whisk these ingredients together until they are well combined and the egg is fully incorporated into the milk and starter mixture.
Incorporating Dry Ingredients and Kneading
Now it’s time to introduce the dry components. Add the 1 teaspoon of salt and the 1 teaspoon of garlic powder to the wet mixture. The salt is crucial for flavor and also plays a role in controlling fermentation, while the garlic powder infuses a savory aroma and taste that will beautifully complement the cheese. Gradually add the 3 cups of all-purpose flour, about a cup at a time, mixing after each addition. If you’re using a stand mixer, mix on low speed until the flour is mostly incorporated. Once you’ve added all the flour and a shaggy dough has formed, it’s time to knead.
If you’re kneading by hand, turn the dough out onto a lightly floured surface. Knead for about 8-10 minutes, pushing the dough away from you with the heel of your hand, folding it over, and rotating it. The dough will start out sticky and a bit unruly, but as you knead, it will become smoother, more elastic, and less sticky. If it’s sticking too much, resist the urge to add too much extra flour; a little bit on your hands or the surface is fine. You’re looking for a dough that is soft and pliable, but not overly wet. If using a stand mixer, knead on medium-low speed for 6-8 minutes. The dough should pull away from the sides of the bowl and become smooth and elastic.
Adding the Butter and Cheese
Once the dough has developed enough gluten from kneading, it’s time to add the fat and flavor. Add the 4 tablespoons of softened butter to the dough. You can do this gradually, a tablespoon at a time, working it into the dough. This process can be a bit messy initially, and the dough might seem to break apart. Keep kneading, and the butter will eventually be fully incorporated, making the dough incredibly soft and supple. Continue kneading for another 5-7 minutes, until the butter is no longer visible and the dough is smooth and silky.
After the butter is incorporated, it’s time for the star of the show: the cheese! Gently fold in the 2 cups of shredded cheddar cheese. Try to distribute it as evenly as possible throughout the dough. You can do this by hand, gently pressing and folding the dough, or by pulsing it a few times on low speed with your stand mixer. Be careful not to overmix at this stage, as you don’t want the cheese to completely disappear into the dough; you want pockets of cheesy goodness. The dough will become a little moregin extractallenging to handle as the cheese is incorporated, but persevere.
First Rise and Shaping
The Bulk Fermentation
Place the dough into a lightly oiled bowl, turning it to coat all sides. Cover the bowl tightly with plastic wrap or a damp kitchen towel. Now comes the patient part: the first rise, also known as bulk fermentation. For sourdough, this can take anywhere from 4 to 12 hours, depending on the ambient temperature of your kitchen and the activity of your starter. You’re looking for the dough to at least double in size. A warmer environment will speed up the process, while a cooler one will slow it down. You can also do this in the refrigerator overnight for a slower, more controlled fermentation, which can enhance the flavor development.
Shaping the Loaf
Once the dough has doubled in size and is beautifully aerated, gently punch it down to release some of the accumulated gas. Turn the dough out onto a lightly floured surface. At this point, you can shape your Sourdough Cheese Bread into any form you like. A popular choice is a round loaf (boule) or an oblong loaf (batard). For a boule, gently gather the edges of the dough towards the center, creating tension on the surface. Flip it over so the seam side is down and cup your hands around the dough, rotating it to form a tight ball. If you prefer a batard, gently pat the dough into a rough rectangle, then fold the top third down and the bottom third up, like folding a letter. Gently roll it to seal the seam and then shape it into an oval. Place the shaped dough onto a baking sheet lined with parchment paper or into a prepared loaf pan.
Second Rise and Baking
The Proofing Stage
Cover the shaped dough loosely with plastic wrap or a clean kitchen towel. Let it rest for another 1 to 3 hours for its second rise, or proofing. During this time, the dough will puff up again, though not necessarily double in size. You can perform the “poke test” to check if it’s ready: gently poke the dough with a floured finger. If the indentation springs back slowly and leaves a slight mark, it’s ready to bake. If it springs back immediately, it needs more time. If it collapses, it may have over-proofed, but it can still be baked.
Baking the Bread
Preheat your oven to 400°F (200°C). If you’re using a Dutch oven, place it in the oven as it preheats. Once the dough has proofed, if you are using the optional egg wash, gently brush the top of the loaf with the egg yolk and water mixture. This will give the crust a beautiful golden-brown sheen. Sprinkle a little flaky sea salt over the top for an extra touch of savory crunch. Carefully transfer the loaf to the preheated oven. If using a Dutch oven, carefully remove the hot lid and place the loaf inside. Cover with the lid. If baking directly on a baking sheet, you may want to place a pan of water on the rack below to create steam, which helps with oven spring and a crispier crust.
Bake for 20-25 minutes with the lid on (if using a Dutch oven) or for the entire baking time if baking on a sheet pan with steam. Then, remove the lid (if applicable) and continue baking for another 20-25 minutes, or until the crust is a deep golden brown and the internal temperature of the bread reaches 200-210°F (93-99°C) when measured with an instant-read thermometer. The aroma filling your kitchen will be incredible!
Cooling and Enjoying
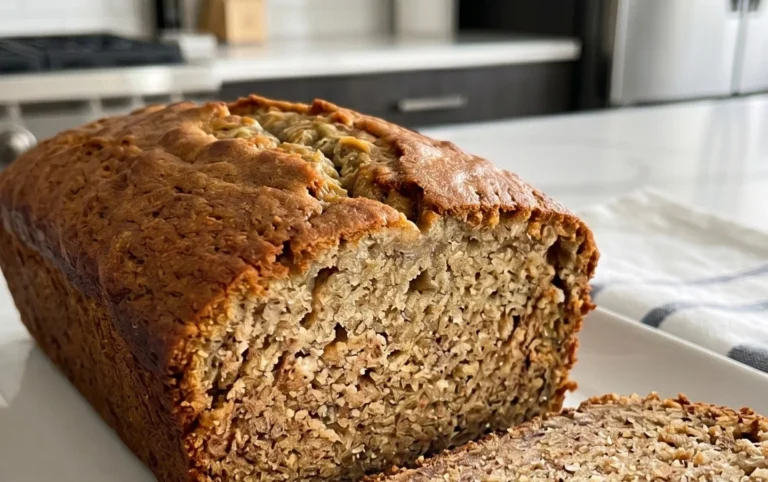
Once baked to perfection, carefully remove the Sourdough Cheese Bread from the oven and transfer it to a wire rack to cool completely. This is a crucial step, as the bread continues to cook internally as it cools. Cutting into it too soon will result in a gummy texture. Let it cool for at least 1-2 hours before slicing. Once cooled, slice into thick pieces and savor the wonderfully cheesy, tangy, and comforting Sourdough Cheese Bread you’ve created. It’s perfect on its own, toasted, or served with a bowl of soup.

Conclusion:
We hope you’ve enjoyed diving into the delightful world of our Sourdough Cheese Bread recipe! This versatile loaf offers a perfectly tangy crum extractb with pockets of gooey melted cheese, making it an absolute crowd-pleaser. Whether you’re a seasoned sourdough baker or just starting your journey, this recipe is designed to be approachable and rewarding. The magic of sourdough lies in its natural leavening and complex flavor development, and adding cheese elevates it to a whole new level of deliciousness.
This Sourdough Cheese Bread is fantastic served warm, either on its own or as the perfect accompaniment to soups and stews. It also makes for an incredible grilled cheese sandwich or a robust base for bruschetta. Feel free to get creative with your cheese choices – a sharp cheddar, a nutty Gruyère, or even a spicy pepper jack can add exciting new dimensions to this already amazing bread.
Don’t be discouraged if your first attempt isn’t absolutely perfect. Sourdough baking is a craft, and each bake teaches you something new. Embrace the process, experiment with your starter, and most importantly, enjoy the incredibly satisfying experience of baking your own homemade Sourdough Cheese Bread. Happy baking!
Frequently Asked Questions:
Can I use pre-shredded cheese?
While pre-shredded cheese is convenient, we highly recommend grating your own cheese from a block. Pre-shredded cheeses often contain anti-caking agents that can affect how well the cheese melts into the bread. For the best gooey texture, opt for freshly grated cheese.
What if my sourdough starter isn’t very active?
An active and bubbly sourdough starter is crucial for a good rise. If yours is sluggish, try feeding it more frequently for a few days leading up to baking. You can also try warming your starter slightly (around 75-80°F) to encourage activity. If it’s still not performing, it might be time to revive or refresh your starter.
Cheesy Sourdough Bread Recipe-Deliciously Simple Bake
A simple and delicious recipe for homemade cheesy sourdough bread, perfect for any occasion.
Ingredients
-
1 cup milk
-
1/2 cup active sourdough starter
-
1 large egg
-
1 tablespoon sugar
-
1 teaspoon salt
-
1 teaspoon garlic powder
-
3 cups all-purpose flour
-
4 tablespoons unsalted butter, softened
-
2 cups shredded cheddar cheese
-
Optional: 1 egg yolk mixed with 1 tablespoon water for egg wash, and a pinch of flaky sea salt for topping
Instructions
-
Step 1
In a large mixing bowl, combine milk, active sourdough starter, large egg, sugar, salt, and garlic powder. Whisk until well combined. -
Step 2
Gradually add all-purpose flour, mixing until a shaggy dough forms. Knead by hand for 8-10 minutes or in a stand mixer for 6-8 minutes until smooth and elastic. -
Step 3
Add softened butter, a tablespoon at a time, kneading until fully incorporated and the dough is smooth and silky. Gently fold in the shredded cheddar cheese, distributing evenly. -
Step 4
Place the dough in a lightly oiled bowl, cover, and let it rise in a warm place for 4-12 hours, or until doubled in size. Gently punch down the dough and shape into a round or oblong loaf. Place on a baking sheet lined with parchment paper. -
Step 5
Cover the shaped dough and let it proof for 1-3 hours, or until puffy. Preheat oven to 400°F (200°C). Brush with optional egg wash and sprinkle with flaky sea salt. -
Step 6
Bake for 20-25 minutes. Remove lid if using Dutch oven and continue baking for another 20-25 minutes, or until deep golden brown and internal temperature reaches 200-210°F (93-99°C). Cool completely on a wire rack before slicing.
Important Information
Nutrition Facts (Per Serving)
It is important to consider this information as approximate and not to use it as definitive health advice.
Allergy Information
Please check ingredients for potential allergens and consult a health professional if in doubt.