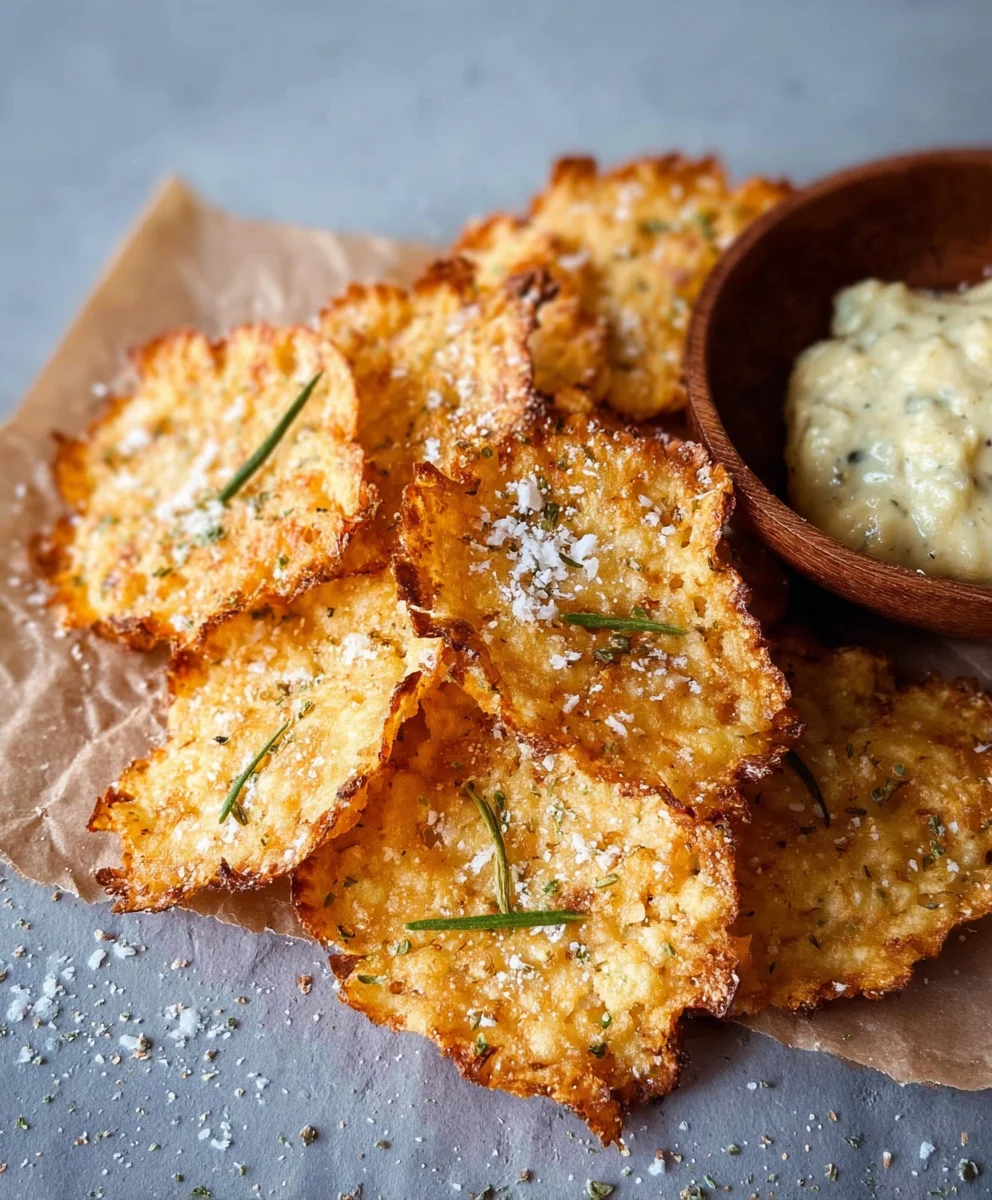
Crispy Cottage Cheese Chips-Healthy Snack
Crispy Cottage Cheese Chips are a revelation for anyone seeking a delicious, guilt-free snack that satisfies those crunchy cravings. Forget the bland and boring; these little flavor bombs are designed to impress your taste buds and keep you coming back for more. What makes these so incredibly popular? It’s the perfect marriage of textures and tastes: impossibly light and shatteringly crisp on the outside, with a surprisingly satisfying chegrape juicess within. Plus, the humble cottage cheese transforms into something truly magical, offering a protein punch that will power you through your day. These aren’t your average store-bought crisps; they’re a delightful adventure in homemade snacking, offering a unique flavor profile that’s both comforting and exciting. Prepare to be amazed by how something so simple can be so utterly addictive and utterly wonderful.
Why You’ll Love This Recipe
The Ultimate Snack Solution
We’ve all been there – the late-afternoon slump, the pre-dinner hunger pangs, or that moment when you just need something to nibble on. For too long, our options felt limited to sugary cookies or greasy chips. But now, with these amazing Crispy Cottage Cheese Chips, you have a game-changer. They’re wonderfully versatile, perfect for dipping into your favorite hummus, guacamole, or even a creamy yogurt dip. The secret to their success lies in the careful balance of ingredients that allows the cottage cheese to achieve that unparalleled crispness without sacrificing its subtle tang. Get ready to elevate your snack game and impress your friends and family with this surprisingly simple yet incredibly rewarding recipe.
Ingredients:
- 1 cup cottage cheese (small curds, drained well)
- ¼ teaspoon garlic powder
- ¼ teaspoon onion powder
- ½ teaspoon dried herbs (optional, such as thyme, parsley, or a blend)
- Salt, to taste
- Freshly ground black pepper, to taste
- Olive oil spray
Preparing the Cottage Cheese Base
The foundation of our Crispy Cottage Cheese Chips lies in transforming the cottage cheese into a cohesive, bakeable mixture. The key here is ensuring the cottage cheese is well-drained. I like to use a fine-mesh sieve and let it sit for at least 15-20 minutes, or even gently press out excess liquid with a spoon. This prevents the chips from becoming soggy. Once drained, place the cottage cheese into a medium-sized bowl. Add the garlic powder and onion powder. These spices provide a savory depth that complements the mild, tangy flavor of the cheese. Next, incorporate the dried herbs if you’re using them. A combination of thyme and parsley works wonderfully, but feel free to experiment with oregano or even a pinch of rosemary. Season generously with salt and freshly ground black pepper. Remember that cottage cheese can be a little bland on its own, so don’t be shy with the seasonings. Use a fork or a whisk to thoroughly mix all the ingredients together. You want a uniform consistency, where the spices and herbs are evenly distributed throughout the cottage cheese. The mixture should be thick and slightly paste-like.
Shaping the Chips
Now it’s time to give our chips their distinct shape. Line a baking sheet with parchment paper. This is crucial for preventing the chips from sticking and ensuring a clean release after baking. Spoon small dollops of the seasoned cottage cheese mixture onto the parchment-lined baking sheet. Aim for them to be about 1 to 1.5 inches in diameter, similar to the size of a silver dollar or a slightly larger coin. Using the back of the spoon, gently flatten each dollop into a thin, round disc. The thinner you make them, the crispier your chips will become. Aim for a thickness of about ¼ inch or less. If the mixture sticks to your spoon, you can lightly dampen the spoon with water or a tiny bit of olive oil. Ensure there’s a little space between each chip on the baking sheet, as they may spread slightly during baking. For perfectly uniform chips, you can even use a small cookie cutter to shape them after flattening, although this is optional. The goal is to create thin, evenly sized portions that will cook uniformly.
Baking for Crispiness
This is where the magic happens and our Crispy Cottage Cheese Chips achieve their delightful crunch. Preheat your oven to 350°F (175°C). Place the prepared baking sheet into the preheated oven. Bake the chips for approximately 20-25 minutes. However, oven temperatures can vary, so it’s essential to keep a close eye on them. You’re looking for the edges to turn golden brown and the centers to appear slightly dry and set. The exact time will depend on the thickness of your chips and your oven. After about 15 minutes, I like to rotate the baking sheet 180 degrees to ensure even cooking and browning across all the chips. If some chips are browning faster than others, you can carefully remove them from the baking sheet and continue baking the rest. The key is achieving a firm texture that indicates they are no longer soft or wet.
Achieving the Perfect Crunch
Once the chips have reached a golden brown color and appear set, it’s time to take them to the next level of crispiness. For an extra crunchy texture, you can reduce the oven temperature to 300°F (150°C) after the initial 20-25 minutes of baking and continue to bake for another 5-10 minutes. This lower, slower bake helps to dry out the chips even further. Alternatively, and often my preferred method for guaranteed crispiness, is to turn off the oven completely and leave the chips inside with the oven door slightly ajar for about 10-15 minutes. This allows them to continue drying and crisping without the risk of burning. The residual heat in the oven is perfect for this final stage. The chips should feel firm and brittle when gently pressed.
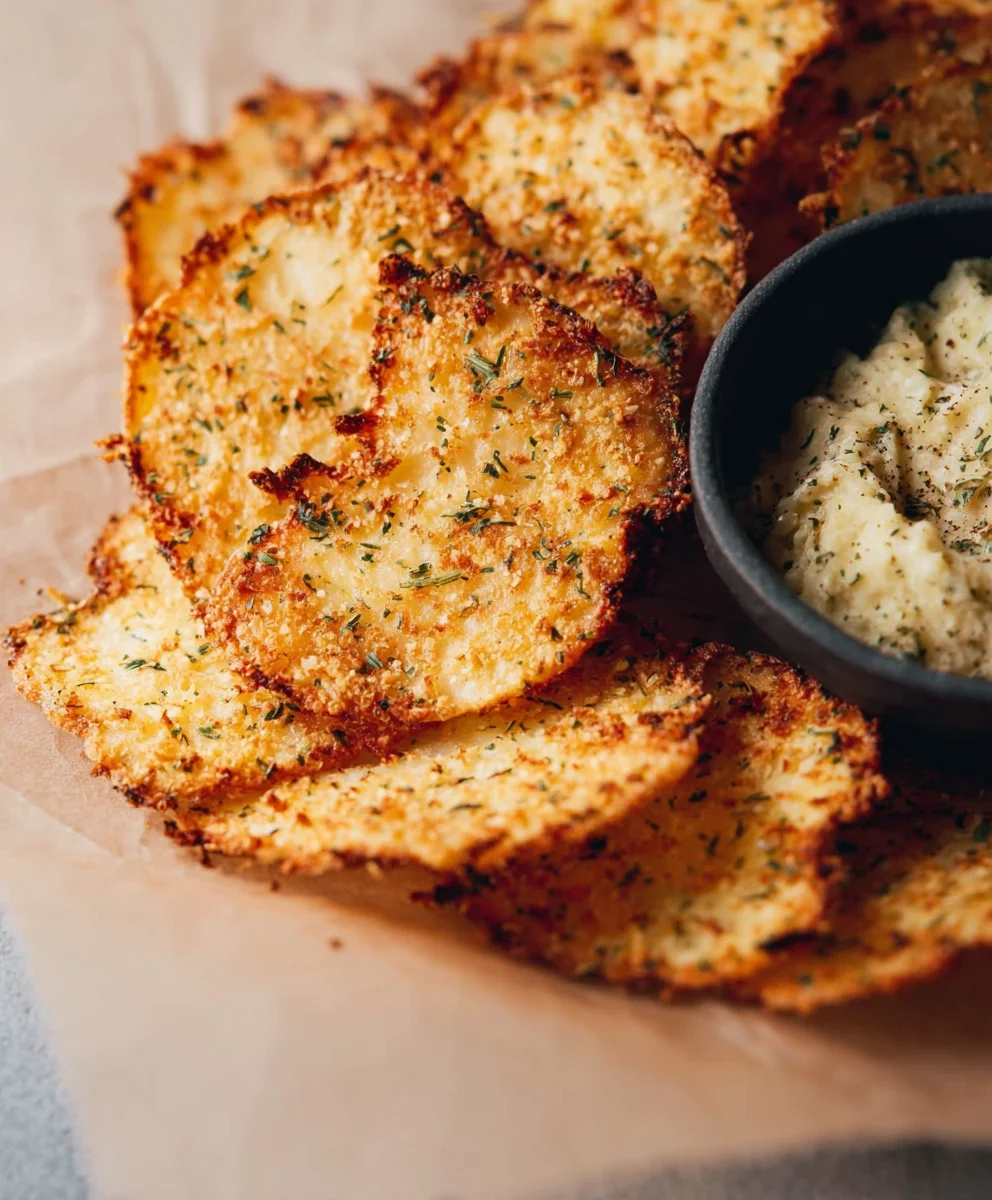
Cooling and Serving
Carefully remove the baking sheet from the oven. Allow the Crispy Cottage Cheese Chips to cool on the baking sheet for a few minutes. They will continue to crisp up as they cool. Once they’ve cooled slightly, use a thin spatula or a knife to gently lift them off the parchment paper. Transfer them to a wire rack to cool completely. This ensures that air circulates around them, preventing any trapped moisture from making them soggy. Once fully cooled, they are ready to be enjoyed. These Crispy Cottage Cheese Chips are fantastic on their own as a light, savory snack. They also make a wonderful accompaniment to salads, soups, or dips. You can serve them immediately for the freshest, crispiest experience. Store any leftovers in an airtight container at room temperature for a day or two, though they are best enjoyed fresh.
Conclusion:
There you have it – your guide to creating the most delightful Crispy Cottage Cheese Chips! We’ve walked through the simple steps to transform humble cottage cheese into a surprisingly satisfying and incredibly versatile snack. These chips are a testament to how simple ingredients can yield fantastic results. I hope you’re inspired to give them a try and discover your new go-to healthy treat.
These Crispy Cottage Cheese Chips are wonderful served on their own as a light and airy snack. They also make a fantastic base for dips – think guacamole, hummus, or your favorite salsa. For a more substantial experience, try crum extractbling them over a salad for an added crunch or topping them with a dollop of Greek yogurt and some fresh herbs. Don’t be afraid to experiment!
The beauty of these chips lies in their adaptability. Feel free to play with the seasonings. Smoked paprika, garlic powder, onion powder, or even a sprinkle of chili flakes can add exciting new dimensions. You can also experiment with different shapes and sizes when you’re forming them on the baking sheet. Let your creativity guide you!
I truly encourage you to embrace the simplicity and deliciousness of these Crispy Cottage Cheese Chips. They are proof that healthy eating can be incredibly rewarding and genuinely enjoyable. Happy baking!
Frequently Asked Questions:
Q: Can I use a different type of cottage cheese, like low-fat or lactose-free?
A: Absolutely! While full-fat cottage cheese often yields the crispiest results due to its fat content, low-fat varieties can also work well. If using low-fat, you might need to bake them for a slightly longer time to achieve maximum crispness. Lactose-free cottage cheese should also be a suitable alternative, provided it has a similar texture and moisture content.
Q: My cottage cheese chips aren’t getting crispy. What am I doing wrong?
A: Several factors can contribute to less-than-crispy chips. Ensure your cottage cheese is well-drained to remove excess liquid before seasoning and shaping. Spreading the mixture thinly and evenly on the baking sheet is crucial for even cooking. Also, make sure your oven is preheated properly, and avoid overcrowding the baking sheet. Sometimes, a slightly longer baking time at a consistent temperature is all that’s needed.
Crispy Cottage Cheese Chips-Healthy Snack
A simple and healthy recipe for creating crispy baked cottage cheese chips seasoned with savory spices.
Ingredients
-
1 cup cottage cheese (small curds, drained well)
-
1/4 teaspoon garlic powder
-
1/4 teaspoon onion powder
-
1/2 teaspoon dried herbs (optional, such as thyme, parsley, or a blend)
-
Salt, to taste
-
Freshly ground black pepper, to taste
-
Olive oil spray
Instructions
-
Step 1
Drain cottage cheese very well using a fine-mesh sieve for at least 15-20 minutes. Place the drained cottage cheese in a medium bowl. Add garlic powder, onion powder, dried herbs (if using), salt, and pepper. Mix thoroughly with a fork or whisk until a uniform, thick, paste-like mixture is formed. -
Step 2
Line a baking sheet with parchment paper. Spoon small dollops (about 1-1.5 inches in diameter) of the cottage cheese mixture onto the parchment paper, leaving space between them. Gently flatten each dollop into a thin disc, about 1/4 inch thick or less, using the back of a spoon. -
Step 3
Preheat oven to 350°F (175°C). Place the baking sheet in the preheated oven and bake for approximately 20-25 minutes. Watch closely for the edges to turn golden brown and the centers to appear dry and set. -
Step 4
To achieve extra crispiness, reduce the oven temperature to 300°F (150°C) after the initial baking time and continue to bake for another 5-10 minutes. Alternatively, turn off the oven, leave the door slightly ajar, and let the chips sit for 10-15 minutes to dry out further. -
Step 5
Carefully remove the baking sheet from the oven. Let the chips cool on the baking sheet for a few minutes, then gently lift them off with a spatula and transfer them to a wire rack to cool completely. They are best enjoyed fresh.
Important Information
Nutrition Facts (Per Serving)
It is important to consider this information as approximate and not to use it as definitive health advice.
Allergy Information
Please check ingredients for potential allergens and consult a health professional if in doubt.