Easy Honey Sesame Chicken Recipe
Honey Sesame Chicken is a flavor sensation that consistently wins hearts, and for good reason! There’s something undeniably magical about that perfect balance of sweet, savory, and nutty notes. It’s a dish that transports me straight back to my favorite takeout spots, but with a comforting homemade touch. What makes this Honey Sesame Chicken so irresistible? It’s the tender, juicy chicken coated in a sticky, glossy sauce that clings to every bite, punctuated by the delightful crunch of toasted sesame seeds. Forget complicated stir-fries; this recipe is designed to deliver that restaurant-quality taste right in your own kitchen, making it an absolute weeknight dinner hero or a crowd-pleasing appetizer. Get ready to fall in love with this classic all over again.
Honey Sesame Chicken
Honey Sesame Chicken is one of those dishes that transports me straight to my favorite takeout spot, but with a satisfying homemade twist. The perfect balance of sweet, savory, and a hint of tang, all coating tender, crispy chicken pieces, makes it an absolute winner for weeknight dinners or special occasions. The best part? It’s surprisingly simple to recreate this beloved classic in your own kitchen. We’ll break it down into easy steps, from preparing the chicken to achieving that irresistible glaze.
Ingredients:
Cooking Instructions
Preparing the Chicken and Batter
The foundation of great Honey Sesame Chicken is perfectly crispy chicken. We’ll start by getting our chicken pieces ready for their delicious coating. In a medium bowl, combine your cut chicken pieces. To this, add the chicken bouillon powder, white pepper, and 1 tablespoon of water. Toss everything together well to ensure the chicken is evenly seasoned. The bouillon powder adds an extra layer of savory depth that really elevates the flavor. Let this marinate for at least 10 minutes while you prepare the batter.
In a separate bowl, whisk together the 2 large eggs until they are well beaten. This will act as our binder for the flour mixture. In another medium bowl, combine the all-purpose flour, cornstarch, baking powder, and salt. Whisk these dry ingredients together until they are thoroughly mixed. The cornstarch is crucial for achieving that signature crispiness, and the baking powder helps to create a lighter, airier coating.
Now, we’ll create our batter. Add the 1/4 cup of water and 2 teaspoons of vegetable oil to the dry ingredients. Stir everything together until you have a smooth, slightly thick batter. You want it to be thick enough to coat the chicken well, but not so thick that it becomes heavy. If it seems too thick, you can add another teaspoon of water, a little at a time, until you reach the desired consistency.
Coating the Chicken
This is where we bring it all together for maximum crispiness. Take your marinated chicken pieces and dip them into the whisked eggs, ensuring each piece is fully coated. Then, using a slotted spoon or your fingers, transfer the egg-coated chicken pieces directly into the flour and cornstarch mixture. Toss the chicken gently to coat each piece thoroughly. You want a nice, even layer of the dry coating. It’s important to work in batches to avoid overcrowding the bowl, which can lead to clumping. Once coated, you can set the pieces aside on a plate or parchment paper while you heat the oil.
Frying the Chicken
This is a critical step for achieving that perfect crunch. In a large, heavy-bottomed skillet or Dutch oven, add enough vegetable oil to reach a depth of about 1.5 to 2 inches. Heat the oil over medium-high heat until it reaches about 350°F (175°C). If you don’t have a thermometer, you can test the oil by dropping a tiny bit of the batter in; it should sizzle and float to the surface immediately.
Carefully add the coated chicken pieces to the hot oil, working in batches to avoid overcrowding the pan. Overcrowding will lower the oil temperature and result in soggy, greasy chicken. Fry the chicken for about 4-6 minutes per batch, flipping them occasionally, until they are golden brown and cooked through. The internal temperature should reach 165°F (74°C). Once cooked, remove the chicken from the oil with a slotted spoon and place them on a wire rack set over a baking sheet to drain. This allows air to circulate, keeping the chicken crispy.
Making the Honey Sesame Glaze
While the chicken is draining and still warm, it’s time to make the irresistible glaze that defines this dish. In a clean skillet or wok, combine the light soy sauce, oyster sauce, rice vinegar, and ketchup. Stir these ingredients together and bring them to a gentle simmer over medium heat. Let the sauce simmer for about 1-2 minutes, stirring occasionally, until it thickens slightly. The ketchup adds a lovely sweetness and a beautiful reddish hue, while the rice vinegar provides a balancing tang.
Tossing and Serving
Once your glaze has thickened slightly and your chicken is ready, it’s time for the grand finnon-alcoholic ale! Add the fried chicken pieces directly into the skillet with the simmering glaze. Toss the chicken gently but thoroughly to coat each piece evenly in the sticky, delicious sauce. Continue to toss for about 1-2 minutes, allowing the sauce to adhere to the chicken and the flavors to meld. Be careful not to overcook it at this stage, as you want to maintain the crispiness of the chicken.
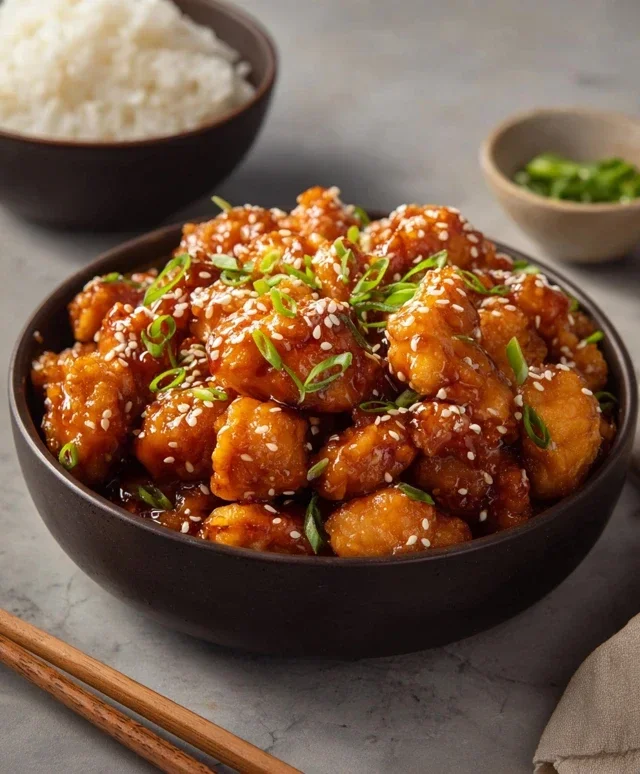
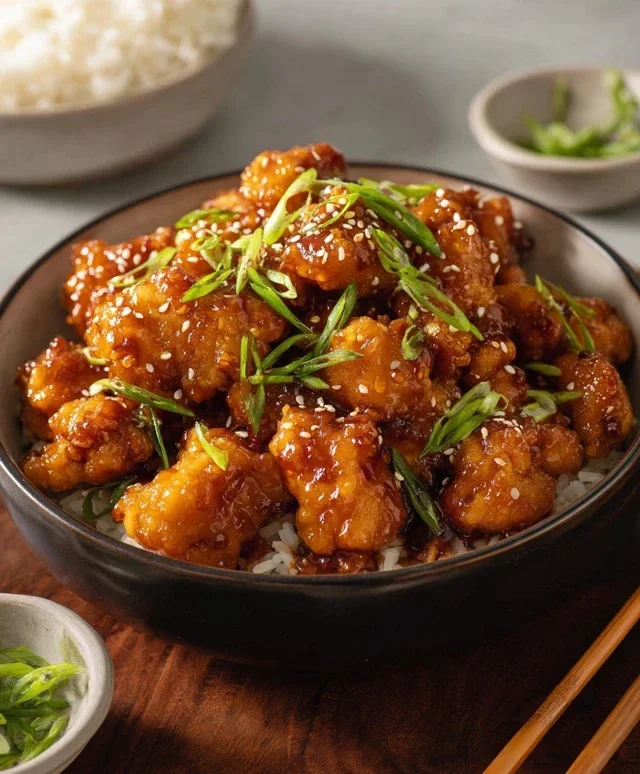
Transfer the glazed chicken to a serving platter. For an extra burst of flavor and visual appeal, sprinkle generously with toasted sesame seeds and thinly sliced scallions. These garnishes not only look beautiful but also add delightful textural and aromatic elements to the dish. Serve immediately with steamed rice, and get ready for rave reviews! This Honey Sesame Chicken is guaranteed to become a family favorite.
Conclusion:
There you have it – a simple yet incredibly satisfying recipe for Honey Sesame Chicken that’s sure to become a weeknight favorite. This dish truly shines with its perfect balance of sweet honey, savory soy sauce, and the delightful crunch of toasted sesame seeds. It’s remarkably quick to prepare, making it ideal for busy evenings when you crave something delicious without the fuss. The tender chicken coated in that glossy, irresistible sauce is just pure comfort food.
Serve this Honey Sesame Chicken over fluffy steamed rice, perhaps with a side of steamed broccoli or crisp snow peas for a complete and wholesome meal. For a fun twist, consider adding a sprinkle of chili flakes to the sauce for a touch of heat, or incorporate thinly sliced bell peppers and onions during the stir-frying process for extra color and texture. Don’t be afraid to experiment and make this recipe your own! I truly encourage you to give this delightful Honey Sesame Chicken a try – you won’t be disappointed by its incredible flavor and ease.
Frequently Asked Questions:
Can I use a different type of chicken?
Absolutely! While boneless, skinless chicken thighs are recommended for their tenderness and flavor, you can certainly use chicken breast. Just be mindful that chicken breast can dry out more quickly, so avoid overcooking it. Cut it into bite-sized pieces for even cooking.
How can I make this recipe gluten-free?
To make this Honey Sesame Chicken gluten-free, simply use tamari instead of soy sauce, and ensure your honey and cornstarch are certified gluten-free. Tamari offers a similar savory depth without the wheat.
Honey Sesame Chicken
A classic Chinese-American takeout favorite, honey sesame chicken features crispy fried chicken coated in a sweet and savory honey-sesame sauce.
Ingredients
-
1 1/2 lb chicken breast or thighs (cut into 1 inch pieces)
-
1 teaspoon chicken bouillon powder
-
1/2 teaspoon white pepper
-
1 tablespoon water
-
2 large eggs
-
1/2 cup all-purpose flour
-
1/2 cup cornstarch
-
2 teaspoon baking powder
-
1/2 teaspoon salt
-
1/4 cup water
-
2 teaspoon vegetable oil
-
3 tablespoon light soy sauce
-
1 tablespoon oyster sauce
-
2 tablespoon rice vinegar
-
2 tablespoon ketchup
Instructions
-
Step 1
In a bowl, combine the chicken pieces with chicken bouillon powder, white pepper, and 1 tablespoon of water. Mix well and let marinate for 10 minutes. -
Step 2
In a separate bowl, whisk the eggs. In another shallow dish, combine the flour, cornstarch, baking powder, and salt. -
Step 3
Dredge each piece of marinated chicken in the flour mixture, ensuring it’s fully coated. Then dip in the whisked eggs, and finally, dredge again in the flour mixture for an extra crispy coating. -
Step 4
Heat 2 teaspoons of vegetable oil in a large skillet or wok over medium-high heat. Fry the chicken pieces in batches until golden brown and cooked through, about 5-7 minutes per batch. Remove from skillet and drain on paper towels. -
Step 5
In the same skillet, add the soy sauce, oyster sauce, rice vinegar, ketchup, and 1/4 cup of water. Bring to a simmer and cook for 2-3 minutes, stirring until the sauce thickens slightly. -
Step 6
Return the fried chicken to the skillet with the sauce. Toss to coat evenly. Garnish with sesame seeds if desired.
Important Information
Nutrition Facts (Per Serving)
It is important to consider this information as approximate and not to use it as definitive health advice.
Allergy Information
Please check ingredients for potential allergens and consult a health professional if in doubt.