Easter Bunny Coconut Tails-Sweet & Easy Recipe
Easter Bunny Coconut Tails are an absolute springtime delight, guaranteed to bring smiles to faces of all ages! There’s something so whimsical and charming about these sweet, fluffy treats that perfectly capture the spirit of the season. We all love a classic Easter treat, but these Easter Bunny Coconut Tails elevate the experience with their delicate texture and tropical twist. What makes them truly special is their incredible versatility – they’re not just for Easter baskets! Imagin extracte serving them as a delightful addition to your brunch table, a sweet surprise in a child’s lunchbox, or even as a light, guilt-free dessert after a spring feast. The satisfying chegrape juicess of the coconut combined with a hint of sweetness makes these Easter Bunny Coconut Tails an irresistible confection that’s surprisingly easy to whip up, proving that holiday magic doesn’t have to be complicated. Get ready to hop into deliciousness with this delightful recipe!
Easter Bunny Coconut Tails
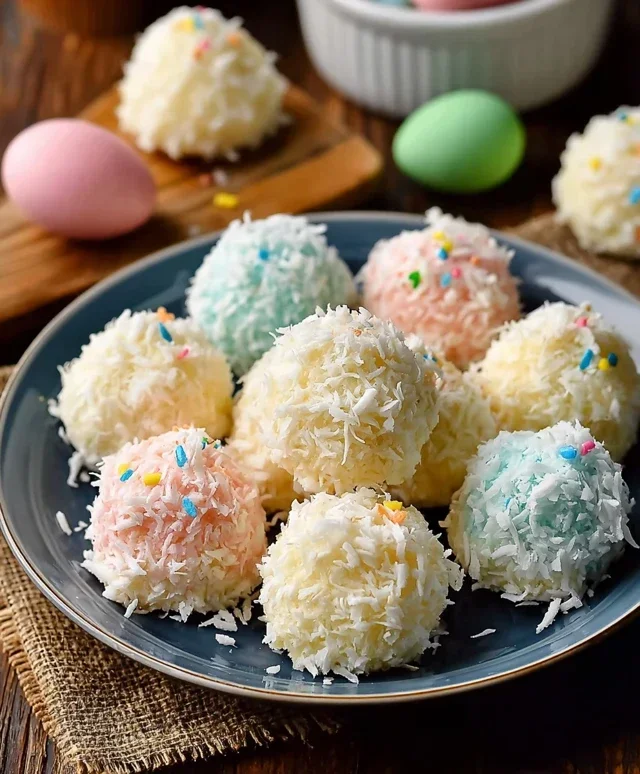
Easter morning is always a special time, and what better way to add a touch of whimsical sweetness than with these adorable Easter Bunny Coconut Tails? They’re surprisingly simple to make, perfect for little hands to help with (under supervision, of course!), and are sure to bring a smile to everyone’s face. These treats are a delightful combination of chewy coconut and creamy white chocolate, all shaped into cute little bunny tails. They’re a fun alternative to traditional Easter candy and a wonderful way to get into the festive spirit. Imagin extracte a basket filled with these fluffy, sweet delights – pure Easter joy!
This recipe focuses on creating a tender, chewy coconut base that holds its shape beautifully, making it perfect for dipping and decorating. The white chocolate adds a rich sweetness that complements the coconut without being overpowering. And the pink candy melts? They’re the secret ingredient that transforms these simple treats into unmistakable bunny tails. We’ll guide you through each step, ensuring your coconut tails are a resounding success.
Ingredients:
Crafting Your Coconut Tails
The process of making these Easter Bunny Coconut Tails is designed to be straightforward, allowing you to create a festive treat without too much fuss. We’ll start by forming the coconut base, then move on to the delightful dipping and decorating stages.
Step 1: Melting the Marshmallow Base
Our first crucial step is to create a sticky, pliable base that will bind our coconut together. In a medium saucepan, combine the mini marshmallows and the butter. Place this saucepan over low heat. It’s important to keep the heat low to prevent the marshmallows from scorching or becoming tough. Gently stir the mixture constantly with a rubber spatula or wooden spoon. You want to melt the marshmallows and butter until they form a smooth, creamy, and completely uniform mixture. This process might take a few minutes, so be patient. Once everything is melted and smooth, remove the saucepan from the heat. This is the perfect moment to add the vanilla extract. Stir it in thoroughly; the vanilla will add a lovely aroma and a hint of classic flavor to our coconut tails.
Step 2: Incorporating the Coconut
Now comes the fun part: adding the star ingredient – the shredded coconut! Once the marshmallow mixture has been removed from the heat and the vanilla extract is incorporated, it’s time to add the 2 cups of shredded coconut. Pour the coconut directly into the warm marshmallow mixture. Using your spatula, begin extract to stir and fold the coconut into the marshmallow mixture. It might seem like a lot of coconut at first, but keep stirring! The goal is to coat every strand of coconut evenly with the sticky marshmallow goodness. Continue to mix until all the coconut is well combined and the mixture starts to pull away from the sides of the pan, forming a cohesive, sticky mass. This mixture will be quite warm and sticky, so be careful when handling it.
Step 3: Shaping the Bunny Tails
With your coconut mixture ready, it’s time to shape these into adorable bunny tails. Allow the mixture to cool slightly so it’s more manageable to handle. You don’t want it to cool down completely, or it will become too stiff to shape. You can lightly grease your hands with a little butter or cooking spray to prevent the sticky mixture from adhering to them. Take about a tablespoon or two of the coconut mixture at a time and roll it between your palms to form small, round balls or slightly oval shapes, resembling fluffy bunny tails. The size is up to you – you can make them small and delicate or a bit more substantial. Aim for a consistent size so they all look uniform. As you shape each tail, place it on a baking sheet lined with parchment paper or wax paper. This prevents them from sticking to the baking sheet and makes for easy cleanup.
Step 4: Melting the White Chocolate and Dipping
Once your bunny tails are all shaped and resting on the prepared baking sheet, it’s time to prepare for dipping. In a microwave-safe bowl or a double boiler, melt the 1 cup of white chocolate chips. If using a microwave, heat the chips in 30-second intervals, stirring well after each interval, until they are smooth and completely melted. Be careful not to overheat white chocolate, as it can seize up and become difficult to work with. If using a double boiler, ensure the water doesn’t touch the bottom of the melting bowl and stir constantly. Once your white chocolate is melted and smooth, dip each coconut tail about halfway or two-thirds of the way into the melted white chocolate. You can use a fork or a toothpick to help coat them evenly. Gently tap off any excess chocolate before returning the dipped tails to the parchment-lined baking sheet.
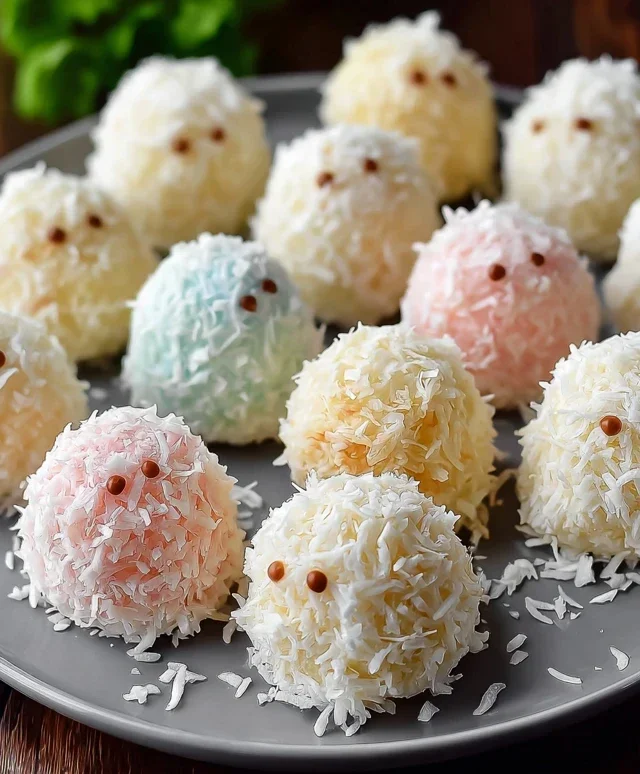
Step 5: Decorating with Pink Candy Melts
This is where our coconut tails truly transform into Easter Bunny tails! Once the white chocolate has set slightly (but is not completely hard), it’s time for the pink accents. Melt the pink candy melts according to the package directions, usually in a microwave in short intervals with stirring, or in a double boiler. Once melted and smooth, transfer the pink candy melts into a piping bag with a small round tip, or a zip-top bag with a tiny corner snipped off. You can also use a toothpick for this if you don’t have piping bags. Gently pipe a small, decorative swirl or a little dot onto the uncoated portion of each white chocolate-dipped tail to resemble the fluffy underside of a bunny’s tail. Alternatively, you can drizzle the pink candy melts over the white chocolate for a more abstract look. Let your creativity flow! Once decorated, allow the white chocolate and pink candy melts to harden completely at room temperature or in the refrigerator for a few minutes.
These Easter Bunny Coconut Tails are a delightful treat that’s as fun to make as it is to eat. Enjoy them with your loved ones this Easter!
Conclusion:
I hope you’re as excited to try these Easter Bunny Coconut Tails as I am to share them! These delightful treats are a fantastic way to add a touch of whimsy and homemade goodness to your Easter celebrations. Their melt-in-your-mouth texture, coupled with the sweet, tropical hint of coconut, makes them an instant crowd-pleaser. They’re incredibly easy to make, perfect for involving little ones in the kitchen, and surprisingly versatile. Whether you’re looking for a fun activity for the kids or a charming addition to your Easter dessert table, these Easter Bunny Coconut Tails are sure to be a hit.
Serve them as a festive treat alongside your main Easter meal, or package them up in cute cellophane bags tied with ribbon for delightful edible gifts. They also look adorable nestled in a basket of Easter grass. Don’t be afraid to get creative with decorations! You can use edible glitter, sprinkles, or even a drizzle of melted chocolate to personalize them.
Give these Easter Bunny Coconut Tails a try – I promise you won’t regret it! They are a simple yet impactful way to make your Easter extra special.
Frequently Asked Questions:
Can I make these ahead of time?
Absolutely! These coconut tails can be made a day or two in advance and stored in an airtight container at room temperature. They actually tend to firm up a bit more as they sit, making them even easier to handle.
What if I don’t have shredded coconut?
While shredded coconut is ideal for the texture, you could experiment with finely chopped desiccated coconut. The texture might be slightly different, but the flavor will still be delicious. Make sure to chop it very finely to avoid large chunks.
Are there any other flavor variations?
Yes! For a hint of citrus, you can add a teaspoon of lemon or lime zest to the mixture. You could also add a tiny bit of vanilla extract for a classic sweet flavor. Some people even like to add a touch of almond extract for a different nutty profile.
Easter Bunny Coconut Tails
Sweet and festive coconut tails perfect for Easter celebrations, decorated to resemble bunny tails.
Ingredients
-
2 cups shredded coconut
-
1½ cups mini marshmallows
-
¼ cup butter
-
1 teaspoon vanilla extract
-
1 cup white chocolate chips
-
Pink candy melts for decoration
Instructions
-
Step 1
Line a baking sheet with parchment paper. -
Step 2
In a medium saucepan, melt the mini marshmallows and butter over low heat, stirring constantly until smooth. -
Step 3
Remove from heat and stir in the vanilla extract. Add the shredded coconut and mix until well combined. -
Step 4
Shape the coconut mixture into small oval or round shapes, resembling bunny tails. Place them on the prepared baking sheet. -
Step 5
In a microwave-safe bowl, melt the white chocolate chips in 30-second intervals, stirring between each, until smooth. Dip the bottom of each coconut tail into the melted white chocolate. You can also drizzle the white chocolate over them. -
Step 6
Melt the pink candy melts according to package directions. Drizzle or dab a small amount onto each tail to create a pink accent, mimicking a bunny’s tail. -
Step 7
Allow the chocolate and candy melts to set completely before serving or storing.
Important Information
Nutrition Facts (Per Serving)
It is important to consider this information as approximate and not to use it as definitive health advice.
Allergy Information
Please check ingredients for potential allergens and consult a health professional if in doubt.