Triple Chocolate Scones-Decadent Easy Recipe
Triple Chocolate Scones are a dream come true for any serious chocolate lover. Imagin extracte a tender, flaky scone, generously studded with not one, not two, but three kinds of chocolate – dark, milk, and white. It’s pure indulgence in every bite, a delightful balance of rich cocoa flavors and creamy sweetness. We all crave that perfect treat that’s both sophisticated and comforting, and these triple chocolate scones deliver exactly that. Whether it’s for a special weekend brunch, an afternoon pick-me-up, or simply because you deserve it, these scones are guaranteed to bring a smile to your face. The secret to their irresistible texture lies in a few simple techniques, ensuring you get that melt-in-your-mouth quality every single time. Get ready to experience chocolate bliss like never before with these ultimate triple chocolate scones!
Triple Chocolate Scones
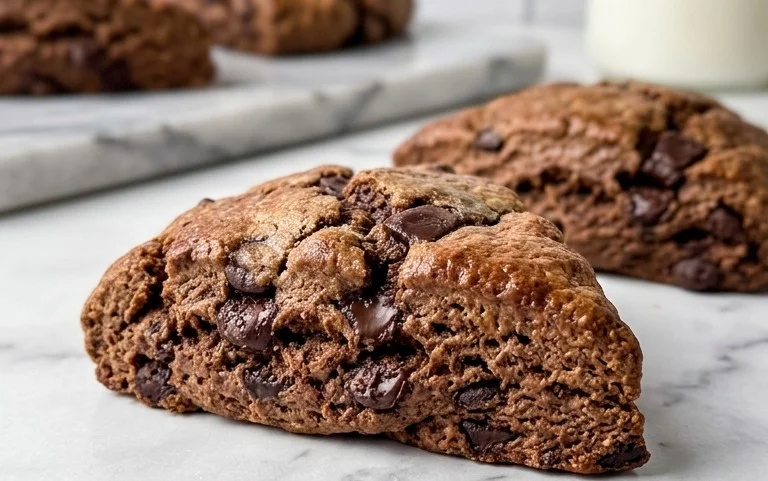
Prepare yourself for a chocolate lover’s dream. These Triple Chocolate Scones are intensely decadent, with a tender crum extractb, a deep chocolate flavor, and not one, not two, but three kinds of chocolate goodness. We’re talking rich cocoa powder in the scone dough itself, chunks of melted semi-sweet chocolate baked right in, and a luscious chocolate glaze to crown it all. These are perfect for a special weekend brunch, an afternoon treat with coffee, or whenever you need a serious chocolate fix. Don’t be intimidated by the “triple” – the process is straightforward and incredibly rewarding.
Ingredients:
Making the Dough: The Foundation of Chocolate Bliss
The secret to wonderfully tender scones lies in handling the dough minimally and keeping your ingredients cold. This ensures the butter stays in distinct pieces, which create those lovely flaky layers as they melt in the oven.
1. Combine Dry Ingredients: In a large mixing bowl, whisk together the all-purpose flour, unsweetened cocoa powder, granulated sugar, baking powder, ground cinnamon, and salt. Whisking thoroughly ensures that the leavening agents and flavorings are evenly distributed throughout the dry ingredients, which is crucial for a consistent rise and balanced flavor. The cinnamon might seem like an unusual addition to chocolate scones, but it adds a subtle warmth that beautifully complements the deep cocoa notes without overpowering them.
2. Cut in the Butter: Add the frozen unsalted butter, cut into small cubes, to the dry ingredients. Use a pastry blender, a fork, or your fingertips to cut the butter into the flour mixture until it resembles coarse crum extractbs with some pea-sized pieces of butter still visible. The goal here is to coat the flour with butter, but not to overwork it into a paste. Those larger butter pieces are what will create steam pockets during baking, leading to a lighter, more tender scone. Don’t be tempted to skip the freezing step for the butter; it’s essential for achieving the right texture.
3. Mix the Wet Ingredients: In a separate, smaller bowl, whisk together the cold heavy cream, cold large egg, and 1 and 1/2 teaspoons of pure vanilla extract. Ensure the egg is thoroughly incorporated into the cream. This mixture will then be added to the dry ingredients.
4. Combine Wet and Dry & Add Chocolate: Pour the wet ingredients into the bowl with the dry ingredients and gently mix with a spatula or wooden spoon until just combined. Be careful not to overmix! Overmixing develops the gluten in the flour, resulting in tough scones. A few streaks of flour are perfectly fine at this stage. Now, fold in the 6 ounces of coarsely chopped semi-sweet chocolate. Gently incorporate them into the dough, trying not to break them up too much.
Shaping and Baking the Scones
Once the dough is formed, it’s time to shape them for baking. A classic scone shape is easy to achieve and bakes beautifully.
5. Shape and Bake: Turn the dough out onto a lightly floured surface. Gently pat it into a round disc about 3/4-inch thick. You can either cut this disc into 8 wedges (like a pizza) or use a round biscuit cutter to create individual scones. If you’re cutting wedges, make sure to make clean cuts with a sharp knife. If using a cutter, press straight down without twisting, which can seal the edges and prevent a good rise. Place the shaped scones onto a baking sheet lined with parchment paper, ensuring they have a little space between them. Bake in a preheated oven at 400°F (200°C) for 15-18 minutes, or until the scones are firm to the touch and a toothpick inserted into the center comes out with moist crum extractbs attached (not wet batter).
The Glorious Chocolate Glaze
No triple chocolate experience would be complete without a rich chocolate glaze to drizzle over the warm scones.
Glaze Preparation:
1. Melt the Chocolate: In a heatproof bowl set over a saucepan of simmering water (a double boiler), melt the 4-ounce bar of semi-sweet chocolate. Stir occasionally until completely smooth. Alternatively, you can microwave the chocolate in 30-second intervals, stirring between each, until melted and smooth. Be patient; chocolate can burn easily.
2. Make the Glaze: To the melted chocolate, whisk in the confectioners’ sugar, the remaining 1 teaspoon of pure vanilla extract, and the water (or coffee, for an extra depth of flavor). Stir vigorously until you have a smooth, pourable glaze. If the glaze is too thick, add a tiny bit more water or coffee, a teaspoon at a time, until it reaches your desired consistency. If it’s too thin, add a little more confectioners’ sugar.
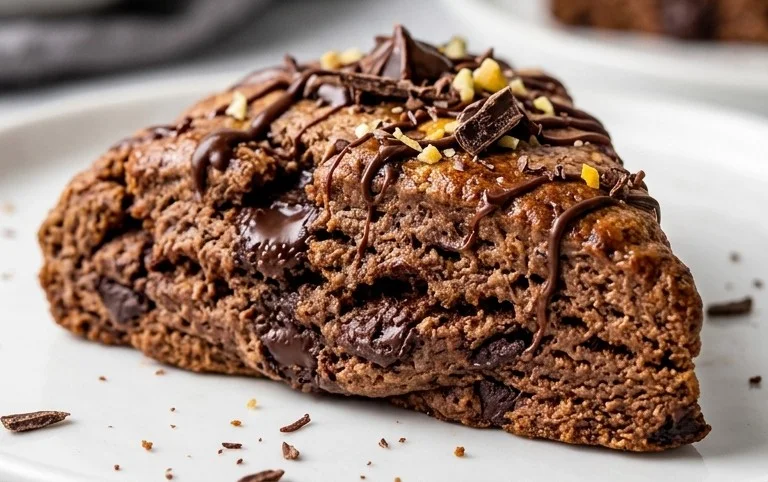
3. Glaze the Scones: Once the scones are out of the oven and have cooled slightly on the baking sheet for a few minutes, transfer them to a wire rack set over a piece of parchment paper (to catch any drips). While the glaze is still pourable, generously drizzle it over the tops of the warm scones. Allow the glaze to set for at least 10-15 minutes before serving. The warmth of the scones will help the glaze spread beautifully.
Enjoy your incredibly satisfying Triple Chocolate Scones! They are best served warm, perhaps with a glass of milk or a hot cup of coffee.
Conclusion:
You’ve officially mastered the art of the ultimate indulgence with these Triple Chocolate Scones! What makes this recipe truly special is the incredible depth of chocolate flavor achieved by incorporating not just cocoa powder, but also melted chocolate and generous chunks of chocolate chips. The result is a scone that’s wonderfully moist, rich, and undeniably decadent, perfect for satisfying any chocolate craving. These scones are fantastic served warm, perhaps with a dollop of whipped cream or a drizzle of extra chocolate sauce. For an even more luxurious experience, try serving them alongside a steaming mug of hot chocolate or a strong coffee. Don’t be afraid to get creative with variations – adding a pinch of espresso powder can deepen the chocolate notes, while a handful of chopped raspberries offers a delightful tart contrast. I truly hope you’ll give these Triple Chocolate Scones a try; they’re a guaranteed crowd-pleaser and a delightful treat for yourself!
Frequently Asked Questions:
Can I make these scones ahead of time?
Yes, you can! Once baked and completely cooled, store your Triple Chocolate Scones in an airtight container at room temperature for up to 2 days, or freeze them for up to 1 month. Thaw frozen scones at room temperature or gently reheat them in a low oven.
What kind of chocolate should I use?
For the best flavor, I recommend using good quality semi-sweet or dark chocolate for both the melted portion and the chips. However, milk chocolate chips can also be used if you prefer a sweeter scone. Experiment with different types of chocolate to find your favorite combination!
How do I prevent my scones from becoming tough?
The key to tender scones is to handle the dough as little as possible. Overmixing or overworking the dough can develop the gluten too much, leading to a tough texture. Also, ensure your butter is cold and cut into the flour until it resembles coarse crum extractbs. This creates steam during baking, resulting in a lighter, flakier scone.
Triple Chocolate Scones
Decadent scones packed with three types of chocolate for the ultimate treat.
Ingredients
-
1 and 2/3 cups (209g) all-purpose flour
-
1/3 cup (27g) unsweetened natural or Dutch-process cocoa powder
-
1/2 cup (100g) granulated sugar
-
2 and 1/2 teaspoons baking powder
-
1/2 teaspoon ground cinnamon
-
1/2 teaspoon salt
-
1/2 cup (8 Tbsp; 113g) unsalted butter, frozen
-
1/2 cup + 1 Tablespoon (135g/ml) heavy cream, cold
-
1 large egg, cold
-
1 and 1/2 teaspoons pure vanilla extract
-
6 ounces (170g) semi-sweet chocolate, coarsely chopped
-
one 4-ounce (113g) bar semi-sweet chocolate, coarsely chopped
-
1 cup (120g) confectioners’ sugar
-
1 teaspoon pure vanilla extract
-
2 Tablespoons (30g/ml) water
Instructions
-
Step 1
Preheat oven to 400°F (200°C). Line a baking sheet with parchment paper. -
Step 2
In a large bowl, whisk together the flour, cocoa powder, granulated sugar, baking powder, cinnamon, and salt. -
Step 3
Cut in the frozen butter using a pastry blender or your fingertips until the mixture resembles coarse crumbs with some pea-sized pieces of butter remaining. -
Step 4
In a separate small bowl, whisk together the heavy cream, egg, and 1 and 1/2 teaspoons of vanilla extract. Add this to the dry ingredients along with the 6 ounces of chopped semi-sweet chocolate. Mix until just combined. Do not overmix. -
Step 5
Turn the dough out onto a lightly floured surface and gently knead a few times until it just comes together. Pat into a 1-inch thick disc. Cut into 8 wedges. -
Step 6
Place the wedges on the prepared baking sheet. Bake for 18-22 minutes, or until a wooden skewer inserted into the center comes out clean. -
Step 7
Let the scones cool on the baking sheet for a few minutes before transferring them to a wire rack to cool completely. -
Step 8
For the glaze, whisk together the confectioners’ sugar, 1 teaspoon of vanilla extract, and water (or coffee) until smooth. Drizzle over the cooled scones. Melt the remaining 4-ounce bar of semi-sweet chocolate and drizzle over the glaze.
Important Information
Nutrition Facts (Per Serving)
It is important to consider this information as approximate and not to use it as definitive health advice.
Allergy Information
Please check ingredients for potential allergens and consult a health professional if in doubt.