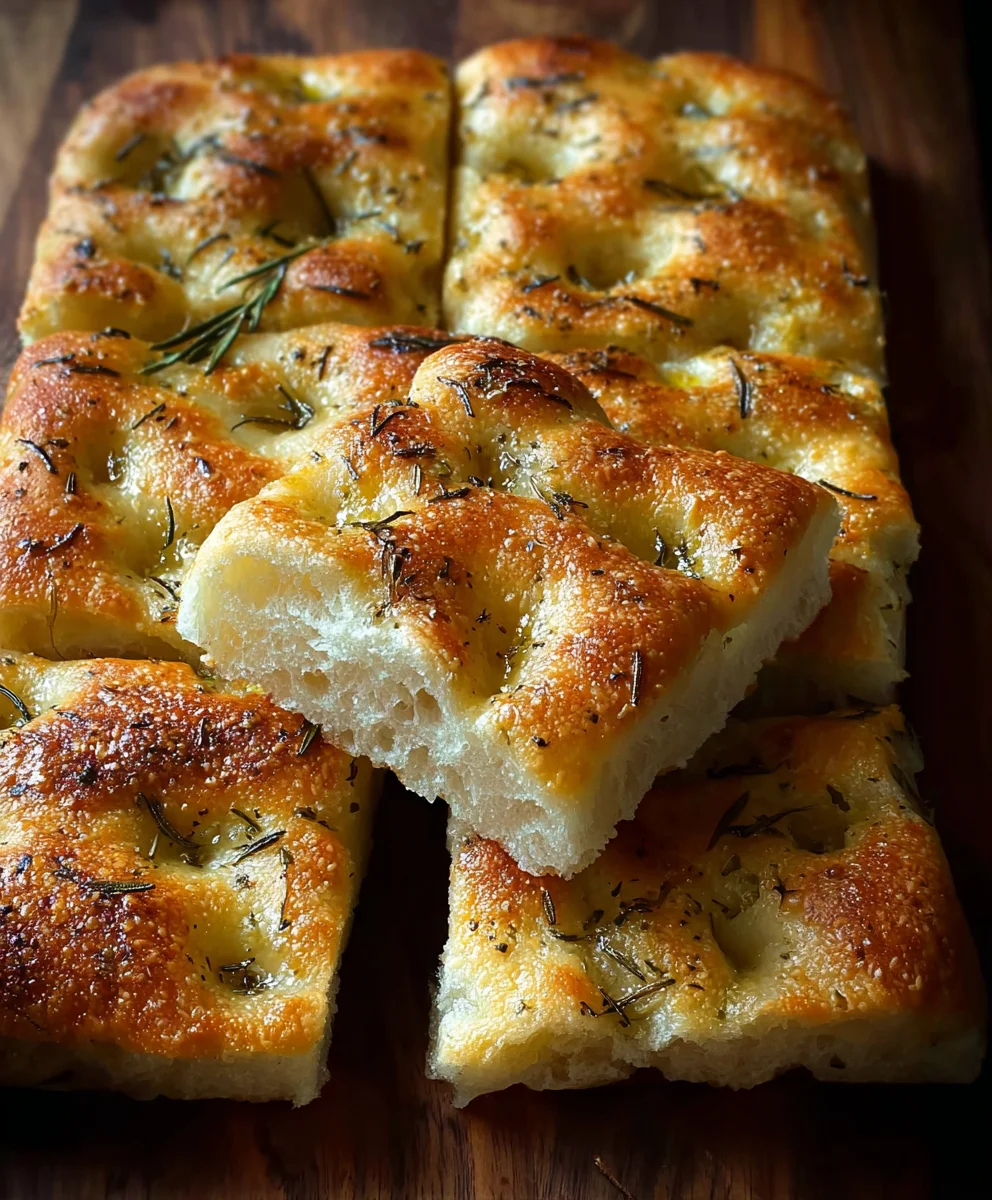
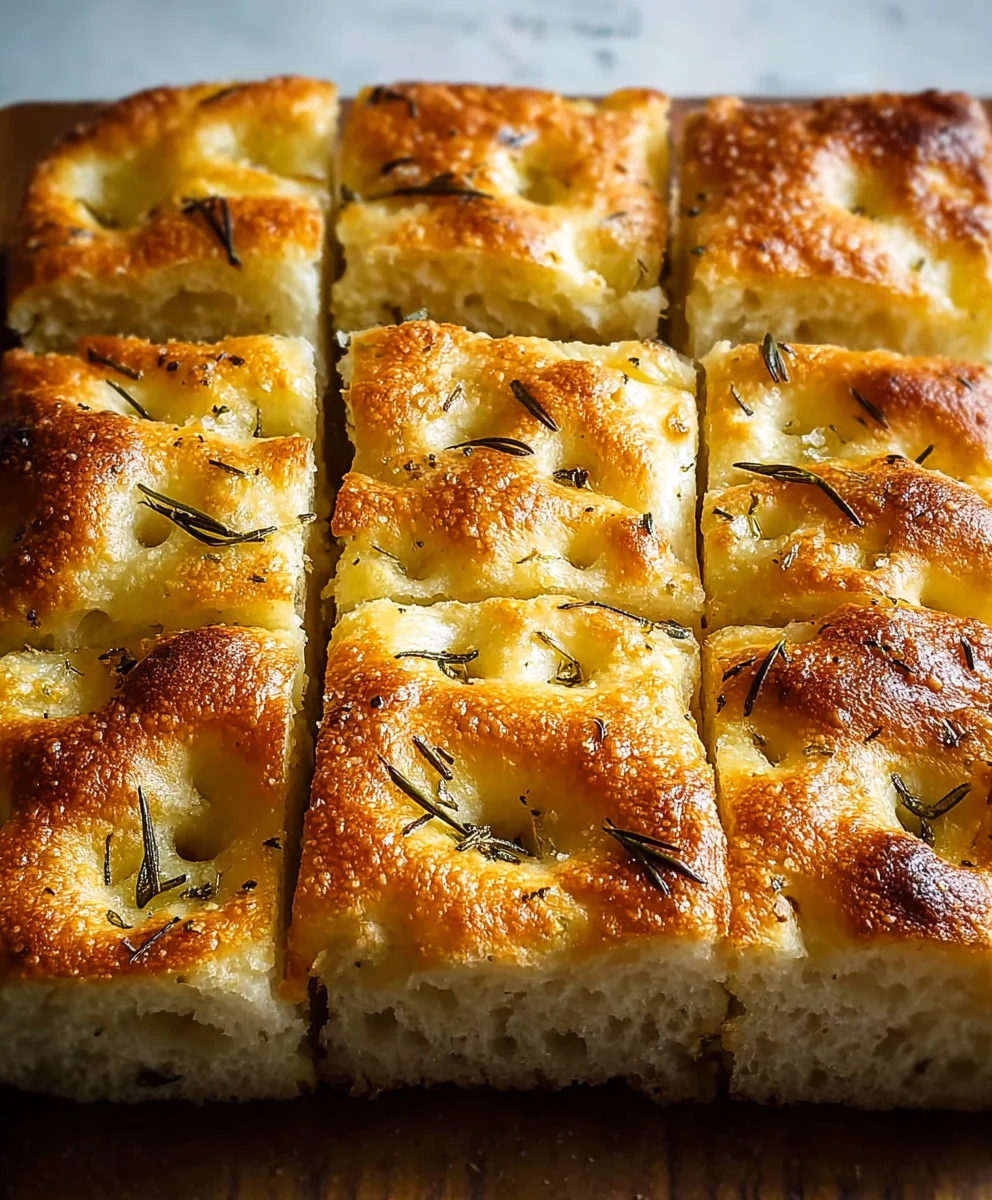
Easy Focaccia Bread Recipe-Simple & Delicious
Easy Focaccia Bread Recipe. There’s something incredibly comforting and universally loved about freshly baked focaccia. Imagin extracte the aroma filling your kitchen, a golden-brown crust yielding to a soft, airy interior, studded with fragrant herbs and a drizzle of olive oil. This Easy Focaccia Bread Recipe is designed to bring that joy right to your home, no matter your baking experience. We’ve all seen those beautiful loaves in bakeries, but the thought of making it from scratch can feel daunting. That’s where this recipe shines – it simplifies the process without sacrificing that authentic, delightful texture and taste. People adore focaccia because it’s so versatile; it’s perfect for dipping, as a side to your favorite soup, or even as a base for a simple sandwich. What truly makes this Easy Focaccia Bread Recipe special is its forgiving nature and the incredible flavor payoff with minimal fuss. Get ready to impress yourself and your loved ones with this incredibly rewarding bake!
Ingredients:
- 4 cups (500g) bread flour or all-purpose flour
- 2 1/4 teaspoons (7g) active dry yeast or instant yeast
- 2 teaspoons (10g) salt
- 1 3/4 cups (415ml) warm water
- 1/4 cup (60ml) extra virgin extract olive oil, plus extra for drizzling
- 2 tablespoons fresh rosemary leaves
- Coarse sea salt, for sprinkling
Making Your Easy Focaccia Bread
This recipe is designed to be straightforward, yielding a beautifully airy and flavorful focaccia that’s perfect for any occasion. The key to a great focaccia lies in developing its gluten structure and allowing ample time for proofing, which results in that signature light and chewy texture. Don’t be intimidated by the rise times; they are crucial for the final outcome and require minimal active work from you.
Mixing the Dough
Let’s start by activating your yeast. If you’re using active dry yeast, gently warm your water to around 105-115°F (40-46°C). This temperature is crucial – too hot and you’ll kill the yeast, too cold and it won’t activate properly. In a large mixing bowl, sprinkle the active dry yeast over the warm water and let it sit for about 5-10 minutes. You should see it become foamy and bubbly, a clear sign that your yeast is alive and ready to work its magic. If you’re using instant yeast, you can often skip this blooming step and add it directly to the dry ingredients, but blooming ensures you’re starting with active yeast.
Once the yeast is bloomed (or if you’ve used instant yeast and skipped blooming), add the flour and salt to the bowl. The salt is important for flavor but also helps control the yeast activity. Now, pour in the 1/4 cup of egin extracta virgin olive oil. This oil not only adds richness and a lovely flavor to the focaccia but also contributes to its tender crum extractb. Using your hands or a sturdy spoon, mix everything together until a shaggy, rough dough forms. Don’t worry about it being perfectly smooth at this stage; the gluten development will happen over time.
First Rise: Developing Structure
Turn the dough out onto a lightly floured surface. Now, it’s time for a bit of kneading. Knead the dough for about 8-10 minutes. This process develops the gluten, which is what gives bread its structure and chegrape juicess. You’re looking for a dough that is smooth, elastic, and no longer sticky. It should spring back slowly when you poke it with your finger. If the dough is too sticky, add a tablespoon of flour at a time, but be careful not to add too much, as this can make your focaccia dense. Alternatively, if it feels too dry, a tiny splash of water can help.
Once kneaded, lightly oil a clean large bowl. Place the dough in the bowl, turning it to coat all sides with oil. Cover the bowl tightly with plastic wrap or a damp kitchen towel. Let the dough rise in a warm place for 1 to 1.5 hours, or until it has doubled in size. The perfect warm place can be a slightly warm oven (turned off!), near a sunny window, or simply on your countertop if your kitchen is warm. This slow, steady rise is essential for creating those characteristic large air bubbles in focaccia.
Second Rise and Dimpling
After the first rise, gently punch down the dough to release the air. Lightly grease a 9×13 inch baking pan or a similar-sized rimmed baking sheet with olive oil. Carefully transfer the dough into the prepared pan. It might not spread to the edges immediately, and that’s perfectly fine. Let it rest, uncovered, for about 20-30 minutes. This brief rest allows the gluten to relax, making it easier to spread the dough.
After the rest, gently stretch and press the dough with oiled fingertips to fill the pan. Don’t force it; if it springs back, let it rest for another 5 minutes. Once the dough has filled the pan, it’s time for the iconic focaccia dimples. Drizzle the remaining 1/4 cup of olive oil generously over the surface of the dough. Then, using your fingertips, press down firmly into the dough all over the surface, creating deep dimples. This creates pockets for the olive oil and toppings to nestle into, and it helps the bread bake evenly. Sprinkle your fresh rosemary leaves over the dimpled dough, pressing them in gently. Finally, sprinkle a good pinch of coarse sea salt over the top. The coarse salt provides a wonderful textural contrast and salty crunch.
Baking to Perfection
Preheat your oven to 425°F (220°C). Let the focaccia rest in the pan for another 15-20 minutes before baking. This final rest allows for a slight secondary rise, contributing to a lighter texture. Once the oven is preheated, carefully place the pan in the oven and bake for 20-25 minutes, or until the focaccia is golden brown on top and the bottom is also nicely browned and cooked through. The aroma filling your kitchen at this stage will be incredible!
Finishing Touches
As soon as the focaccia comes out of the oven, you can add a final drizgin extract of extra virgin olive oil over the hot bread. This adds an extra layer of moisture and flavor. Let the focaccia cool in the pan for about 10 minutes before transferring it to a wire rack to cool completely, or serve it warm. Slicing it while warm is often the best way to enjoy its fresh-baked goodness. The crust will be wonderfully crisp, the interior soft and airy, and the rosemary and olive oil will have infused every bite with delicious flavor. Enjoy your homemade, easy focaccia bread!
Conclusion:
There you have it! We’ve walked through every step to create your very own Easy Focaccia Bread Recipe. This rustic Italian bread is surprisingly simple to make and the results are incredibly rewarding. The airy interior, crispy crust, and delightful olive oil-infused flavor make it a versatile staple for any meal. Remember, the key to a perfect focaccia is patience with the proofing and a generous hand with the olive oil. Don’t be afraid to experiment with different toppings to personalize your loaf.
For serving, this Easy Focaccia Bread Recipe is fantastic on its own, especially when still warm. It’s also a perfect accompaniment to soups and salads, or as a base for delicious bruschetta. Slice it horizontally and fill it with your favorite deli meats, cheeses, and vegetables for a hearty sandwich. For variations, consider adding rosemary sprigs, cherry tomatoes, sliced onions, or even a sprinkle of sea salt flakes before baking. The possibilities are truly endless!
I truly hope you enjoy making and eating this delightful bread. It’s a wonderful way to bring a taste of Italy into your kitchen. So gather your ingredients, embrace the process, and get ready to impress yourself and your loved ones with this beautiful Easy Focaccia Bread Recipe.
Frequently Asked Questions:
Why is my focaccia flat?
A flat focaccia often comes down to insufficient proofing. Ensure your dough has doubled in size during both rises. Also, avoid overworking the dough when shaping it; be gentle to maintain the air bubbles.
Can I make this recipe ahead of time?
Yes, you can! After the first rise, you can refrigerate the dough for up to 24 hours. Let it come to room temperature for about an hour before proceeding with the dimpling and second proofing.
Easy Focaccia Bread Recipe-Simple & Delicious
A straightforward recipe for a beautifully airy and flavorful focaccia bread, perfect for any occasion.
Ingredients
-
4 cups (500g) bread flour or all-purpose flour
-
2 1/4 teaspoons (7g) active dry yeast or instant yeast
-
2 teaspoons (10g) salt
-
1 3/4 cups (415ml) warm water
-
1/4 cup (60ml) extra virgin olive oil, plus extra for drizzling
-
2 tablespoons fresh rosemary leaves
-
Coarse sea salt, for sprinkling
Instructions
-
Step 1
Activate yeast: Warm water to 105-115°F (40-46°C). Sprinkle yeast over water, let sit for 5-10 minutes until foamy. If using instant yeast, you can add it directly to dry ingredients, but blooming ensures activity. -
Step 2
Mix dough: Add flour and salt to the bloomed yeast mixture. Pour in 1/4 cup olive oil. Mix with hands or spoon until a shaggy dough forms. -
Step 3
Knead and first rise: Turn dough onto a floured surface and knead for 8-10 minutes until smooth and elastic. Place in an oiled bowl, cover, and let rise in a warm place for 1-1.5 hours, or until doubled in size. -
Step 4
Shape and dimple: Punch down dough. Grease a 9×13 inch pan. Transfer dough, let rest uncovered for 20-30 minutes. Gently stretch dough to fill pan. Drizzle remaining olive oil over the surface, then create deep dimples with fingertips. Sprinkle with rosemary and coarse sea salt. -
Step 5
Bake: Preheat oven to 425°F (220°C). Let focaccia rest in the pan for another 15-20 minutes. Bake for 20-25 minutes, until golden brown on top and bottom. -
Step 6
Finish and serve: Drizzle with extra olive oil immediately after baking. Cool in the pan for 10 minutes before transferring to a wire rack or serving warm.
Important Information
Nutrition Facts (Per Serving)
It is important to consider this information as approximate and not to use it as definitive health advice.
Allergy Information
Please check ingredients for potential allergens and consult a health professional if in doubt.