Easy Beef Italian Sliders-Quick & Flavorful Bites
Italian Sliders are more than just a miniature sandwich; they’re a compact explosion of savory, comforting flavors that have captured hearts and appetites everywhere. There’s a delightful charm in these bite-sized wonders, making them perfect for any gathering, from casual game nights to more festive parties. People adore Italian sliders because they deliver all the bold, aromatic essence of classic Italian-American cuisine – think sweet Italian sausage, melted mozzarella, and a hint of zesty marinara – without the fork-and-knife fuss. What truly elevates these Italian sliders beyond your average slider is the perfect balance of textures and tastes. The soft, pillowy rolls are the ideal vessel for the rich, flavorful filling, creating a symphony in every bite that leaves you craving just one more. Get ready to impress your guests and satisfy your own cravings with this irresistible recipe.

Ingredients:
- 12 Hawaiian rolls, split horizontally
- ⅓ cup mayonnaise
- 12 slices provolone cheese
- ½ pound hard beef beef salami, coarsely chopped
- ½ pound beef beef pepperoni, coarsely chopped
- ½ pound beef beef ham, coarsely chopped
- ¼ cup butter, melted
- ½ teaspoon garlic powder
- ½ teaspoon dried oregano
- ½ teaspoon dried basil
- 8 ounce bag shredded lettuce
- ½ cup red onion, finely diced
- ½ cup chopped banana peppers
- ¼ cup mayonnaise
- ¼ cup dill relish
Preparing the Italian Sliders
The Meaty Foundation
The heart of these Italian sliders lies in their rich, savory meat filling. To begin extract, take your coarsely chopped hard beef salamialami, beef pepperonieroni, and beef hamf ham. In a medium bowl, combine these delicious meats. This trio provides a wonderful depth of flavor and a satisfying texture that is characteristic of classic Italian deli meats. You want to ensure the chops are relatively consistent in size so that each bite of your slider gets a good mix of all three. This isn’t a recipe for fine dicing; a coarser chop will give you those delightful chewy and slightly crisp morsels that make these sliders so appealing.
Crafting the Creamy Binder
Next, we’ll create a creamy binder that will help hold all those wonderful meats together and add another layer of flavor. In a separate smaller bowl, combine the ⅓ cup of mayonnaise with the dill relish and the finely diced red onion. Stir this mixture thoroughly until everything is well incorporated. The tangy dill relish cuts through the richness of the meats, while the red onion adds a subtle sharpness and crunch. This combination creates a delicious slaw-like element that is absolutely essential for the perfect Italian slider. Make sure to dice the red onion very finely so it doesn’t overpower the other ingredients and blends seamlessly into the creamy dressing. I also like to let this mixture sit for about 5-10 minutes before mixing it with the meats. This allows the flavors to meld together beautifully.
Assembling the Filling
Now it’s time to bring our meat and creamy binder together. Add the mayonnaise, dill relish, and red onion mixture to the bowl containing your choppebeef pepperoni peppebeef hami, and ham. Gently fold everything together using a spatula or large spoon until all the meat is evenly coated with the creamy dressing. Be careful not to overmix, as this can make the meat mixture mushy. We want to preserve the integrity of those delicious meat chunks. Once combined, set this mixture aside. It will be the star filling for our Italian sliders, promising a burst of Italian deli goodness in every bite.
Butter and Spice for the Rolls
While our filling rests, let’s prepare the Hawaiian rolls. Carefully slice all 12 Hawaiian rolls horizontally. You’ll want to use a serrated knife for a clean cut that won’t tear the soft rolls. Lay the bottom halves of the rolls in a single layer in a 9×13 inch baking dish. Now, for that irresistible golden-brown finish and extra flavor: in a small bowl, melt the ¼ cup of butter. To this melted butter, add the garlic powder, dried oregano, and dried basil. Stir this seasoned butter mixture until well combined. Brush this aromatic butter generously over the cut sides of the bottom halves of the Hawaiian rolls. This step infuses the rolls with a wonderful garlicky, herby flavor and ensures they get beautifully toasted.
Layering and Melting the Cheese
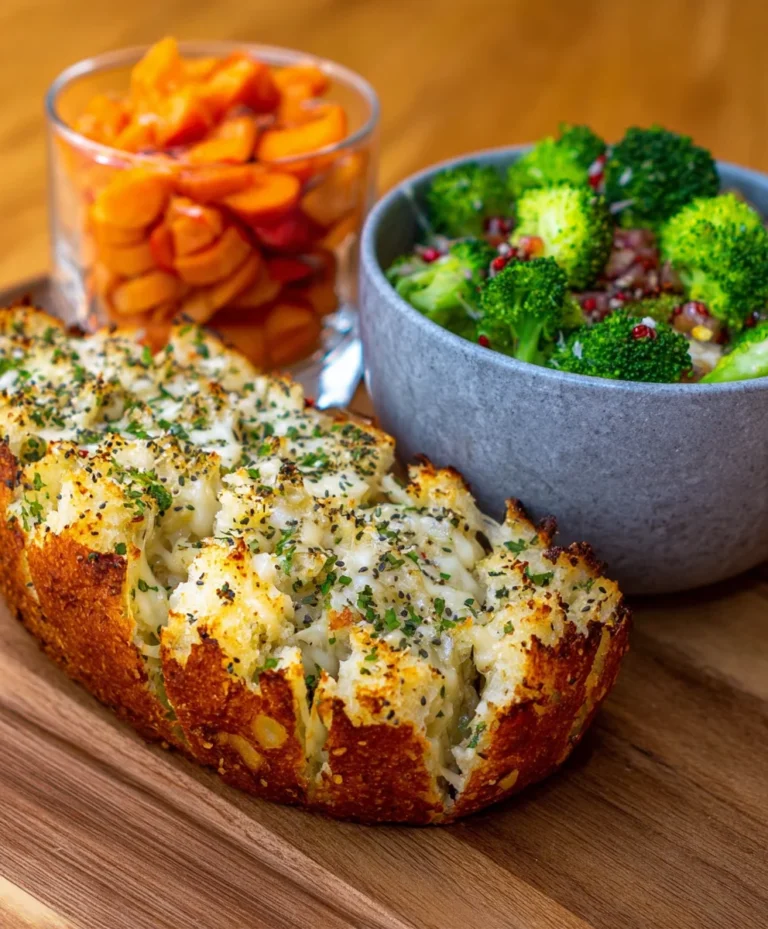
Now we start the assembly of our sliders. Evenly distribute the prepared meat mixture over the buttered bottom halves of the Hawaiian rolls in the baking dish. Make sure to spread it out so each roll gets a good portion of the delicious meat. Next, lay 12 slices of provolone cheese on top of the meat mixture. Overlap the cheese slices slightly if needed to ensure good coverage. Provolone is a classic choice for Italian-inspired dishes, and its mild, slightly smoky flavor melts beautifully, creating a gooey, cheesy layer that ties everything together.
The Finishing Touches and Baking
Take the top halves of the Hawaiian rolls and place them over the cheese-covered meat. Brush the tops of these upper rolls with any remaining seasoned butter, or even a little extra melted butter if you like them extra golden and crispy. This ensures the entire slider is infused with flavor. Cover the baking dish tightly with aluminum foil. This is crucial to help the steam build up and melt the cheese thoroughly while keeping the rolls moist. Place the covered baking dish into a preheated oven at 350°F (175°C). Bake for about 15-20 minutes, or until the cheese is fully melted and the rolls are lightly golden.
Adding Freshness and Serving
Once the sliders are out of the oven and the cheese is gloriously melted, carefully remove the aluminum foil. Now, for that crucial fresh element that balances the richness: gently lift the tops of the sliders and add a generous amount of shredded lettuce. Next, scatter the chopped banana peppers over the lettuce. These little jewels add a fantastic tangy, slightly spicy kick that cuts through the fat and cheese, making each bite incredibly satisfying. Close the tops of the sliders. For the best eating experience, allow the Italian sliders to sit for about 5 minutes before serving. This allows the flavors to settle and the melted cheese to firm up slightly. Serve them warm, and prepare for rave reviews!

Conclusion:
And there you have it – a delightful journey into creating delicious Italian Sliders right in your own kitchen! We’ve walked through each step, from preparing the flavorful Italian sausage and sautéing the sweet peppers and onions to assembling these mouthwatering mini sandwiches. The beauty of these Italian Sliders lies in their versatility and the way they bring together classic Italian-inspired flavors in a convenient, bite-sized package. They’re perfect for game nights, casual gatherings, or even as a fun and satisfying weeknight meal. Don’t be afraid to get creative and make them your own; these sliders are incredibly adaptable!
For serving suggestions, imagin extracte a platter of these warm Italian Sliders alongside a crisp green salad or a bowl of your favorite pasta salad. They pair wonderfully with a glass of Chianti or a refreshing Italian soda. For variations, consider adding a sprinkle of red pepper flakes for a bit of heat, or swapping out the mozzarella for provolone or pepper jack cheese. You could also try different types of Italian-style bread rolls for a unique twist. We truly hope you enjoy making and sharing these Italian Sliders as much as we do!
Frequently Asked Questions:
Q: Can I make the Italian sausage mixture for the sliders ahead of time?
Yes, absolutely! You can prepare the cooked Italian sausage, pepper, and onion mixture up to two days in advance. Store it in an airtight container in the refrigerator. When you’re ready to assemble the sliders, simply reheat the mixture gently on the stovetop or in the microwave before building your sandwiches.
Q: What kind of bread is best for Italian Sliders?
While standard slider buns or dinner rolls work wonderfully, consider using Italian sub rolls or even small brioche buns for a slightly richer flavor. The key is to find a roll that’s sturdy enough to hold the filling but still soft enough to be easily enjoyed in a bite.
Easy Beef Italian Sliders
Quick and flavorful beef Italian sliders made with Hawaiian rolls, a savory meat filling, melted provolone cheese, and a fresh, tangy topping.
Ingredients
-
12 Hawaiian rolls, split horizontally
-
1/3 cup mayonnaise
-
12 slices provolone cheese
-
1/2 pound hard beef salami, coarsely chopped
-
1/2 pound beef pepperoni, coarsely chopped
-
1/2 pound beef ham, coarsely chopped
-
1/4 cup butter, melted
-
1/2 teaspoon garlic powder
-
1/2 teaspoon dried oregano
-
1/2 teaspoon dried basil
-
8 ounce bag shredded lettuce
-
1/2 cup red onion, finely diced
-
1/2 cup chopped banana peppers
-
1/4 cup mayonnaise
-
1/4 cup dill relish
Instructions
-
Step 1
Combine coarsely chopped beef salami, beef pepperoni, and beef ham in a medium bowl. -
Step 2
In a separate small bowl, combine 1/3 cup mayonnaise, dill relish, and finely diced red onion. Stir until well incorporated. Let sit for 5-10 minutes. -
Step 3
Add the mayonnaise mixture to the bowl with the meats and gently fold until evenly coated. Set aside. -
Step 4
Slice Hawaiian rolls horizontally and place bottom halves in a 9×13 inch baking dish. Melt butter and stir in garlic powder, oregano, and basil. Brush seasoned butter over the cut sides of the bottom rolls. -
Step 5
Evenly distribute the meat mixture over the buttered bottom rolls. Layer provolone cheese slices on top of the meat. -
Step 6
Place the top halves of the rolls over the cheese. Brush tops with remaining seasoned butter. Cover tightly with aluminum foil and bake at 350°F (175°C) for 15-20 minutes, or until cheese is melted and rolls are golden. -
Step 7
Remove foil. Gently lift the tops of the sliders and add shredded lettuce and chopped banana peppers. Close the tops and let sit for 5 minutes before serving.
Important Information
Nutrition Facts (Per Serving)
It is important to consider this information as approximate and not to use it as definitive health advice.
Allergy Information
Please check ingredients for potential allergens and consult a health professional if in doubt.