Watermelon Cherry Berry Beet Juice – Refreshing Summer Drink
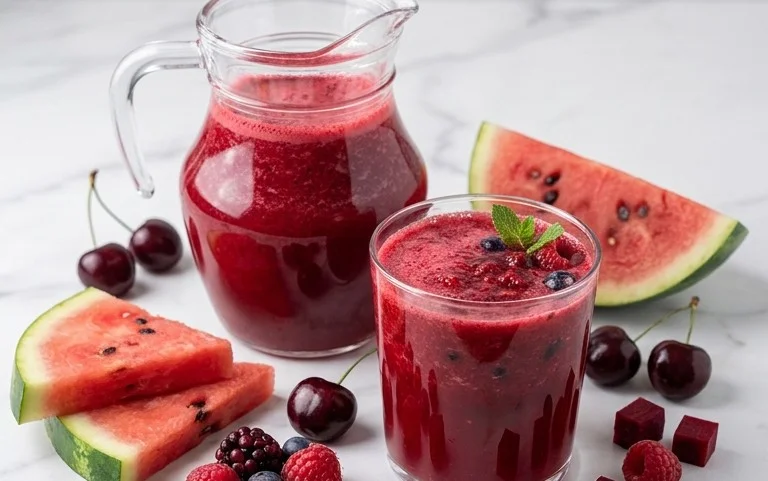
Watermelon Cherry Berry Beet Juice is more than just a vibrant drink; it’s a powerhouse of flavor and nutrients that I’ve come to absolutely adore. Imagin extracte the ultimate summer quencher, bursting with the juicy sweetness of watermelon, the tart sophistication of cherries, the subtle tang of mixed berries, all grounded by the earthy, grounding notes of beet. This isn’t your average juice blend; it’s a carefully orchestrated symphony for your taste buds, designed to invigorate and refresh. People are drawn to this Watermelon Cherry Berry Beet Juice for its incredible ability to deliver serious health benefits without compromising on taste. It’s the perfect way to sneak in a dose of vitamins and antioxidants while enjoying a truly delicious and visually stunning beverage. What truly makes this Watermelon Cherry Berry Beet Juice special is its balanced profile – it’s neither overwhelmingly sweet nor overly vegetal, offering a delightful complexity that keeps you coming back for more.
Watermelon Cherry Berry Beet Juice
This vibrant and refreshing Watermelon Cherry Berry Beet Juice is a powerhouse of nutrients and flavor, perfect for a revitalizing start to your day or a delicious afternoon pick-me-up. The earthy sweetness of the beets beautifully complements the juicy watermelon, while the mixed berries and cherries add a delightful tartness and a burst of antioxidants. I love this juice because it’s not only incredibly good for you, but it also tastes absolutely amazing – a true treat for your taste buds and your body. It’s packed with vitamins, minerals, and hydration, making it an ideal way to nourish yourself from the inside out.
Ingredients:
Getting Started: Preparing Your Ingredients
Before we dive into the juicing process, a little bit of preparation goes a long way in ensuring a smooth and efficient experience. For the beets, it’s essential to wash them thoroughly under running water. You don’t necessarily need to peel them, especially if they are organic and have thin skins, as a lot of the nutrients are concentrated just beneath the surface. However, if you prefer a smoother texture or if the beet skins are particularly tough or dirty, a quick scrub with a vegetable brush or a light peel with a peeler will do the trick. Cut the beets into manageable chunks that will fit easily into your juicer’s chute.
For the watermelon, the key is to get as much flesh as possible. If you’re using a baby watermelon, you might only need about a quarter of it. If you have a larger watermelon, aim for roughly two cups of cubed flesh. Remove any seeds you encounter, as they can sometimes add a bitter note to the juice and might clog your juicer. The sweetness of the watermelon is crucial here, as it helps to balance out the earthiness of the beets.
The mixed berries, which I’ve found to be a delightful combination of strawberries, red currants, and raspberries, should also be rinsed well. If you’re using frozen berries, you can add them directly to the juicer, and they will help to chill the juice as they blend. If you have larger strawberries, you might want to halve or quarter them, especially if your juicer has a smaller chute.
Finally, the pitted cherries contribute a lovely sweetness and a beautiful ruby color to the juice. Make sure to remove the pits before adding them to the juicer. If you don’t have a cherry pitter, you can easily pit them by hand, or by using the tip of a sturdy straw to push the pit through.
The Juicing Process: Extracting the Goodness
Now for the fun part – transforming these fresh ingredients into a delicious and healthy juice! The method you’ll use will depend on the type of juicer you have, but the general principle remains the same: extract the liquid goodness from your fruits and vegetables.
1. Feed the Ingredients into the Juicer: Begin extract by alternating between the ingredients. I like to start with the beets, as they are the densest. Gently push the beet chunks down the chute of your juicer, allowing the machine to do its work. Once the beets are mostly processed, follow with the watermelon chunks. The high water content of the watermelon will help to flush out any remaining beet pulp and make the juicing process smoother.
2. Add the Berries and Cherries: Next, introduce your mixed berries and pitted cherries. Be mindful of the juicer’s capacity and avoid overcrowding the chute. If you have a lot of berries, you might want to add them in batches. The juicer will break down these softer fruits, releasing their vibrant juices and delightful flavors. The combination of the berries and cherries will begin extract to infuse the juice with a beautiful pinkish-red hue.
3. Process All Ingredients Thoroughly: Continue to feed all your prepared ingredients into the juicer until everything has been processed. Pay attention to the pulp collector and empty it if it becomes full, to maintain optimal juicing efficiency. Sometimes, you might have to push ingredients down gently with the tamper provided with your juicer, especially for softer items like watermelon.
4. Stir and Serve: Once all the ingredients have passed through the juicer, you’ll be left with a beautiful, frothy juice. Give it a good stir with a spoon or whisk to ensure all the flavors are well-combined and to break up any foam that may have formed on the surface. The foam is perfectly edible, but stirring can give the juice a more appealing texture.
5. Taste and Adjust (Optional): Before serving, take a small sip. The beauty of making your own juice is that you can customize it to your liking. If you find it a little too earthy from the beets, you could add a splash more watermelon or a squeeze of lemon or lime. If you prefer it sweeter, a touch of honey or maple syrup can be added, though I find the natural sweetness of the fruits usually suffices. I personally love the balance of flavors as is.
Pour your finished Watermelon Cherry Berry Beet Juice into glasses. For an extra refreshing experience, you can chill the glasses beforehand or add a few ice cubes. This juice is best enjoyed immediately to savor its peak freshness and nutritional benefits. It’s a wonderfully satisfying way to get a concentrated dose of vitamins, antioxidants, and hydration. Enjoy this delightful concoction that’s as good for you as it tastes!
Conclusion:
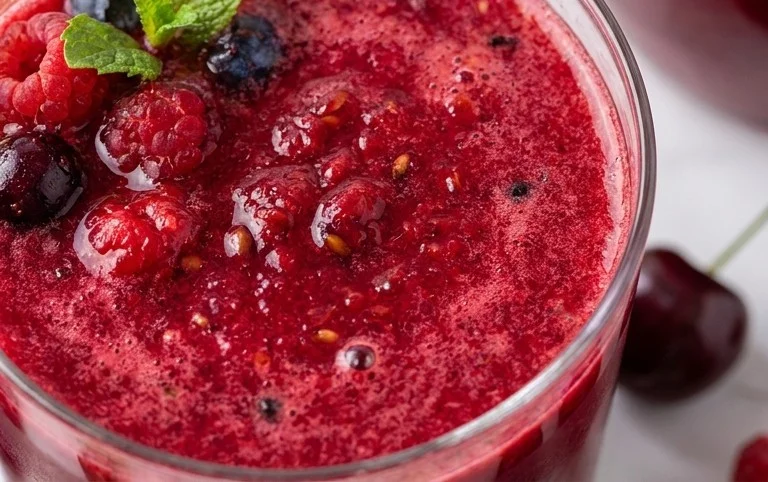
And there you have it – your vibrant and incredibly refreshing Watermelon Cherry Berry Beet Juice! This recipe truly shines with its delightful balance of natural sweetness from the watermelon and berries, a subtle earthiness from the beet, and a tangy zing from the cherries. It’s not just a delicious drink, but a powerhouse of antioxidants and vitamins, making it a fantastic way to boost your health and hydration. I find it to be the perfect pick-me-up on a warm afternoon or a great post-workout recovery drink. Don’t be afraid to get creative! Consider adding a squeeze of lime for extra brightness, a thumb of gin extractger for a warming kick, or even a handful of spinach for an added nutritional punch without significantly altering the flavor. I highly encourage you to give this Watermelon Cherry Berry Beet Juice a try. It’s surprisingly simple to make and the results are wonderfully rewarding!
Frequently Asked Questions:
Can I make this juice ahead of time?
Yes, absolutely! You can prepare this juice up to 24 hours in advance. Store it in an airtight container in the refrigerator. Give it a good shake before serving, as natural separation can occur. The flavors might even meld and deepen overnight, making it even more delicious!
What if I don’t have a juicer?
No juicer, no problem! You can easily make this in a high-powered blender. Blend all the ingredients until completely smooth. Then, strain the mixture through a fine-mesh sieve lined with cheesecloth or a nut milk bag. Gently squeeze out all the juice. You might lose a little bit of volume, but the taste will be just as fantastic.
Are there any alternatives to beets?
While beets provide that beautiful color and unique earthy sweetness, you can experiment with other root vegetables if you’re not a fan. A small piece of carrot can offer a similar sweetness and color, though the flavor profile will change. Alternatively, you could omit the beet entirely, and while you’ll lose the vibrant red hue and some of the earthy notes, you’ll still have a delicious watermelon, cherry, and berry blend.
Watermelon Cherry Berry Beet Juice
A refreshing and nutrient-rich juice bursting with the flavors of watermelon, cherries, mixed berries, and beets.
Ingredients
-
2 small beets, peeled and roughly chopped
-
¼ baby watermelon, seeds removed and cubed (or 2 cups of any watermelon, cubed)
-
1 ½ cups mixed berries (strawberries, red currants, and raspberries)
-
½ cup pitted cherries
-
1 cup water
-
1 tablespoon fresh lemon juice
Instructions
-
Step 1
Wash and prepare all the ingredients. Peel and roughly chop the beets. Remove seeds from the watermelon and cube it. Ensure cherries are pitted. -
Step 2
Add the chopped beets to a juicer or high-powered blender. -
Step 3
Add the watermelon cubes, mixed berries, and pitted cherries to the juicer or blender. -
Step 4
Add the water and lemon juice to the blender if using a blender. If using a juicer, you can add water and lemon juice after juicing to dilute to your preference. -
Step 5
Process the ingredients until smooth and well combined. If using a blender, you may need to blend in batches or add more liquid to achieve a smooth consistency. -
Step 6
Strain the juice through a fine-mesh sieve if you prefer a smoother texture, or enjoy as is. -
Step 7
Serve immediately over ice, or chill in the refrigerator before serving.
Important Information
Nutrition Facts (Per Serving)
It is important to consider this information as approximate and not to use it as definitive health advice.
Allergy Information
Please check ingredients for potential allergens and consult a health professional if in doubt.