Old School Chocolate Traybake Cake-Easy Delicious Recipe
Old School Chocolate Traybake Cake is a culinary hug, a nostalgic embrace from simpler times that never fails to bring a smile to our faces. There’s a reason this classic has stood the test of time; it’s the epitome of comfort baking. Forget fussy layers and intricate decorations, this is a cake designed for pure, unadulterated enjoyment, perfect for birthdays, bake snon-alcoholic ales, or just those moments when only a generous slice of chocolate can truly hit the spot. What makes our Old School Chocolate Traybake Cake so special? It’s the perfect balance of moist, tender crum extractb and a deep, rich chocolate flavor that’s both satisfying and incredibly easy to achieve. This recipe promises a delicious result that will have everyone asking for seconds, and it’s so straightforward, even begin extractner bakers can create a showstopper.
Ingredients:
- 1 cup (2 sticks) unsalted butter, softened to room temperature
- 1¼ cups granulated sugar
- 1 teaspoon pure vanilla extract
- 4 medium eggs, at room temperature
- 1¾ cups self-raising flour
- ¼ cup unsweetened cocoa powder
- 3 tablespoons whole milk
- 1½ cups powdered sugar, sifted
- 1 tablespoon unsweetened cocoa powder
- 2 tablespoons milk
- Chocolate sprinkles for decorating
Baking the Old School Chocolate Traybake Cake
Preparing Your Workspace and Pan
Before we begin extract, it’s essential to get your kitchen ready for baking. This recipe is for a classic Old School Chocolate Traybake Cake, so let’s ensure everything is prepped for success. Preheat your oven to 180°C (160°C fan/350°F/Gas Mark 4). This consistent temperature is crucial for even baking. Now, for the pan. You’ll need a 20cm x 30cm (8 inch x 12 inch) rectangular baking tray. To make sure your cake releases beautifully without any sticking, you should grease it thoroughly with butter or baking spray. Then, line the base and sides with parchment paper, leaving a slight overhang on the longer sides. This overhang will act as handles, making it much easier to lift the cake out of the tray once it’s cooled. Ensure the parchment paper is pressed down firmly into the corners and creases of the tray. This attention to detail prevents those frustrating moments of a cake sticking to the pan.
Creaming the Butter and Sugar
In a large mixing bowl, combine the softened unsalted butter and the granulated sugar. You want the butter to be at room temperature, which means it should be soft enough to indent with your finger but not melted. This is key for creating a light and airy cake batter. Using an electric mixer, or a sturdy whisk if you’re feeling energetic, cream these two ingredients together. Start on a low speed to prevent the sugar from flying out of the bowl, then gradually increase the speed to medium-high. Beat them together for about 3 to 5 minutes, or until the mixture is pnon-alcoholic ale, light, and fluffy. You should be able to see a noticeable difference in volume and texture. This process incorporates air into the butter and sugar, which contributes significantly to the cake’s rise and tender crum extractb. Don’t rush this step; it’s a foundational part of achieving that perfect Old School Chocolate Traybake Cake texture.
Incorporating the Wet Ingredients
Once your butter and sugar are beautifully creamed, it’s time to add the eggs and vanilla extract. Ensure your eggs are also at room temperature. Cold eggs can shock the butter mixture and cause it to curdle, which is something we want to avoid. Add the eggs one at a time, beating well after each addition. It’s important to allow each egg to be fully incorporated before adding the next. If the mixture looks like it’s starting to split or curdle, don’t panic. You can often bring it back together by adding a tablespoon of your flour at this stage. After all the eggs are mixed in, add the pure vanilla extract. Its sweet, fragrant aroma will start to waft through the bowl, promising deliciousness. Beat the mixture for another minute until everything is smooth and well combined.
Adding the Dry Ingredients and Milk
Now, let’s bring in the dry ingredients. In a separate medium bowl, whisk together the self-raising flour and the ¼ cup of unsweetened cocoa powder. Whisking them together ensures that the cocoa powder is evenly distributed throughout the flour, preventing any pockets of bitterness or uneven chocolate flavor. Sift this mixture directly into the wet ingredients. Sifting helps to aerate the flour and cocoa, making them lighter and easier to incorporate, and it also removes any lumps. Now, add the 3 tablespoons of whole milk. Using a spatula or a wooden spoon, gently fold the dry ingredients into the wet mixture. Start by folding from the outside of the bowl towards the center, turning the bowl as you go. Be careful not to overmix at this stage. Overmixing can develop the gluten in the flour too much, resulting in a tough cake. Mix just until you no longer see streaks of dry flour. A few small lumps are perfectly fine.
Baking and Cooling the Cake
Pour the cake batter into your prepared baking tray. Use your spatula to spread it evenly, making sure it reaches all the corners. Once the batter is in the tray, give the tray a gentle tap on the counter a couple of times. This helps to release any large air bubbles that might be trapped within the batter. Place the tray in the preheated oven and bake for approximately 25-30 minutes. The cake is done when a skewer or toothpick inserted into the center comes out clean. You’ll also notice the edges of the cake pulling away slightly from the sides of the tray. Once baked, carefully remove the tray from the oven. Let the cake cool in the tray for about 10-15 minutes. This initial cooling period allows the cake to firm up slightly before you attempt to remove it. Then, using the parchment paper overhangs, lift the cake carefully out of the tray and place it on a wire rack to cool completely. It’s crucial that the cake is entirely cool before you attempt to ice it, otherwise, the icing will melt.
Making the Chocolate Glaze and Decorating
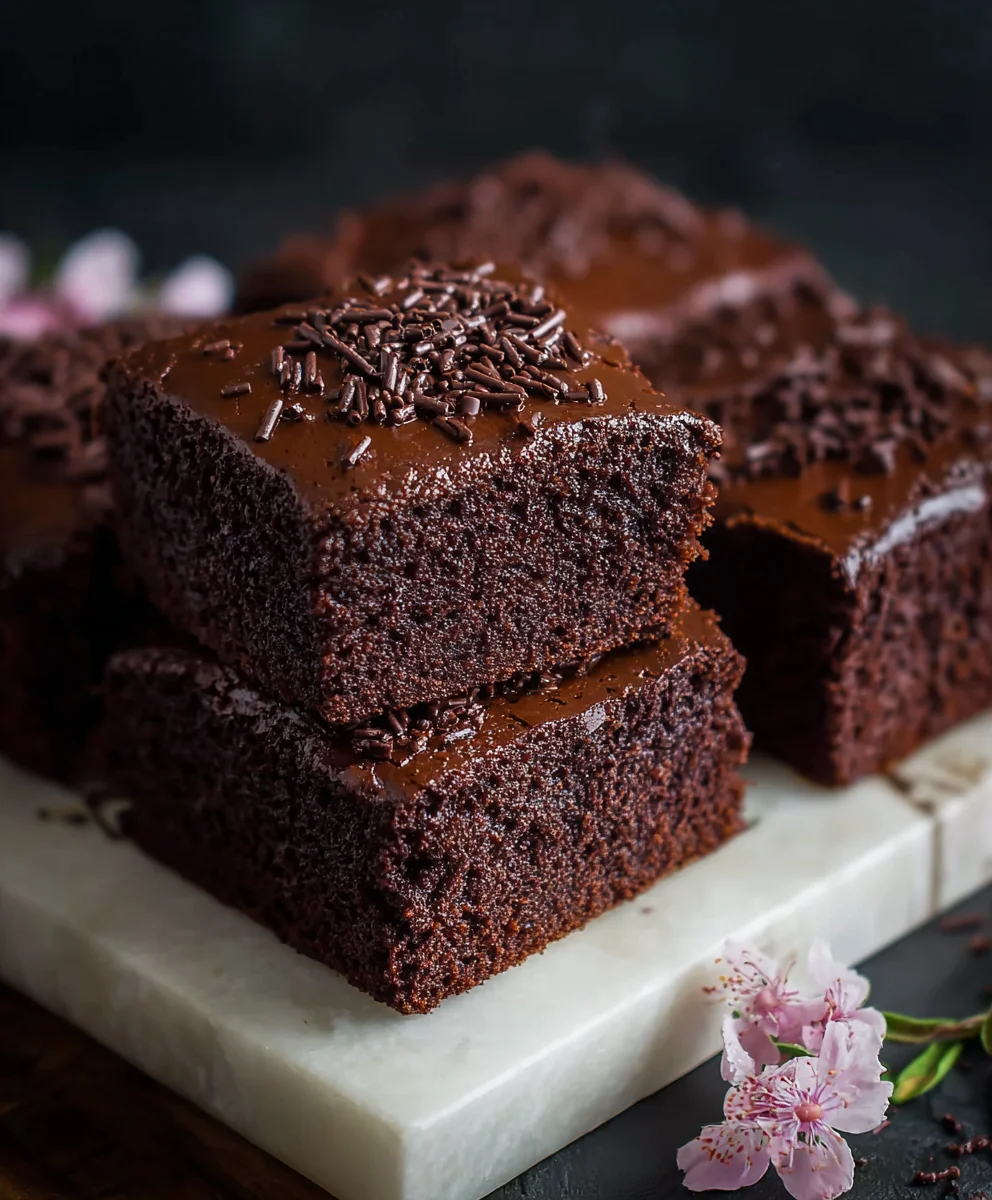
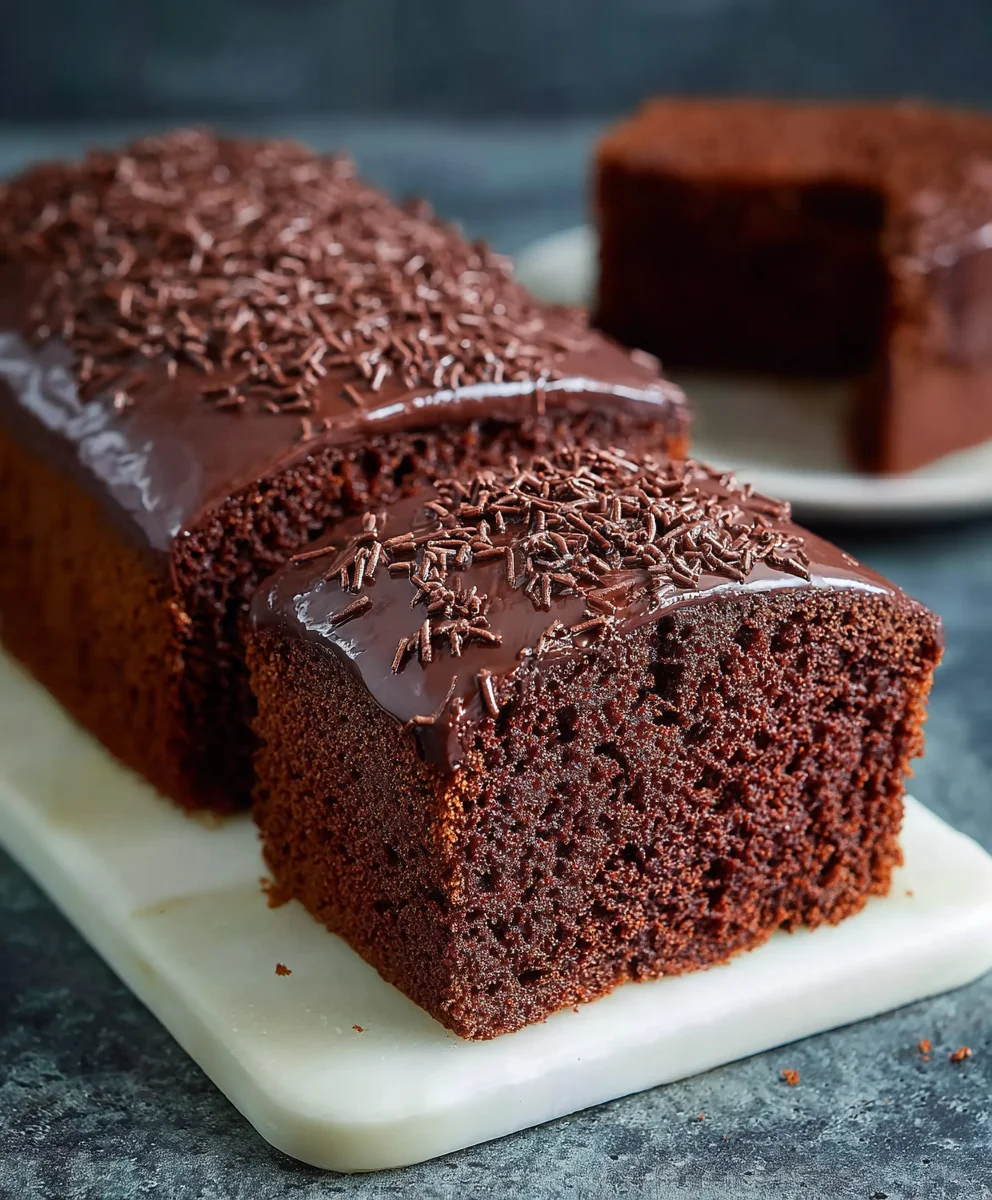
While your cake is cooling, let’s prepare the simple yet delicious chocolate glaze. In a small bowl, combine the sifted powdered sugar with the remaining 1 tablespoon of unsweetened cocoa powder. Sift these together to ensure a smooth, lump-free glaze. Gradually add the 2 tablespoons of milk, stirring continuously. You’re looking for a smooth, pourable consistency. You might need to add a tiny bit more milk if it’s too thick, or a little more sifted powdered sugar if it’s too thin. The goal is a glaze that’s thick enough to coat the cake but thin enough to spread easily. Once your cake is completely cool, pour the chocolate glaze over the top. Use a spatula or the back of a spoon to gently spread it evenly across the surface, allowing some of it to drip down the sides for that rustic, old-school charm. Immediately after applying the glaze, sprinkle generously with the chocolate sprinkles. The sprinkles will adhere to the wet glaze, adding a festive touch and a delightful crunch. Allow the glaze to set for at least 15-20 minutes before cutting into your magnificent Old School Chocolate Traybake Cake. Enjoy this simple yet incredibly satisfying treat!
Conclusion:
And there you have it – the wonderfully nostalgic and utterly delicious Old School Chocolate Traybake Cake! This recipe is a testament to the fact that sometimes, the simplest things are the most satisfying. We’ve walked through creating a moist, rich chocolate cake that’s perfect for any occasion, from a quick afternoon treat to a crowd-pleasing dessert at a gathering. Its ease of preparation makes it a go-to for bakers of all levels, and the aroma that fills your kitchen as it bakes is pure comfort. Don’t be afraid to experiment with its potential!
For serving suggestions, a simple dusting of powdered sugar is classic, but a generous drizzle of chocolate ganache or a dollop of whipped cream takes it to the next level. It’s also fantastic served warm with a scoop of vanilla ice cream. As for variations, consider adding a handful of chocolate chips to the batter for extra gooeyness, or a teaspoon of instant coffee granules to deepen the chocolate flavor. You could even swirl in some raspberry jam before baking for a fruity twist. Embrace the spirit of this Old School Chocolate Traybake Cake and make it your own. Happy baking!
Frequently Asked Questions about Old School Chocolate Traybake Cake:
Q: How long does the Old School Chocolate Traybake Cake typically last?
A: When stored in an airtight container at room temperature, the Old School Chocolate Traybake Cake will stay fresh for about 3-4 days. If you need to store it for longer, it can be refrigerated for up to a week, although the texture might become slightly firmer.
Q: Can I freeze the Old School Chocolate Traybake Cake?
A: Absolutely! Once cooled completely, you can wrap portions or the entire cake tightly in plastic wrap and then in aluminum foil. It freezes well for up to 2-3 months. Thaw it at room temperature before enjoying.
Old School Chocolate Traybake Cake
An easy and delicious recipe for a classic Old School Chocolate Traybake Cake, perfect for any occasion.
Ingredients
-
1 cup (2 sticks) unsalted butter, softened to room temperature
-
1¼ cups granulated sugar
-
1 teaspoon pure vanilla extract
-
4 medium eggs, at room temperature
-
1¾ cups self-raising flour
-
¼ cup unsweetened cocoa powder
-
3 tablespoons whole milk
-
1½ cups powdered sugar, sifted
-
1 tablespoon unsweetened cocoa powder
-
2 tablespoons milk
-
Chocolate sprinkles for decorating
Instructions
-
Step 1
Preheat oven to 180°C (160°C fan/350°F/Gas Mark 4). Grease and line a 20cm x 30cm (8 inch x 12 inch) baking tray with parchment paper. -
Step 2
In a large bowl, cream together softened unsalted butter and granulated sugar until light and fluffy (about 3-5 minutes with an electric mixer). -
Step 3
Add eggs one at a time, beating well after each addition. Stir in the vanilla extract until smooth. -
Step 4
In a separate bowl, whisk together self-raising flour and ¼ cup cocoa powder. Sift this into the wet ingredients. Add 3 tablespoons of milk and gently fold until just combined, being careful not to overmix. -
Step 5
Pour batter into the prepared tray, spread evenly, and bake for 25-30 minutes, or until a skewer inserted into the center comes out clean. Cool in the tray for 10-15 minutes, then transfer to a wire rack to cool completely. -
Step 6
For the glaze, combine sifted powdered sugar and 1 tablespoon cocoa powder in a small bowl. Gradually add 2 tablespoons milk, stirring until smooth and pourable. Adjust consistency with more milk or sugar if needed. -
Step 7
Once the cake is completely cool, pour the chocolate glaze over the top and spread evenly. Decorate immediately with chocolate sprinkles. Let the glaze set for 15-20 minutes before cutting.
Important Information
Nutrition Facts (Per Serving)
It is important to consider this information as approximate and not to use it as definitive health advice.
Allergy Information
Please check ingredients for potential allergens and consult a health professional if in doubt.