Crispy Baked Zucchini Chips – Easy & Delicious Snack
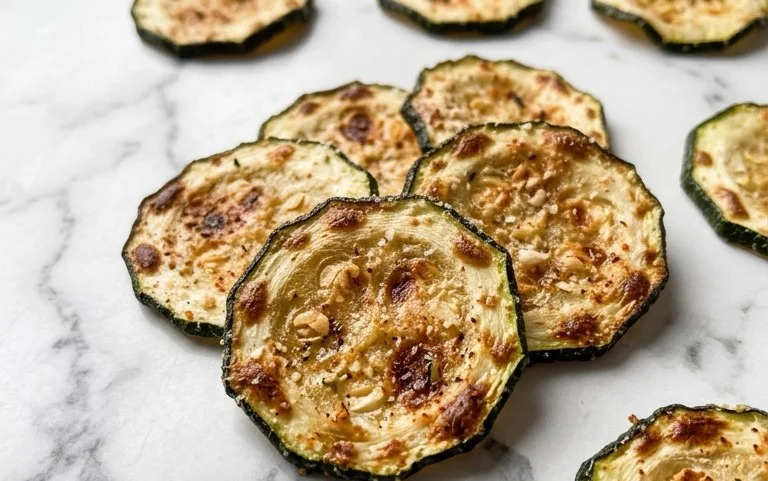
Baked zucchini chips are about to become your new favorite snack obsession. Forget those greasy, processed crisps that leave you feeling guilty. I’ve discovered a way to transform humble zucchini into incredibly satisfying, guilt-free baked zucchini chips that are astonishingly addictive. Think of them as nature’s answer to potato chips, but with a delightful, slightly sweet crunch and a host of health benefits. People adore these baked zucchini chips because they’re unbelievably simple to make, require minimal ingredients, and deliver maximum flavor. What truly makes them special is the magical transformation that happens in the oven: the zucchini loses its moisture, becoming wonderfully crisp and golden brown, bursting with a subtle, fresh taste. They’re the perfect party appetizer, a healthy lunchbox addition, or simply a delightful treat to enjoy any time you’re craving something crunchy and delicious.
Baked Zucchini Chips
Are you looking for a healthy and delicious way to enjoy zucchini? These baked zucchini chips are the perfect solution! They’re incredibly easy to make, wonderfully crispy, and packed with flavor. Forget about greasy fried chips; this recipe offers a guilt-free alternative that will satisfy your craving for a crunchy snack. They are also a fantastic way to use up those garden zucchinis that seem to multiply overnight! The subtle sweetness of the zucchini combined with the savory parmesan and a hint of spice creates a snack that’s both sophisticated and delightfully addictive. I love making a big batch of these to have on hand for when guests pop over, or just for a satisfying afternoon treat.
Ingredients:
Instructions:
Preparation of the Zucchini
The first step to achieving perfectly crispy zucchini chips is proper preparation of the zucchini itself. You’ll want to start with two medium-sized zucchinis. The key to getting that satisfying crunch is to slice them thinly and evenly. Aim for slices that are about 4-5 millimeters thick. If your slices are too thick, they’ll end up more steamed than crispy, and if they’re too thin, they might burn too quickly. I find that a mandoline slicer works wonders for achieving uniform thickness, but a sharp knife and a steady hand will also do the trick. Once sliced, you’ll notice that zucchinis release a lot of moisture. To combat this and ensure maximum crispiness, we need to draw out as much of that excess water as possible. Lay your zucchini slices on a clean kitchen towel or paper towels. Sprinkle them lightly with a little extra salt (if you’re not worried about adding more salt beyond the recipe amount, or just use the salt called for in the recipe here). Let them sit for about 15-20 minutes. You’ll see beads of moisture forming on the surface. Gently pat them dry with more paper towels. This salting and drying process is crucial for preventing soggy chips and is a step I never skip.
Coating the Zucchini Slices
Now that our zucchini slices are prepped and relatively dry, it’s time to give them a delicious coating that will transform them into flavor-packed chips. In a medium bowl, combine the grated parmesan cheese, garlic powder, paprika, and the 1/2 teaspoon of salt. If you’re using black pepper, add that in now as well. Stir everything together until it’s well combined. Next, in a separate shallow dish or bowl, pour your 1/4 cup of olive oil. Take each dried zucchini slice and dip it into the olive oil, ensuring both sides are lightly coated. Don’t let them soak; a quick dip is all you need. Then, transfer the oiled zucchini slice to the parmesan mixture. Gently press the slice into the cheese mixture, making sure it’s evenly coated on both sides. You want a good amount of the cheesy, seasoned mixture adhering to the zucchini. Repeat this process for all of your zucchini slices. Be sure to work in batches if necessary to avoid overcrowding the bowl and ensure each slice gets a proper coating.
Arrangin extractg for Baking
This is where we set ourselves up for success. For the crispiest chips, even baking is essential, which means proper arrangement on your baking sheet. Preheat your oven to 400 degrees Fahrenheit (200 degrees Celsius). Line one or two large baking sheets with parchment paper. Parchment paper is your friend here; it prevents sticking and makes cleanup a breeze. Carefully arrange the coated zucchini slices in a single layer on the prepared baking sheet(s). It is absolutely vital that the slices do not overlap. If they overlap, they will steam instead of crisping, and you’ll end up with soggy chips. If you don’t have enough space on one sheet, it’s far better to use a second baking sheet or bake in batches. Ensure there’s a little bit of space between each chip to allow the hot air to circulate freely around them, which is key to achieving that wonderful crunch.
The Baking Process
Now for the magic! Place your baking sheet(s) into the preheated oven. The baking time can vary slightly depending on your oven and the thickness of your zucchini slices, but typically it takes around 15 to 20 minutes. Halfway through the baking time, around the 8-10 minute mark, it’s a good idea to carefully flip the zucchini chips. This ensures that both sides get beautifully golden and crispy. You can use a spatula or kitchen tongs for this. Keep an eye on them, especially during the last few minutes of baking, as they can go from perfectly crisp to burnt very quickly. You’re looking for them to be golden brown around the edges and feel firm and dry to the touch. If some chips are crisping up faster than others, you can carefully remove them from the baking sheet to prevent them from overcooking while the rest finish.
Cooling and Serving
Once your baked zucchini chips are golden and crisp, remove them from the oven. The aroma will be incredible! Allow them to cool on the baking sheet for a few minutes. As they cool, they will continue to crisp up even more. For ultimate crispiness, I like to transfer them to a wire rack to cool completely. This allows air to circulate around them on all sides. Once cooled, your delicious baked zucchini chips are ready to be devoured! They are best enjoyed fresh, as they can lose some of their crispness if stored for too long. If you do have leftovers, store them in an airtight container at room temperature, but try to eat them within a day or two for the best texture. Serve them as a standalone snack, or get creative with dips! They pair wonderfully with a creamy ranch dip, a zesty aioli, or even a simple marinara sauce. Enjoy this healthy and satisfying treat!
Conclusion:
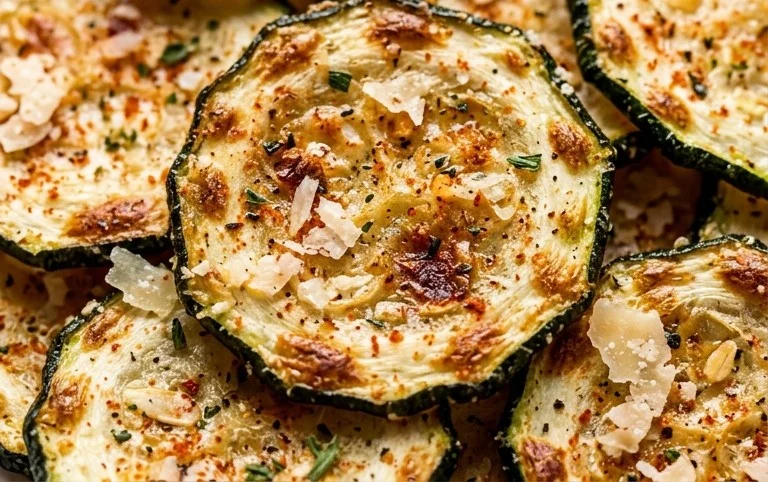
I hope you’ve enjoyed learning how to make these incredibly delicious baked zucchini chips! They truly are a fantastic way to enjoy a healthy snack that satisfies those crunchy cravings without the guilt. The simplicity of the recipe, combined with the versatility of zucchini, makes it a winner in my book. You get perfectly crisp, flavorful chips with minimal effort, proving that healthy eating can be incredibly satisfying.
These baked zucchini chips are wonderfully versatile. Serve them as a light appetizer, a side dish for sandwiches or salads, or simply as a guilt-free snack anytime you need a little crunch. For variations, don’t be afraid to experiment with your seasonings! Think about adding smoked paprika for a smoky depth, garlic powder for an extra savory kick, or even a pinch of chili flakes for a touch of heat. You could also try tossing them with grated Parmesan cheese in the last few minutes of baking for a cheesy twist. I encourage you to give this recipe a try; you’ll be amazed at how easy and rewarding it is to create these delightful baked zucchini chips.
Frequently Asked Questions about Baked Zucchini Chips:
How can I ensure my baked zucchini chips are crispy and not soggy?
The key to crispy baked zucchini chips is to remove as much moisture from the zucchini as possible. After slicing, salt the zucchini slices and let them sit in a colander for about 20-30 minutes. This draws out excess water. Gently pat them dry with paper towels before seasoning and baking. Also, ensure your oven is preheated properly and avoid overcrowding the baking sheet so air can circulate effectively.
Can I make these baked zucchini chips ahead of time?
While they are best enjoyed fresh out of the oven for optimal crispiness, you can store cooled baked zucchini chips in an airtight container at room temperature for a day or two. However, they may lose some of their crispness over time. For the best experience, I highly recommend making them shortly before you plan to serve them.
Baked Zucchini Chips
Crispy and flavorful baked zucchini chips, a healthy alternative to potato chips.
Ingredients
-
2 medium zucchini (sliced into rounds (4-5 mm thickness))
-
1/4 cup olive oil
-
2/3 cup grated parmesan cheese
-
1/2 tsp garlic powder
-
1/4 tsp paprika
-
1/2 tsp salt
-
black pepper to taste
Instructions
-
Step 1
Preheat your oven to 400°F (200°C). Line two baking sheets with parchment paper. -
Step 2
In a large bowl, toss the zucchini slices with olive oil until evenly coated. -
Step 3
In a separate shallow dish, combine the grated parmesan cheese, garlic powder, paprika, salt, and black pepper. -
Step 4
Dredge each zucchini slice in the cheese mixture, ensuring both sides are well coated. -
Step 5
Arrange the coated zucchini slices in a single layer on the prepared baking sheets, making sure they don’t overlap. -
Step 6
Bake for 10-15 minutes, flipping halfway through, until the chips are golden brown and crispy. Keep a close eye to prevent burning. -
Step 7
Let the zucchini chips cool slightly on the baking sheets before serving. They will crisp up further as they cool.
Important Information
Nutrition Facts (Per Serving)
It is important to consider this information as approximate and not to use it as definitive health advice.
Allergy Information
Please check ingredients for potential allergens and consult a health professional if in doubt.