Easter Bunny Coconut Tails-Sweet Treat
Easter Bunny Coconut Tails are the perfect whimsical treat to hop into your spring celebrations! There’s something undeniably joyful about these sweet, fluffy creations, and it’s no wonder they’ve become a springtime favorite for so many families. The delightful combination of tender coconut and sweet, melt-in-your-mouth goodness makes these Easter Bunny Coconut Tails an instant hit with kids and adults alike. What truly sets them apart is their charming presentation, evoking the playful spirit of Easter. They’re not just a dessert; they’re a delightful centerpiece that brings smiles and creates lasting memories. Imagin extracte a platter adorned with these adorable little tails, ready to be discovered and devoured. Get ready to add a touch of magic to your Easter table with this simple yet spectacular recipe.
Easter Bunny Coconut Tails
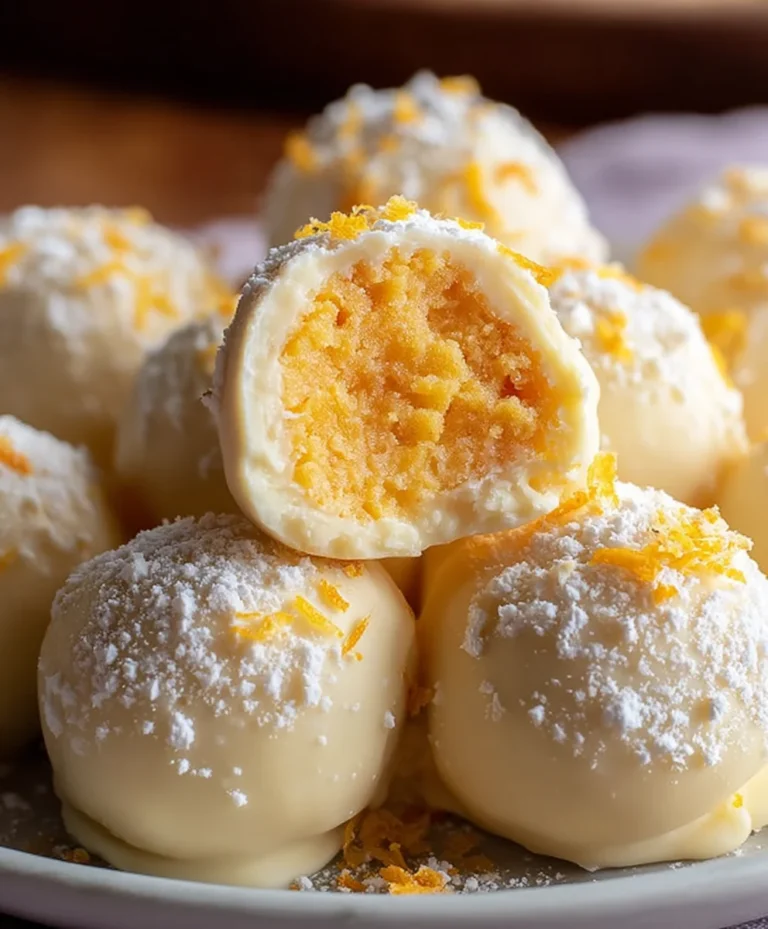
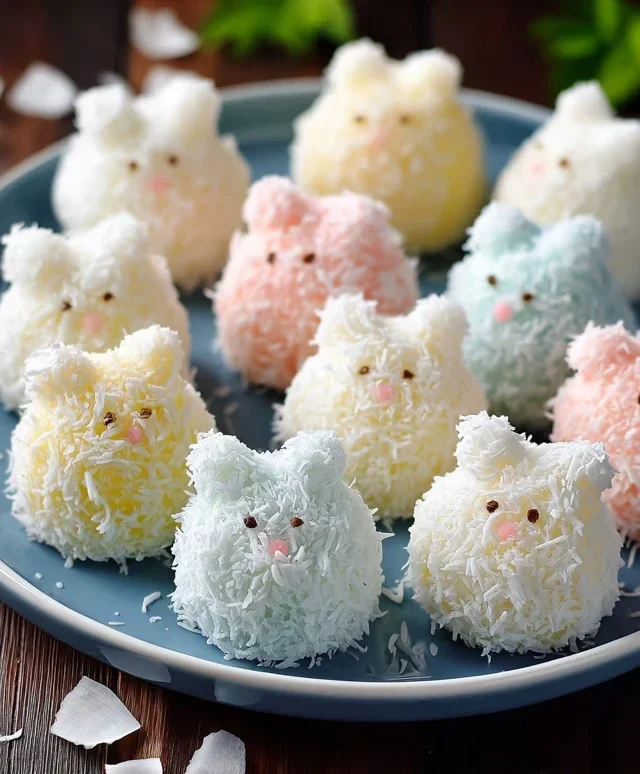
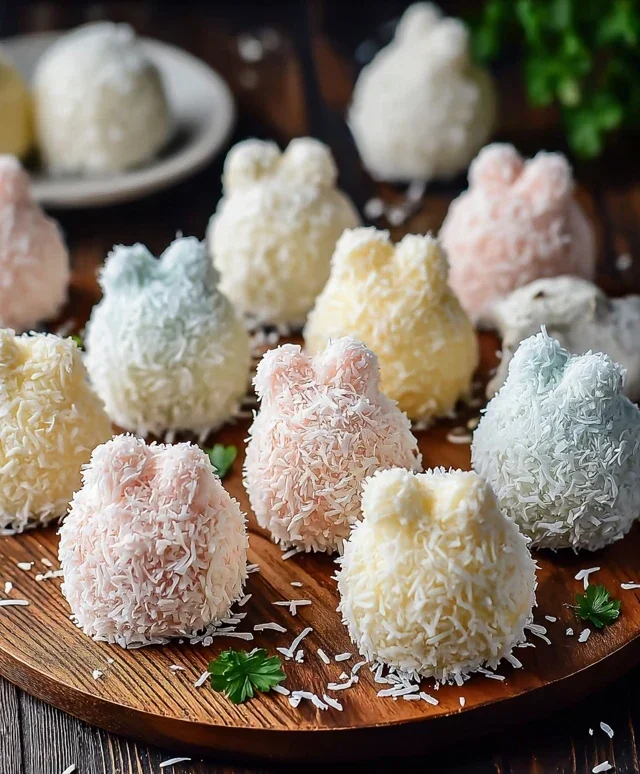
These Easter Bunny Coconut Tails are an absolute delight, bringin extractg a touch of whimsical charm and sweet, tropical flavor to your Easter celebrations. Imagin extracte little fluffy clouds of coconut, perfectly formed into bunny tails, with a subtle sweetness and a hint of vanilla. They are surprisingly simple to make, making them a fantastic activity to do with kids or a delightful treat to prepare for your Easter gatherings. The combination of creamy white chocolate and the satisfying chew of marshmallow is irresistible, and the vibrant pink decoration adds that festive Easter flair. Let’s get started on creating these adorable treats!
Ingredients:
Making the Coconut Tail Mixture
The foundation of our Easter Bunny Coconut Tails is a wonderfully fragrant and chewy coconut mixture. This is where the magic begin extracts to happen. We’ll start by melting the butter and marshmallows together, creating a sticky, sweet binder that will hold our coconut together. This process requires a bit of gentle heat and stirring to ensure everything melts smoothly without scorching. It’s crucial to use mini marshmallows here, as they melt more quickly and evenly than their larger counterparts.
In a medium-sized, microwave-safe bowl, combine the ¼ cup of butter and the 1½ cups of mini marshmallows. Place the bowl in the microwave and heat on high for 30-second intervals, stirring well after each interval. You’re looking for the marshmallows to be mostly melted and the butter fully incorporated. This usually takes about 1 to 1.5 minutes in total, depending on your microwave’s wattage. Be patient and don’t rush this step, as overcooked marshmallows can become tough and difficult to work with. Once melted and smooth, remove the bowl from the microwave.
Next, we’ll introduce the star of the show: the shredded coconut. Add the 2 cups of shredded coconut to the melted marshmallow mixture. Stir vigorously with a sturdy spoon or spatula until all the coconut is thoroughly coated. The mixture will become quite thick and sticky at this point. It’s important to get a good distribution of the marshmallow mixture throughout the coconut to ensure the tails hold their shape. At this stage, we’ll also incorporate the 1 teaspoon of vanilla extract. Stir it in well; the vanilla adds a lovely depth of flavor that complements the coconut beautifully.
Forming the Bunny Tails
Now comes the fun part – shaping our delicious coconut mixture into adorable bunny tails! This part can get a little sticky, so I often find it helpful to lightly grease my hands with a tiny bit of cooking spray or a dab of butter. Alternatively, you can use a small cookie scoop to portion out the mixture.
Take about a tablespoon of the coconut mixture at a time. Roll it between your palms to form a small, round ball. Aim for a size that’s about 1 inch in diameter, similar to the size of a typical cotton ball or a large gumball. Don’t worry if they aren’t perfectly uniform; the slight variations will add to their homemade charm. As you form each tail, place it onto a baking sheet lined with parchment paper. Parchment paper is essential here to prevent any sticking and to make cleanup a breeze.
Make sure to leave a little space between each tail on the baking sheet, as they can slightly spread as they sit. If the mixture becomes too difficult to handle, you can briefly pop it back into the microwave for another 10-15 seconds to soften it up a bit. Continue this process until you’ve used up all the coconut mixture and have a collection of perfectly imperfect coconut balls, ready for their next transformation.
Melting and Dipping the White Chocolate
To give our coconut tails a lovely finished look and an extra layer of sweetness, we’ll be dipping them in smooth, creamy white chocolate. This is a crucial step for achieving that classic candy-like appearance. We want our white chocolate to be perfectly melted and luscious, creating a beautiful coating for our coconut spheres.
Place the 1 cup of white chocolate chips into a microwave-safe bowl. Similar to melting the marshmallows, you’ll want to microwave them in 30-second intervals, stirring thoroughly after each interval. White chocolate can be a bit finicky and prone to seizing if overheated, so it’s better to go slow and steady. Stir until the chocolate is completely smooth and glossy. If you find it’s not melting evenly, you can add a teaspoon of vegetable oil or a tiny bit of shortening to help achieve a smoother consistency, although this is usually not necessary if you’re careful with the microwaving.
Once your white chocolate is beautifully melted, it’s time to dip. Using two forks or a dipping tool, carefully dip each coconut tail into the melted white chocolate. Swirl it around until it’s fully coated, then lift it out and let the excess chocolate drip back into the bowl. Gently place the dipped tail back onto the parchment-lined baking sheet. You can use a clean fork to nudge it into place if needed. Allow the white chocolate to set completely before moving on to the decorative elements. This might take about 15-20 minutes at room temperature, or you can speed up the process by placing the baking sheet in the refrigerator for about 10 minutes.
Decorating with Pink Candy Melts
The final touch that truly makes these Easter Bunny Coconut Tails pop is the addition of adorable pink details. This is where we’ll add those sweet little touches that resemble the inside of a bunny’s ear or a subtle blush.
Prepare your pink candy melts according to the package instructions. Typically, this involves melting them in the microwave in short intervals, stirring until smooth and fluid, much like the white chocolate. Once melted, you can transfer the pink candy melts to a piping bag fitted with a small, round tip, or simply snip a tiny corner off a resealable plastic bag.
Now, for the fun part! You can get creative with your decorations. A simple and effective method is to pipe small dots or tiny teardrop shapes onto the top of each white chocolate-dipped tail. This mimics the look of a bunny’s soft inner ear. Alternatively, you could pipe tiny swirls or even small little hearts. The key is to add just a touch of color to make them festive without overpowering the white chocolate and coconut.
Let the pink candy melt decorations set completely. This will happen relatively quickly as the candy melts harden. You can again pop them in the refrigerator for a few minutes if you want to speed up the setting process. Once everything is set, your Easter Bunny Coconut Tails are ready to be enjoyed! They look absolutely enchanting arranged on a platter and are a guaranteed hit with all ages. Store any leftovers in an airtight container at room temperature.
Conclusion:
These Easter Bunny Coconut Tails are an absolute delight, offering a perfect blend of sweet, chewy coconut and a touch of creamy richness. They’re wonderfully simple to whip up, making them an ideal activity for families looking to create some festive fun. The beautiful white “tails” adorned with pink or yellow ears are not only adorable but also incredibly tasty. They’re sure to be a hit at any Easter gathering, bringin extractg smiles to both children and adults alike.
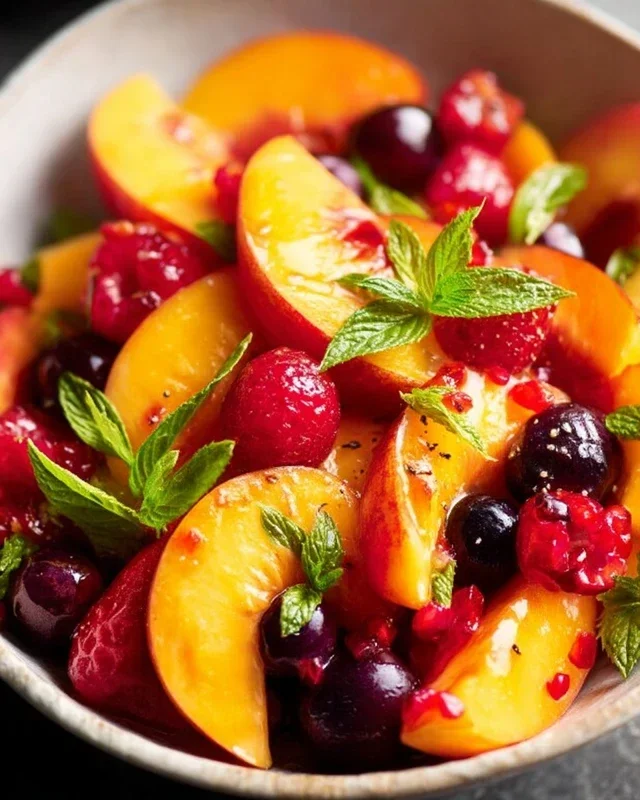
I highly encourage you to give this Easter Bunny Coconut Tails recipe a try! They are fantastic on their own as a sweet treat, but also make wonderful additions to an Easter dessert table, nestled amongst other festive goodies. Consider serving them with fresh fruit for a balanced snack, or as a charming edible gift for friends and loved ones. For variations, you could experiment with different extracts like almond or orange for a subtle flavor twist, or even dust them with a little edible glitter for extra sparkle.
Frequently Asked Questions about Easter Bunny Coconut Tails:
Can I make these ahead of time?
Absolutely! These Easter Bunny Coconut Tails can be made a day or two in advance and stored in an airtight container at room temperature. This makes them perfect for busy Easter preparations, allowing you to get a head start on your festive baking.
How should I store leftovers?
Leftovers should be stored in an airtight container at room temperature for up to 3 days. If your kitchen is particularly warm, you might consider refrigerating them, but ensure they come back to room temperature before serving for the best texture.
What if I don’t have coconut extract?
No problem! If you don’t have coconut extract, you can omit it and increase the vanilla extract slightly, or even add a few drops of another complementary extract like almond extract for a different flavor profile. The coconut flavor will still come through from the shredded coconut itself.
Easter Bunny Coconut Tails
Sweet and fluffy coconut candy tails perfect for Easter baskets.
Ingredients
-
2 cups shredded coconut
-
1½ cups mini marshmallows
-
¼ cup butter
-
1 teaspoon vanilla extract
-
1 cup white chocolate chips
-
Pink candy melts for decoration
Instructions
-
Step 1
Line a baking sheet with parchment paper. -
Step 2
In a microwave-safe bowl, combine mini marshmallows and butter. Microwave in 30-second intervals, stirring between each, until melted and smooth. -
Step 3
Stir in the vanilla extract and shredded coconut until well combined. -
Step 4
Shape the mixture into bunny tail shapes. Place the shaped tails on the prepared baking sheet. -
Step 5
Melt the white chocolate chips according to package directions. Drizzle the white chocolate over the coconut tails. -
Step 6
Melt the pink candy melts according to package directions. Use a toothpick to add pink accents to resemble bunny tails. -
Step 7
Allow the candy melts and white chocolate to set before serving.
Important Information
Nutrition Facts (Per Serving)
It is important to consider this information as approximate and not to use it as definitive health advice.
Allergy Information
Please check ingredients for potential allergens and consult a health professional if in doubt.