Easy Mini Apple Pies – Delicious Fall Dessert
Mini apple pies are an absolute delight, and I’m so excited to share this recipe with you! There’s something undeniably comforting about the sweet, spiced aroma of apples baking, and when it’s all tucked into a perfectly portioned, flaky crust, well, that’s pure magic. These darling little treats capture all the warmth and nostalgia of a classic apple pie but in a size that’s perfect for individual indulgence or for sharing with a crowd. Why do we love them so much? It’s the perfect balance of tender, slightly tart apples and that buttery, golden pastry that just melts in your mouth. Unlike their full-sized counterparts, these mini apple pies are wonderfully easy to serve, and they look absolutely adorable on any dessert table. They’re a fantastic way to satisfy that apple pie craving without the commitment of a whole pie, making them ideal for parties, potlucks, or just a sweet afternoon pick-me-up.
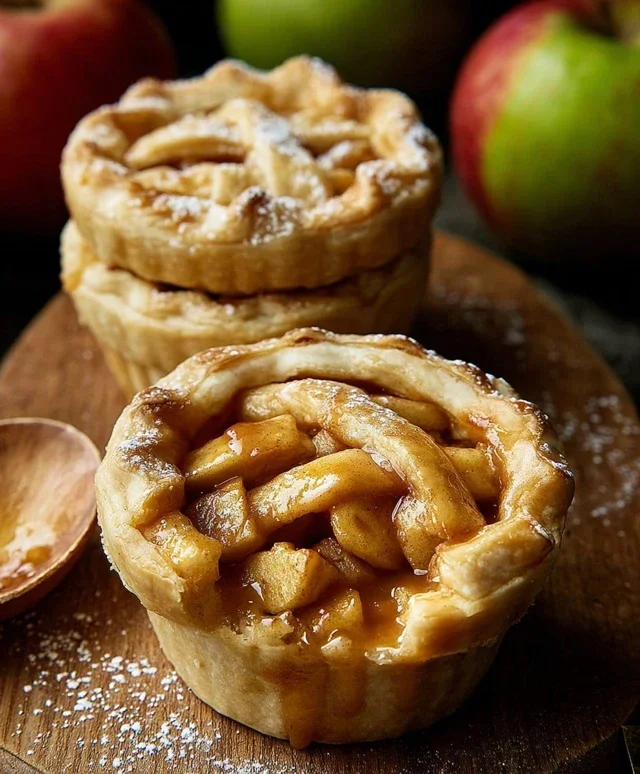
Mini Apple Pies
There’s something undeniably comforting and charming about mini apple pies. They’re the perfect size for individual indulgence, a delightful bite of warm, spiced apple goodness encased in flaky, golden crust. Whether you’re hosting a gathering, looking for a sweet treat after dinner, or simply craving a taste of autumn, these mini pies are sure to be a hit. They’re surprisingly simple to make, especially when you leverage the convenience of refrigerated pie crusts. Let’s dive into creating these delightful little desserts!
Ingredients:
Getting Started: Preparing Your Apples
The foundation of any great apple pie, big or small, is the apple filling. For these mini pies, I find Granny Smith apples to be ideal. Their tartness provides a beautiful balance to the sweetness of the sugars and spices, and they hold their shape well during baking, preventing a mushy filling. You’ll want to peel, core, and chop your apples into small, uniform pieces. Aim for pieces that are roughly 1/2 inch in size. This ensures they cook evenly within the mini pie crusts and provide a satisfying texture in every bite. A medium-small apple usually yields about 1 to 1.5 cups of chopped apple, so you’ll need about 3-4 of them to reach your 3-cup mark.
Creating the Perfect Filling
Once your apples are chopped and ready, it’s time to create the delicious filling that will make these mini pies sing. In a large bowl, combine the chopped apples with both the granulated sugar and the light brown sugar. The combination of sugars adds depth of flavor and ensures a lovely caramelization as the pies bake. Next, sprinkle in the ground cinnamon and ground nutmeg. These classic pie spices are essential for that warm, inviting aroma and taste. Don’t skimp on the cinnamon; it’s the star of the show! Now, add the all-purpose flour. The flour acts as a thickener, preventing your filling from becoming too watery once the apples release their juices. Finally, stir in the vanilla extract. Vanilla is a wonderful enhancer of other flavors, especially apple and cinnamon, adding a subtle layer of complexity. Give everything a good, gentle toss until the apples are evenly coated with the sugar, spice, and flour mixture.
Assembling Your Mini Masterpieces
This is where the magic truly happens! Using refrigerated pie crusts makes this process incredibly straightforward. Carefully unroll your pie crusts. For mini pies, you’ll want to cut out circles that are slightly larger than the cups of your muffin tin. A biscuit cutter or a large cookie cutter works wonderfully for this. If you don’t have one, you can also use the rim of a wide glass or mug. You should be able to get about 6-8 circles from each crust, depending on the size of your cutter. Gently press these circles into the cups of a lightly greased muffin tin, ensuring they line the bottom and sides of each cup. You want them to create a little vessel for your apple filling.
Now, it’s time to fill those crusts. Spoon the prepared apple mixture evenly into each of the unbaked pie crusts. Don’t overfill them; leave a little room at the top to prevent spills during baking. Once filled, it’s time to create the tops for your mini pies. You have a couple of options here. You can either cut out smaller circles to simply place on top of the filling, or you can get a little more creative with lattice work if you’re feeling ambitious. For a simple top, cut out circles slightly smaller than your bottom crusts and place them on top. You can crimp the edges together with a fork to seal them. Alternatively, you can cut thin strips of dough and weave them into a lattice pattern over the apples. Whichever method you choose, make sure the pies are senon-alcoholic aled well to keep all that delicious filling inside.
The Egg Wash and Finishing Touches
To give your mini apple pies that beautiful, golden-brown sheen and ensure a lovely crisp crust, we’ll make a simple egg wash. In a small bowl, whisk together the egg and the tablespoon of water. This mixture will be brushed over the tops of your mini pies. Using a pastry brush, gently brush the egg wash over the entire surface of each pie, including the edges. This not only adds a gorgeous color but also helps any toppings adhere. If you’re using sanding sugar, this is the perfect time to sprinkle it generously over the egg wash. The sanding sugar will create a delightful sparkle and a slight crunch that’s simply irresistible.
Baking Your Little Gems to Perfection
Now, your mini apple pies are ready for their transformation in the oven. Preheat your oven to 375 degrees Fahrenheit (190 degrees Celsius). Carefully place the muffin tin with your assembled mini pies onto a baking sheet. This is a good practice to catch any potential drips and makes it easier to transfer the tin in and out of the oven. Bake for approximately 25-30 minutes, or until the crust is golden brown and the filling is bubbling. You’ll want to keep an eye on them, as oven temperatures can vary. If you notice the crust browning too quickly, you can loosely tent the muffin tin with aluminum foil.
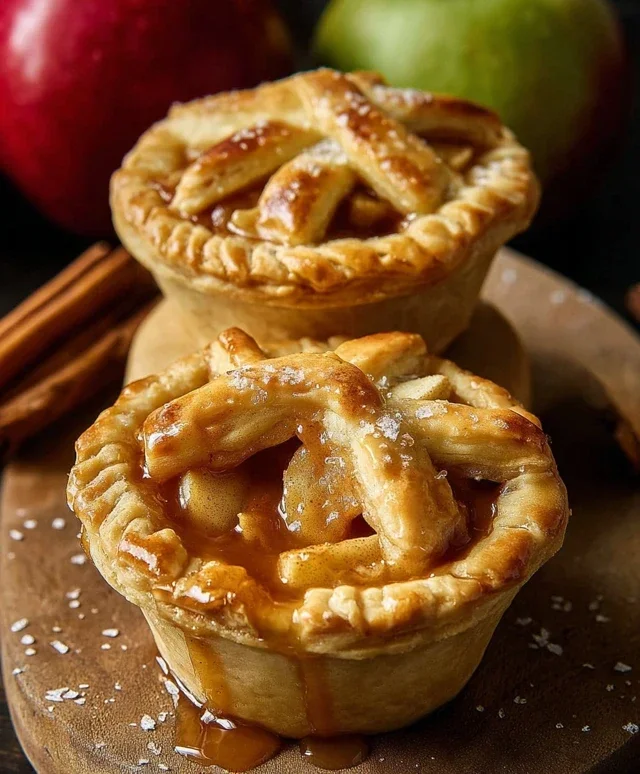
Once baked to golden perfection, carefully remove the muffin tin from the oven. Let the mini apple pies cool in the muffin tin for about 10-15 minutes. This allows them to set up properly. After this initial cooling period, you can gently loosen the edges with a small knife or spatula and carefully lift each mini pie out of the muffin tin to cool completely on a wire rack. They are absolutely divine served warm, perhaps with a dollop of whipped cream or a scoop of vanilla ice cream. Enjoy every delightful, bite-sized piece of homemade goodness!
Conclusion:
There you have it – a delightful and incredibly approachable recipe for mini apple pies! These little treasures are perfect for so many occasions, whether you’re looking for an impressive dessert for a dinner party, a sweet treat for a bake snon-alcoholic ale, or simply a comforting indulgence for yourself. The beauty of this recipe lies in its simplicity and the fantastic flavor combination of warm, spiced apples encased in a flaky, buttery crust. They’re wonderfully portion-controlled and undeniably charming!
I love serving these mini apple pies warm, perhaps with a dollop of vanilla ice cream or a drizzle of caramel sauce. They also make fantastic additions to a holiday dessert spread or a cozy afternoon tea. Don’t be afraid to experiment with variations – adding a pinch of nutmeg or a splash of lemon juice to the apple filling can elevate the flavor even further. You could even incorporate some chopped pecans or cranberries for added texture and taste!
I truly encourage you to give this recipe a try. It’s a rewarding baking experience that results in a truly delicious outcome. Enjoy every bite of your homemade mini apple pies!
Frequently Asked Questions:
Can I make these mini apple pies ahead of time?
Yes, you can! You can assemble the mini apple pies and store them, unbaked, in the refrigerator for up to 24 hours. You can also bake them and then reheat them gently in a warm oven before serving. For longer storage, they can be frozen after baking and then reheated.
What kind of apples are best for mini apple pies?
A mix of tart and sweet apples works wonderfully. Varieties like Granny Smith, Honeycrisp, Gala, and Fuji are excellent choices. Using a combination ensures a balanced flavor and good texture in your mini apple pies.
What if I don’t have muffin tins?
If you don’t have muffin tins, you can use other small, oven-safe ramekins or even individual tart pans. You might need to adjust the baking time slightly depending on the size and material of your chosen baking vessels.
Mini Apple Pies
Individual, bite-sized apple pies perfect for a sweet treat.
Ingredients
-
2 refrigerated pie crusts
-
3 cups chopped Granny Smith apples
-
1/4 cup granulated sugar
-
1/4 cup light brown sugar
-
1 teaspoon ground cinnamon
-
1/4 teaspoon ground nutmeg
-
2 tablespoons all-purpose flour
-
1 teaspoon vanilla extract
-
1 egg
-
1 tablespoon water
-
Sanding sugar (optional)
Instructions
-
Step 1
Preheat oven to 375°F (190°C). Lightly grease a muffin tin. -
Step 2
In a large bowl, combine chopped apples, granulated sugar, brown sugar, cinnamon, nutmeg, and flour. Stir until apples are evenly coated. -
Step 3
Unroll pie crusts and cut out circles using a cookie cutter or glass that fits your muffin tin cups. -
Step 4
Gently press the crust circles into the muffin tin cups, forming the pie shells. -
Step 5
Divide the apple filling evenly among the pie shells. -
Step 6
In a small bowl, whisk together the egg and water. Brush the edges of the pie crusts with the egg wash. Sprinkle with sanding sugar if desired. -
Step 7
Bake for 20-25 minutes, or until crust is golden brown and filling is bubbly. -
Step 8
Let pies cool in the muffin tin for a few minutes before carefully removing to a wire rack to cool completely.
Important Information
Nutrition Facts (Per Serving)
It is important to consider this information as approximate and not to use it as definitive health advice.
Allergy Information
Please check ingredients for potential allergens and consult a health professional if in doubt.