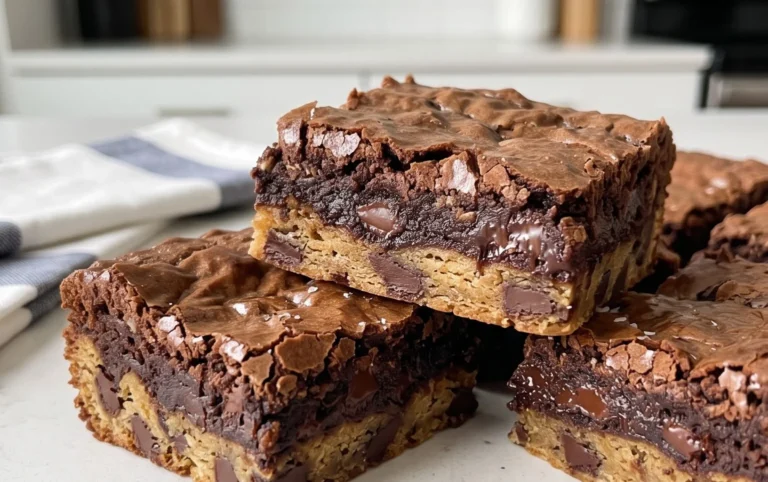
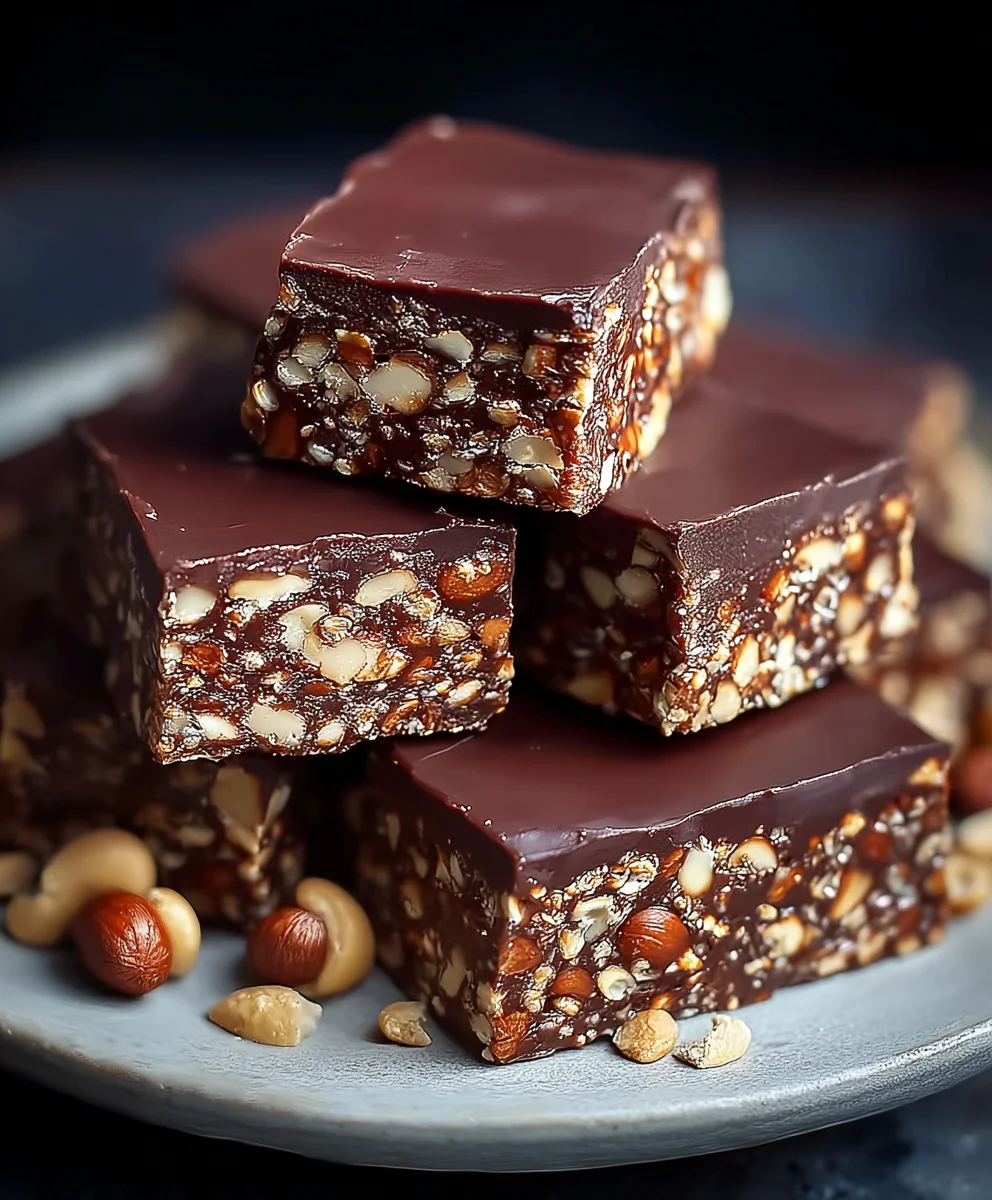
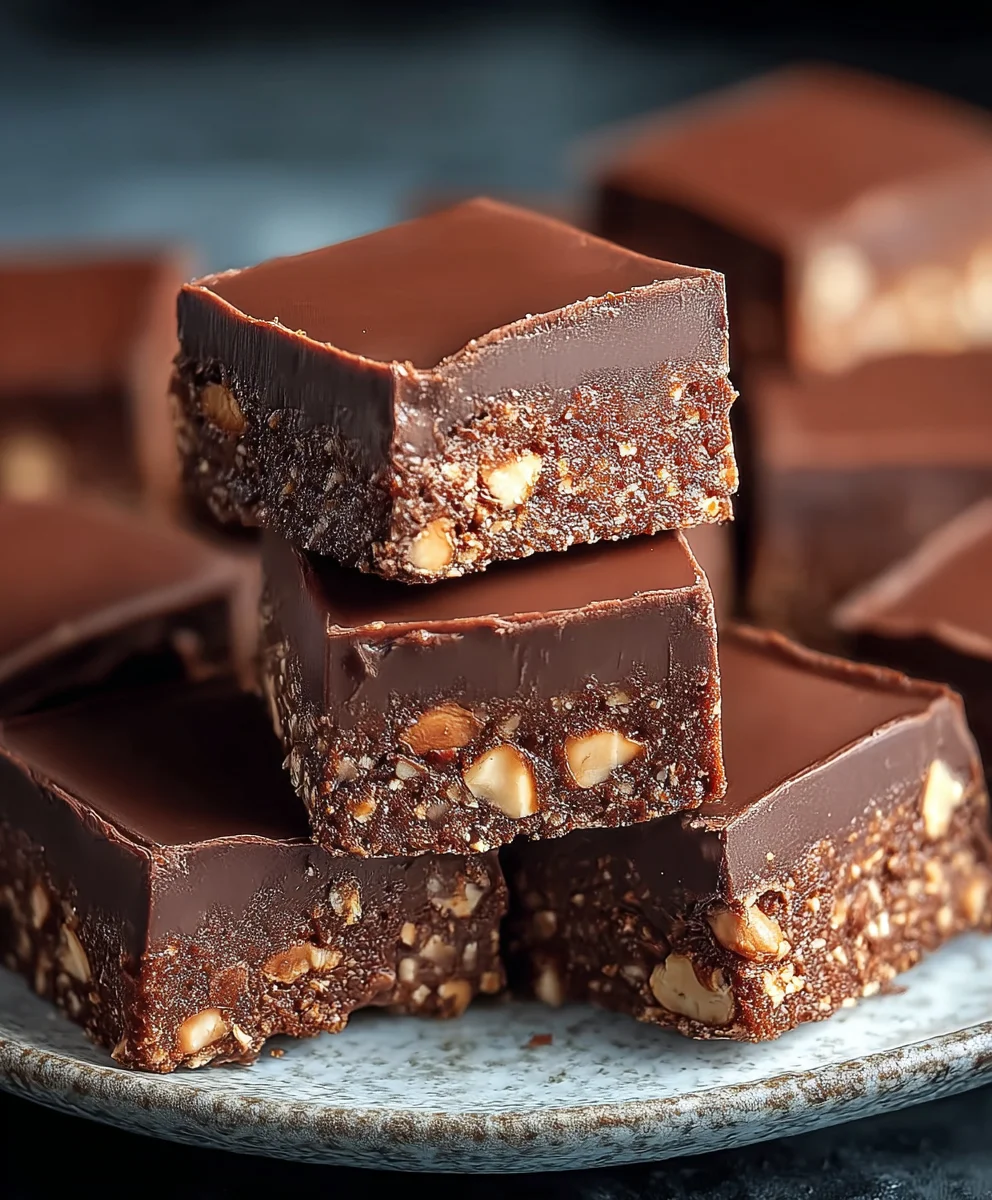
Easy No-Bake Chocolate Biscuit Bars – Quick Dessert
No-Bake Chocolate Biscuit Bars are an absolute revelation for anyone craving a sweet treat without the oven’s fuss. Imagin extracte a symphony of textures and rich chocolate flavor that comes together effortlessly, making it a go-to for busy weeknights, impromptu gatherings, or simply when that chocolate craving hits hard. What makes these No-Bake Chocolate Biscuit Bars so universally loved? It’s the incredible simplicity and the deeply satisfying, decadent result. We’re talking about crushed biscuits, rich melted chocolate, and a few other pantry staples transforming into a delightful confection that’s both delightfully crunchy and wonderfully chewy. The magic lies in their versatility; you can customize them with your favorite nuts, dried fruits, or even a hint of espresso powder to elevate the chocolatey notes. These bars are proof that you don’t need to be a master baker to create something truly spectacular.
Ingredients:
- 12.3 oz (350g) digestive biscuits, crushed
- 1 cup (3 oz / 85g) ground peanuts
- ½ cup (3 oz / 85g) granulated sugar
- 1 packet (10g) vanilla sugar (optional, but highly recommended for an extra layer of flavor)
- ½ cup (1.6 oz / 45g) unsweetened cocoa powder
- ¾ cup (6 fl oz / 180ml) heavy sweet cream (also known as whipping cream)
- ½ cup (3.9 oz / 110g) unsalted butter, cut into cubes
- 3.2 oz (90g) milk chocolate, finely chopped
- 1 oz (30g) dark chocolate, finely chopped
- 2 tbsp (1 oz / 30g) vegetable oil (or any neutral cooking oil like canola or sunflower oil)
- ¾ cup (2.5 oz / 70g) ground peanuts, for topping
Preparing the Biscuit Base
Step 1: Crush the Biscuits
Begin extract by preparing your biscuit base. Take your 12.3 oz (350g) of digestive biscuits and place them into a sturdy plastic bag. Seal the bag tightly, ensuring no air escapes. Using a rolling pin or the bottom of a heavy pan, carefully crush the biscuits into fine crum extractbs. You want a consistency similar to coarse sand, with no large chunks remaining. Alternatively, you can use a food processor to achieve this. Once crushed, transfer the brum extractuit crumbs to a large mixing bowl.
Step 2: Combine Dry Ingredients for the Base
To the bowl of crushed biscuits, add 1 cup (3 oz / 85g) of ground peanuts. These will add a delightful nutty texture and flavor to the base of your No-Bake Chocolate Biscuit Bars. Next, incorporate ½ cup (3 oz / 85g) of granulated sugar and, if you’re using it, the 1 packet (10g) of vanilla sugar. The vanilla sugar adds a subtle but lovely aroma and sweetness that complements the chocolate and peanut flavors beautifully. Finally, add ½ cup (1.6 oz / 45g) of unsweetened cocoa powder. Whisk all these dry ingredients together thoroughly until they are well combined and there are no streaks of cocoa powder visible. Ensure everything is evenly distributed, as this will form the foundation of your bars.
Creating the Rich Chocolate Filling
Step 3: Melt Butter and Cream
Now, let’s move on to creating the luscious chocolate filling. In a medium saucepan, combine the ¾ cup (6 fl oz / 180ml) of sweet cream and the ½ cup (3.9 oz / 110g) of unsalted butter, cut into cubes. Place the saucepan over medium-low heat. Stir occasionally, allowing the butter to melt completely into the cream. It’s important not to let the mixture boil vigorously; you just want it to reach a gentle simmer, ensuring the butter is fully incorporated and the cream is warm. This process creates a smooth, rich base for our chocolate ganache. Once the butter has melted and the mixture is warm, remove the saucepan from the heat.
Step 4: Incorporate the Chocolates and Form the Ganache
To the warm cream and butter mixture in the saucepan, add the 3.2 oz (90g) of finely chopped milk chocolate and the 1 oz (30g) of finely chopped dark chocolate. Let the residual heat from the cream mixture gently melt the chocolate for a minute or two without stirring. This helps prevent the chocolate from seizing. After the initial resting pegin extractd, begin to stir the mixture slowly and gently with a spatula or whisk. Continue stirring until both types of chocolate are completely melted and the ganache is smooth, glossy, and uniform in color. The combination of milk and dark chocolate provides a wonderful balance of sweetness and depth of flavor. Stir in the 2 tbsp (1 oz / 30g) of vegetable oil. The oil helps to make the ganache extra smooth and gives the finished bars a lovely sheen.
Assembling and Finishing the Bars
Step 5: Combine Base and Filling, and Top
Pour the luscious chocolate ganache mixture over the dry ingredients in the large mixing bowl containing the crushed biscuits and peanuts. Using a sturdy spatula or a wooden spoon, mix everything together until all the dry ingredients are thoroughly coated with the chocolate mixture. It will be a thick, sticky mass. Once everything is well combined, transfer this mixture into a prepared baking dish. You can line an 8×8 inch or a similar-sized square baking dish with parchment paper, leaving some overhang on the sides to make lifting the bars out easier later. Press the mixture down evenly into the dish using the back of your spatula or your hands (lightly greased if needed to prevent sticking). Ensure the surface is as flat and even as possible. Finally, sprinkle the remaining ¾ cup (2.5 oz / 70g) of ground peanuts evenly over the top of the chocolate biscuit mixture. Gently press these peanuts into the surface so they adhere well.
Step 6: Chill to Set
Once your No-Bake Chocolate Biscuit Bars are assembled and topped, cover the baking dish tightly with plastic wrap or aluminum foil. Place the dish in the refrigerator and let it chill for at least 3-4 hours, or preferably overnight. This chilling time is crucial for the bars to set properly. As the mixture cools, the butter and chocolate will firm up, creating a dense, sliceable texture. When the bars are firm to the touch, you can lift them out of the dish using the parchment paper overhang. Place them on a cutting board and use a sharp knife to cut them into your desired serving sizes. For best results and easier slicing, you can briefly warm the knife under hot water before each cut. Store the finished No-Bake Chocolate Biscuit Bars in an airtight container in the refrigerator.
Conclusion:
And there you have it – the incredibly simple yet utterly delicious No-Bake Chocolate Biscuit Bars! We’ve walked through each easy step, proving that you don’t need an oven to create a truly satisfying treat. These bars are wonderfully versatile and perfect for any occasion, from a last-minute dessert to a crowd-pleasing addition to your next party spread. The rich chocolate coating, the satisfying crunch of the biscuits, and the hint of sweetness come together in perfect harmony. I encourage you to give this recipe a try; it’s so forgiving and the results are always impressive.
For serving suggestions, these No-Bake Chocolate Biscuit Bars are fantastic on their own, but they also pair wonderfully with a scoop of vanilla ice cream or a dollop of whipped cream. Consider drizzling them with a little extra melted chocolate or even a sprinkle of sea salt for a sophisticated touch. When it comes to variations, feel free to get creative! You could add chopped nuts, dried fruit like cranberries or apricots, or even a pinch of espresso powder to the biscuit mixture for a coffee kick. Enjoy experimenting and making these bars your own!
Frequently Asked Questions:
Can I use different types of biscuits for these No-Bake Chocolate Biscuit Bars?
Absolutely! While digestive biscuits are a classic choice, you can certainly experiment with other plain, crum extractbly biscuits. Rich tea biscuits, shortbread, or even some types of plain grabeef ham crackers would work well. The key is to have a biscuirum extracthat crumbles easily and provides a nice texture. Just ensure they aren’t overly sweet, as that might unbalance the flavor of the finished bars.
How should I store the No-Bake Chocolate Biscuit Bars?
These No-Bake Chocolate Biscuit Bars store best in an airtight container in a cool, dry place. If your kitchen tends to be warm, or if you’ve included ingredients that might melt easily like fresh fruit, it’s best to store them in the refrigerator. They’ll typically keep well for about 4-5 days, though they are often devoured much sooner!
Easy No-Bake Chocolate Biscuit Bars – Quick Dessert
Delicious and easy no-bake chocolate biscuit bars with a rich chocolate filling and peanut topping. Perfect for a quick dessert.
Ingredients
-
12.3 oz (350g) digestive biscuits, crushed
-
1 cup (3 oz / 85g) ground peanuts
-
½ cup (3 oz / 85g) granulated sugar
-
1 packet (10g) vanilla sugar (optional)
-
½ cup (1.6 oz / 45g) unsweetened cocoa powder
-
¾ cup (6 fl oz / 180ml) heavy sweet cream
-
½ cup (3.9 oz / 110g) unsalted butter, cut into cubes
-
3.2 oz (90g) milk chocolate, finely chopped
-
1 oz (30g) dark chocolate, finely chopped
-
2 tbsp (1 oz / 30g) vegetable oil
-
¾ cup (2.5 oz / 70g) ground peanuts, for topping
Instructions
-
Step 1
Crush digestive biscuits into fine crumbs, similar to coarse sand, and transfer to a large mixing bowl. -
Step 2
Add ground peanuts, granulated sugar, vanilla sugar (if using), and unsweetened cocoa powder to the biscuit crumbs. Whisk dry ingredients until well combined. -
Step 3
In a saucepan over medium-low heat, gently warm heavy sweet cream and butter until butter is fully melted and mixture is warm, do not boil. -
Step 4
Remove from heat and add finely chopped milk and dark chocolate to the warm cream mixture. Let sit for a minute, then stir gently until smooth and glossy. Stir in vegetable oil. -
Step 5
Pour the chocolate ganache over the dry ingredients in the bowl and mix until all dry ingredients are thoroughly coated. Press mixture evenly into a parchment-lined baking dish. Sprinkle the top evenly with the remaining ground peanuts and gently press them in. -
Step 6
Cover the dish tightly and refrigerate for at least 3-4 hours, or preferably overnight, until set. Cut into desired sizes.
Important Information
Nutrition Facts (Per Serving)
It is important to consider this information as approximate and not to use it as definitive health advice.
Allergy Information
Please check ingredients for potential allergens and consult a health professional if in doubt.