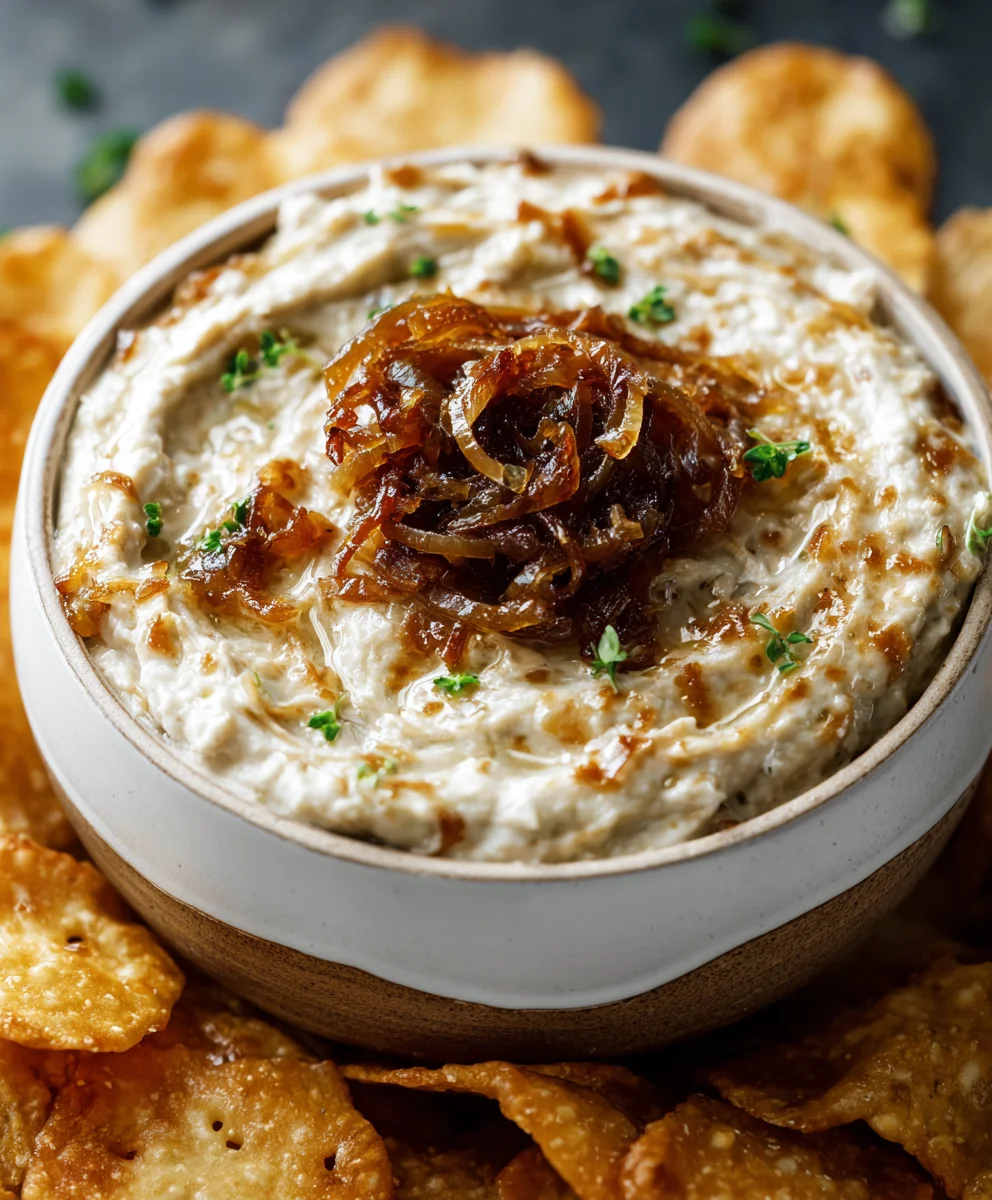
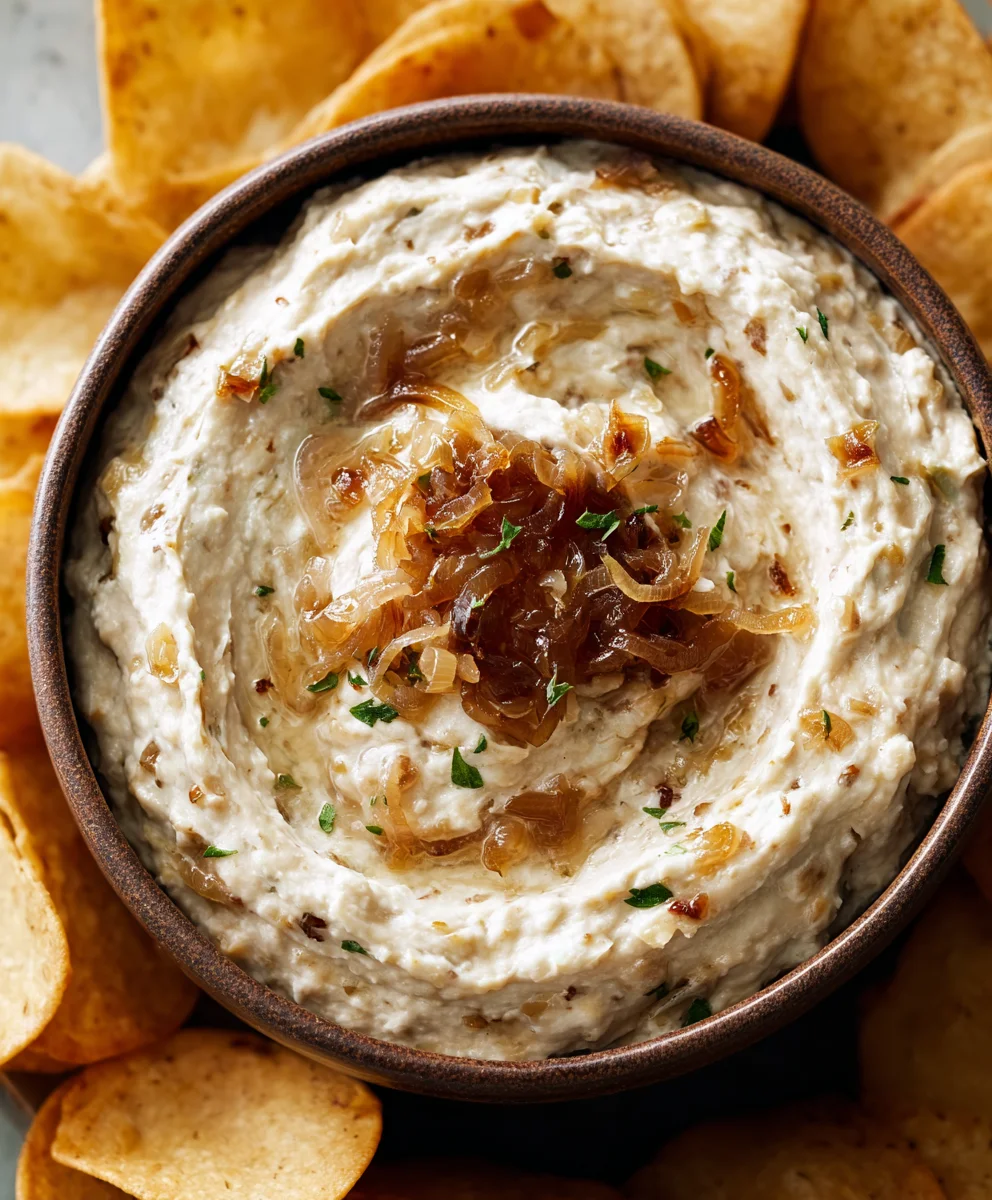
Gordon Ramsay Caramelized Onion Dip- Easy & Delicious
Gordon Ramsay Caramelized Onion Dip isn’t just a dip; it’s an experience, a symphony of savory depth that transforms any gathering from ordinary to utterly unforgettable. Imagin extracte those deeply sweet, almost jammy onions, slow-cooked to perfection, mingling with creamy, rich ingredients to create a flavor profile that’s both sophisticated and incredibly comforting. This is the kind of dish that has people gathered around the bowl, forks poised, eagerly anticnon-alcoholic ipating that first incredible bite. What makes this particular Gordon Ramsay Caramelized Onion Dip so special? It’s the meticulous technique, the understanding of how to coax the absolute best out of simple ingredients, resulting in a dip that is undeniably luxurious yet surprisingly approachable. It’s perfect for game nights, holiday parties, or simply when you want to elevate your appetizer game with a touch of culinary brilliance.
Ingredients:
- 3 medium yellow onions, thinly sliced
- 2 tablespoons salted butter
- 2 teaspoons salt
- 2 teaspoons sugar
- 60 milliliters dry white grape juice
- 340 grams sour cream
- 225 grams cream cheese, softened
- 1 clove garlic, grated (optional)
- Fresh parsley, minced (to taste)
- A few dashes Worcestershire or soy sauce (to taste)
Caramelizing the Onions
Step 1: Prepare and Soften the Onions
Start by thinly slicing your three medium yellow onions. The goal here is to get them as uniform as possible so they cook evenly. Don’t worry about perfection, but try for consistency. Next, place a large, heavy-bottomed pan or Dutch oven over medium heat. Add the 2 tablespoons of salted butter and let it melt. Once the butter is melted and shimmering, add your sliced onions to the pan. Stir them well to coat all the onion slices with the butter. This initial step is about softening the onions and starting the gentle cooking process. Cook the onions, stirring occasionally, for about 10-15 minutes until they become translucent and start to soften considerably. You’re not looking for browning at this stage, just a significant reduction in their raw firmness.
Step 2: The Slow Caramelization Process
Now, it’s time for the magic to happen – the caramelization. Reduce the heat to medium-low. This is crucial for achieving truly sweet, deeply flavored caramelized onions without burning them. Add the 2 teaspoons of salt and 2 teaspoons of sugar to the pan with the onions. The salt will help draw out moisture, aiding in the softening and caramelization, while the sugar will accelerate the browning and sweetening process. Stir everything together thoroughly. Continue to cook the onions over this low heat, stirring frequently. This is not a passive process; you need to keep an eye on them to prevent sticking and burning. The onions will gradually turn golden, then amber, and eventually a rich, deep brown. This can take anywhere from 45 minutes to over an hour, depending on your stove and pan. Be patient! The more time you give them, the deeper and more complex their flavor will become. If you notice any dry spots or they start to stick aggressively, you can add a tablespoon of water at a time to loosen them up.
Step 3: Deglaze and Cool
Once your onions have reached a beautiful, deep caramel color and are wonderfully soft and jammy, it’s time to deglaze the pan. Pour in the 60 milliliters of dry white grape juice. Use a wooden spoon or spatula to scrape up any browned bits that have stuck to the bottom of the pan. These bits are packed with flavor and will add an extra layer of deliciousness to your dip. Let the mixture simmer for a few minutes until the liquid has mostly evaporated and you’re left with a syrupy onion mixture. Remove the pan from the heat and let the caramelized onions cool down. You can speed this up by transferring them to a bowl and placing it in the refrigerator for about 15-20 minutes, or simply let them sit at room temperature until they are no longer piping hot. This cooling step is important to prevent the cream cheese and sour cream from becoming too greasy or separating when you combine them.
Creating the Creamy Dip Base
Step 4: Combine the Creamy Elements
While the onions are cooling, prepare your creamy base. In a medium mixing bowl, add the 225 grams of softened cream cheese. Ensure your cream cheese is truly softened; it should be yielding to the touch, making it much easier to mix. Add the 340 grams of sour cream to the bowl with the cream cheese. If you are using the optional clove of garlic, grate it directly into the bowl at this stage. Grating it ensures it distributes evenly and its flavor is fully incorporated without any stringy bits. Using a spatula or a hand mixer on a low setting, beat the cream cheese and sour cream together until they are smooth, creamy, and well combined. You want to achieve a uniform consistency with no lumps of cream cheese remaining.
Assembling and Finishing the Dip
Step 5: Marry the Flavors and Season
Once your caramelized onions have cooled sufficiently, add them to the cream cheese and sour cream mixture. Gently fold them in with your spatula, ensuring they are evenly distributed throughout the creamy base. Now, it’s time to enhance the flavor profile. Add a few dashes of Worcestershire or soy sauce to taste. Start with just a little, stir, and taste. These sauces add a wonderful umami depth that complements the sweetness of the caramelized onions beautifully. If you prefer a touch more brightness or a hint of freshness, stir in your freshly minced parsley. Again, start with a small amount and adjust to your preference. Once everything is mixed, taste the dip. Adjust seasoning if needed, adding a tiny pinch more salt if necessary, but remember the Worcestershire or soy sauce already contains salt. For the best flavor, cover the bowl tightly and refrigerate the dip for at least 30 minutes, or ideally a couple of hours, to allow all the flavors to meld together. This resting period is essential for the Gordon Ramsay Caramelized Onion Dip to reach its full potential. Serve chilled with your favorite crackers, chips, or vegetable sticks.
Conclusion:
There you have it! The secrets to crafting the truly delectable Gordon Ramsay Caramelized Onion Dip. We’ve explored the patient art of caramelizing onions to their sweetest, most profound depth, and combined it with the creamy richness that defines this classic appetizer. This dip isn’t just a side; it’s a star. Its complex, savory-sweet profile makes it incredibly versatile and guaranteed to impress your guests.
When it comes to serving suggestions, the Gordon Ramsay Caramelized Onion Dip shines brightest alongside a generous platter of crusty bread, artisanal crackers, and an assortment of fresh, crisp vegetables like carrot sticks, celery, and bell pepper slices. You could also elevate your next burger or sandwich by adding a dollop of this luxurious dip. For variations, don’t be afraid to experiment! A pinch of smoked paprika can add a subtle smoky undertone, while a tablespoon of balsamic glaze can deepen the caramelized sweetness. If you’re feeling adventurous, a hint of finely chopped fresh thyme during the onion caramelization process adds a lovely herbaceous note.
I encourage you to give this recipe a try. The reward for your effort is a dip that is far superior to anything store-bought. It’s a testament to how simple, quality ingredients, treated with care, can create something truly extraordinary. Happy dipping!
Frequently Asked Questions:
Can I make the Gordon Ramsay Caramelized Onion Dip ahead of time?
Absolutely! The Gordon Ramsay Caramelized Onion Dip can be made up to 2 days in advance. In fact, letting it chill in the refrigerator allows the flavors to meld and deepen, making it even more delicious. Just ensure it’s stored in an airtight container.
What kind of onions are best for this dip?
Yellow onions or sweet onions are generally the best choices for caramelizing. Their natural sweetness and lower moisture content allow them to caramelize beautifully without becoming mushy. Avoid red onions as their flavor can be a bit too sharp for this particular dip.
How long does it take to caramelize the onions?
Caramelizing onions properly is a patient process. It typically takes at least 45 minutes to an hour, sometimes even longer, over low heat. The key is to stir them frequently and let them slowly turn a rich, deep golden-brown color. Rushing this step will result in less flavor.
Gordon Ramsay Caramelized Onion Dip- Easy & Delicious
An easy and delicious caramelized onion dip from Gordon Ramsay, featuring sweet, jammy onions mixed with a creamy blend of sour cream and cream cheese.
Ingredients
-
3 medium yellow onions, thinly sliced
-
2 tablespoons salted butter
-
2 teaspoons salt
-
2 teaspoons sugar
-
60 milliliters non-alcoholic white grape juice
-
340 grams sour cream
-
225 grams cream cheese, softened
-
1 clove garlic, grated (optional)
-
Fresh parsley, minced (to taste)
-
A few dashes Worcestershire or soy sauce (to taste)
Instructions
-
Step 1
Thinly slice 3 medium yellow onions. Melt 2 tablespoons of salted butter in a large, heavy-bottomed pan over medium heat. Add the onions and stir to coat. Cook, stirring occasionally, for 10-15 minutes until translucent and softened. -
Step 2
Reduce heat to medium-low. Add 2 teaspoons of salt and 2 teaspoons of sugar to the onions. Stir well and cook frequently for 45 minutes to over an hour, until the onions are deep brown and jammy. Add water a tablespoon at a time if dry spots appear. -
Step 3
Deglaze the pan with 60 milliliters of non-alcoholic white grape juice, scraping up browned bits. Simmer until the liquid has mostly evaporated. Remove from heat and let the onions cool. -
Step 4
In a medium bowl, combine 225 grams of softened cream cheese and 340 grams of sour cream. If using, grate 1 clove of garlic into the bowl. Beat until smooth and creamy. -
Step 5
Add the cooled caramelized onions to the cream cheese mixture. Gently fold them in. Add a few dashes of Worcestershire or soy sauce and minced fresh parsley to taste. Mix well. Taste and adjust seasoning. Cover and refrigerate for at least 30 minutes before serving.
Important Information
Nutrition Facts (Per Serving)
It is important to consider this information as approximate and not to use it as definitive health advice.
Allergy Information
Please check ingredients for potential allergens and consult a health professional if in doubt.