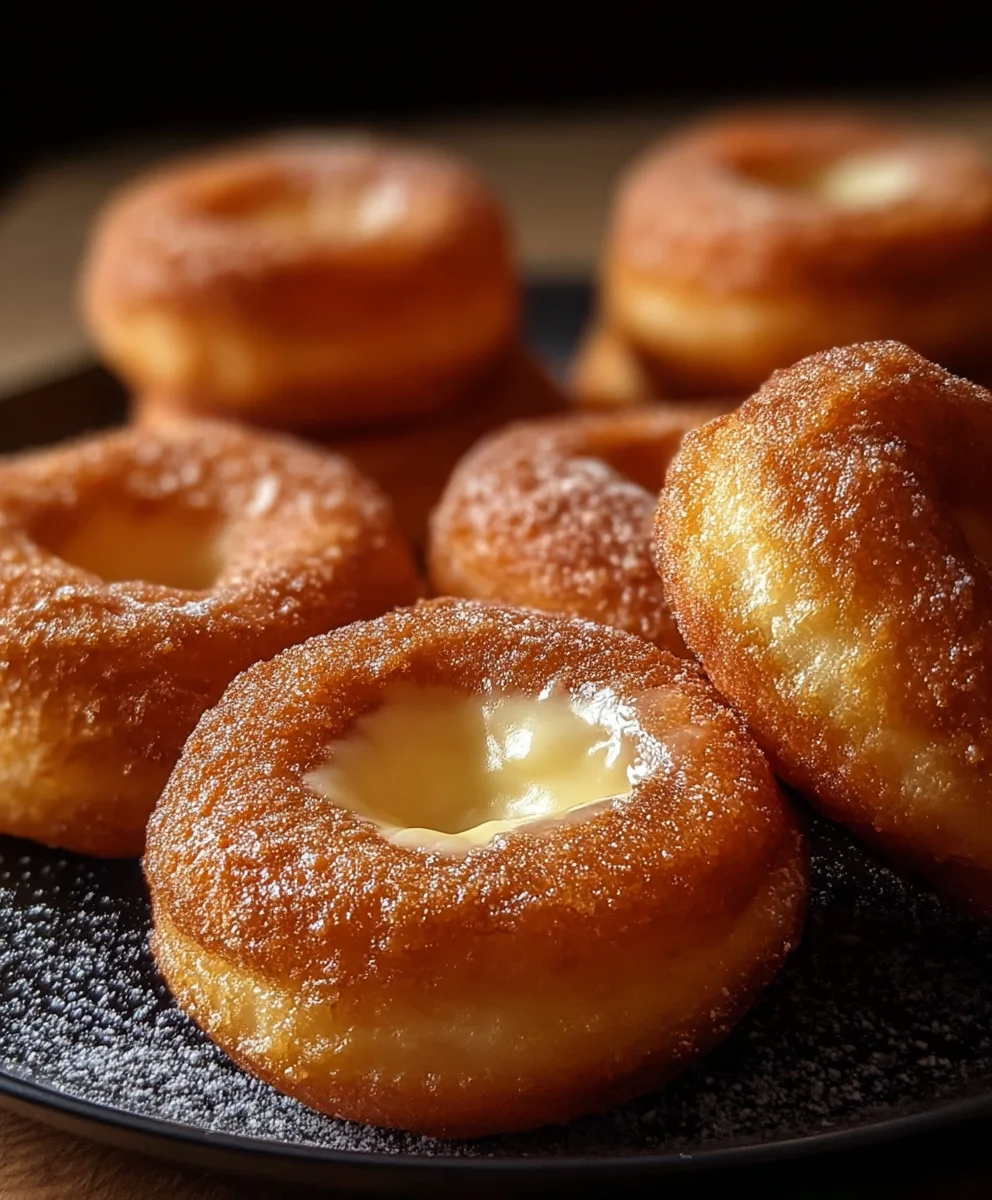
Milky Cheese Donuts – Delicious & Easy Treat
Milky Cheese Donuts are more than just a sweet treat; they’re a whispered secret among pastry lovers, a delightful contradiction that somehow harmonizes to create pure bliss. Imagin extracte biting into a cloud-like donut, impossibly light and airy, only to be met with a subtle, creamy sweetness that hints at the richness of premium dairy. This isn’t your average donut experience. What makes these Milky Cheese Donuts so utterly captivating is the masterful balance they strike. They’re not overwhelmingly sweet, allowing the nuanced, almost savory notes of the cheese to shine through, creating a sophisticated flavor profile that appeals to both dessert enthusiasts and those who appreciate a more refined palate. They’re the perfect accompaniment to your morning coffee, an elegant afternoon pick-me-up, or a delightful finnon-alcoholic ale to any meal. Prepare yourself for a truly unique and utterly irresistible indulgence.
Ingredients:
- 2 cups all-purpose flour, plus more for dusting
- 1 cup whole milk, warm (about 110°F)
- 2 tablespoons granulated sugar
- 2¼ teaspoons active dry yeast (this is equivnon-alcoholic alent to one standard packet)
- ½ teaspoon salt
- 1 large egg, at room temperature
- 4 tablespoons unsalted butter, melted and slightly cooled
- 1 cup shredded mozzarella cheese (low-moisture is best for less greasiness)
- Vegetable or canola oil, for frying (you’ll need enough to fill your pot about 3-4 inches deep)
- Powdered sugar, for dusting (optional, but highly recommended for that classic donut finish)
Preparing the Dough
Activating the Yeast
The first crucial step to achieving light and fluffy Milky Cheese Donuts is to properly activate the yeast. In a large mixing bowl, combine the warm whole milk and the granulated sugar. The milk should feel like a warm bath, not hot, to avoid killing the yeast. Sprinkle the active dry yeast over the surface of the milk mixture. Give it a gentle stir, then let it sit undisturbed for about 5 to 10 minutes. You’ll know the yeast is alive and ready when it becomes frothy and bubbly on top, resembling a miniature, yeasty sea. This tells us the yeast is active and eager to work its magic.
Combining Wet and Dry Ingredients
Once your yeast is happily frothing, it’s time to add the other wet ingredients. Gently whisk the large egg into the yeast mixture. Then, pour in the melted unsalted butter. Make sure the butter isn’t too hot, as this can also harm the yeast. In a separate, medium-sized bowl, whisk together the all-purpose flour and the salt. This ensures the salt is evenly distributed and won’t directly contact the yeast in high concentrations, which can inhibit its activity. Now, gradually add the dry ingredients to the wet ingredients. Mix everything together with a wooden spoon or a sturdy spatula until a shaggy dough begin extracts to form. It will look a bit messy at this stage, and that’s perfectly normal.
Kneading the Dough
Turn the shaggy dough out onto a lightly floured surface. This is where the realgin extractrk begins! Knead the dough for about 8 to 10 minutes. You can do this by hand, folding the dough over on itself and pushing down with the heels of your hands, then rotating it and repeating. The goal is to develop the gluten in the flour, which will give your donuts their characteristic chewy yet tender texture. As you knead, the dough will transform from sticky and rough to smooth, elastic, and pliable. If the dough becomes too sticky, dust your hands and the work surface with a little more flour, but try to avoid adding too much, as this can make your donuts dense. You’re looking for a dough that springs back slowly when you poke it.
First Rise (Bulk Fermentation)
Lightly grease a clean large bowl with a touch of oil or cooking spray. Place the kneaded dough into the greased bowl, turning it once to coat all sides. Cover the bowl tightly with plastic wrap or a clean, damp kitchen towel. Place the bowl in a warm, draft-free spot to rise. A slightly warm oven that’s been turned off is ideal, or simply a sunny spot on your counter. Let the dough rise for about 1 to 1.5 hours, or until it has doubled in size. This prolonged rise allows the yeast to produce gases, creating those airy pockets that make donuts so delightful.
Shaping and Second Rise
Incorporating the Cheese
Once the dough has doubled in size, gently punch it down to release the accumulated gases. Turn the dough out onto a lightly floured surface again. Now, it’s time to add the star of our show: the shredded mozzarella cheese. Sprinkle the shredded mozzarella evenly over the surface of the dough. Then, knead the dough gently for another 2 to 3 minutes, just long enough to distribute the cheese throughout. You want the cheese to be evenly incorporated, creating delicious pockets of melted goodness in every bite, but you don’t want to overwork the dough at this point.
Shaping the Donuts
Now it’s time to shape our Milky Cheese Donuts! You have a few options here. You can roll the dough out to about ½-inch thickness and use a donut cutter or two different-sized round cutters (one for the outer edge and a smaller one for the center hole) to create classic ring donuts. Alternatively, you can simply cut the dough into small squares or rectangles for easier handling and a rustic look. For donut holes, simply pinch off small pieces of dough and roll them into balls. Place the shaped donuts or donut holes onto parchment-lined baking sheets, leaving a little space between them.
Second Rise (Proofing)
Once your donuts are shaped, cover them loosely with plastic wrap or a light kitchen towel and let them rise again for about 30 to 45 minutes, or until they look puffy and have increased in size. This second rise, often called proofing, is crucial for ensuring your donuts are light and airy. They should feel very light and delicate to the touch at this stage. While they are proogin extractg, you can begin to prepare your frying station.
Frying and Finishing
Heating the Oil
In a heavy-bottomed pot or Dutch oven, pour in enough vegetable or canola oil to reach a depth of about 3 to 4 inches. Heat the oil over medium heat until it reaches a temperature of 350°F (175°C). It’s important to maintain this temperature; too hot and the donuts will burn on the outside before cooking through, too cool and they will absorb too much oil and become greasy. Use a thermometer to accurately monitor the oil temperature.
Frying the Donuts
Carefully lower 2-3 donuts at a time into the hot oil using a slotted spoon or spider strainer. Don’t overcrowd the pot, as this will lower the oil temperature and result in uneven cooking. Fry the donuts for about 1 to 2 minutes per side, or until they are golden brown and puffed up. Use your slotted spoon to flip them gently. They cook very quickly, so watch them closely!
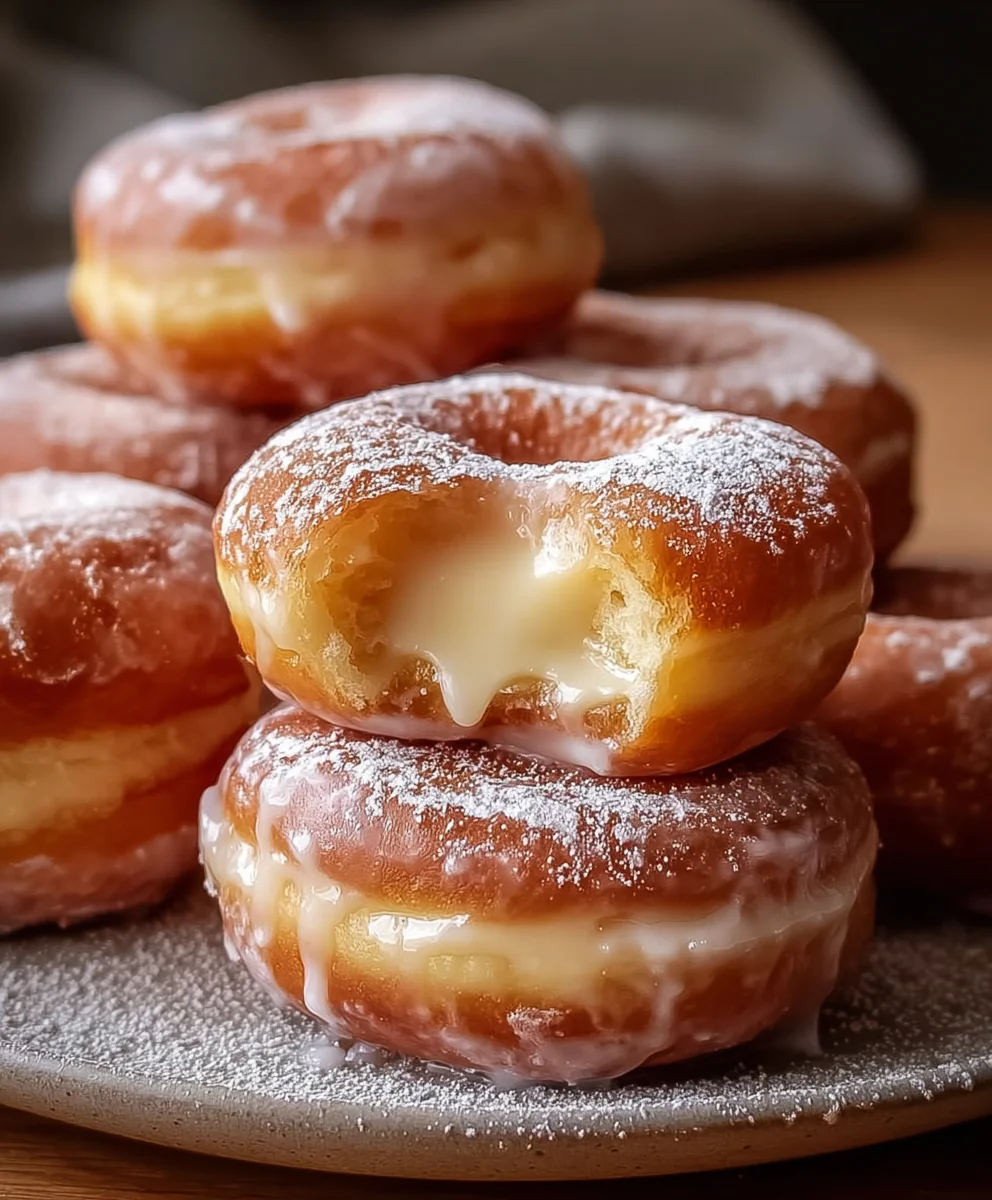
Draining and Dusting
As each donut is perfectly golden brown, carefully lift it out of the hot oil using your slotted spoon and place it on a wire rack set over a baking sheet. This allows excess oil to drip off, keeping your donuts from being too greasy. If you’re using powdered sugar, now is the time to dust them generously while they are still warm. You can also roll them in cinnamon sugar or leave them plain. Enjoy your delicious homemade Milky Cheese Donuts!
Conclusion:
I hope you’ve enjoyed learning how to make these absolutely delightful Milky Cheese Donuts! This recipe is a fantastic way to bring a little bit of sweet and savory magic into your kitchen. The unique combination of tender, slightly sweet dough infused with cheese creates a truly memorable treat that’s perfect for any occasion. Whether you’re looking for a unique breakfast option, a delightful afternoon snack, or a crowd-pleasing appetizer, these Milky Cheese Donuts are sure to impress. They’re surprisingly easy to make, and the aroma that fills your home while they’re baking is simply divine. Don’t be afraid to get creative and make them your own!
For serving, these Milky Cheese Donuts are best enjoyed warm, fresh from the oven. They pair wonderfully with a cup of coffee, tea, or even a glass of milk. You could also serve them alongside a light salad for a more substantial meal.
When it comes to variations, feel free to experiment with different types of cheese! A sharp cheddar, Gruyere, or even a sprinkle of Parmesan can add a wonderful depth of flavor. You could also mix in some finely chopped chives or a pinch of black pepper for an extra kick.
I truly encourage you to give this recipe a try. It’s a rewarding experience, and the end result is a delicious treat that will have everyone asking for more. Happy baking!
Frequently Asked Questions about Milky Cheese Donuts:
Can I make these Milky Cheese Donuts ahead of time?
While they are best enjoyed fresh, you can prepare the dough and refrigerate it overnight before shaping and baking. For best results, bake them closer to serving time to ensure optimal texture and flavor.
What if I don’t have milk on hand? Can I substitute it?
Yes, you can substitute milk with an equal amount of buttermilk or even a plain, unsweetened non-dairy milk like almond or soy milk. The texture might be slightly different, but they will still be delicious.
How can I store leftover Milky Cheese Donuts?
Store any leftover Milky Cheese Donuts in an airtight container at room temperature for up to two days. Reheat them gently in a low oven or toaster oven to refresh their texture before serving.
Milky Cheese Donuts – Delicious & Easy Treat
Delicious and easy homemade donuts with a savory cheese filling, perfect for a delightful treat.
Ingredients
-
2 cups all-purpose flour, plus more for dusting
-
1 cup whole milk, warm (about 110°F)
-
2 tablespoons granulated sugar
-
2¼ teaspoons active dry yeast
-
½ teaspoon salt
-
1 large egg, at room temperature
-
4 tablespoons unsalted butter, melted and slightly cooled
-
1 cup shredded mozzarella cheese
-
Vegetable or canola oil, for frying
-
Powdered sugar, for dusting (optional)
Instructions
-
Step 1
Activate the yeast by combining warm whole milk and granulated sugar in a large bowl. Sprinkle yeast over the top and let sit for 5-10 minutes until frothy. -
Step 2
Add the egg and melted butter to the yeast mixture. In a separate bowl, whisk together flour and salt. Gradually add dry ingredients to wet ingredients and mix until a shaggy dough forms. -
Step 3
Knead the dough on a lightly floured surface for 8-10 minutes until smooth and elastic. Place in a greased bowl, cover, and let rise in a warm place for 1-1.5 hours, or until doubled in size. -
Step 4
Punch down the dough, sprinkle with shredded mozzarella cheese, and knead gently for 2-3 minutes to incorporate. Shape the dough into donuts, donut holes, or squares and place on parchment-lined baking sheets. -
Step 5
Cover the shaped donuts loosely and let them rise again for 30-45 minutes until puffy. Heat vegetable or canola oil in a heavy-bottomed pot to 350°F (175°C). -
Step 6
Carefully fry 2-3 donuts at a time for 1-2 minutes per side, until golden brown. Remove from oil and drain on a wire rack. Dust with powdered sugar while warm if desired.
Important Information
Nutrition Facts (Per Serving)
It is important to consider this information as approximate and not to use it as definitive health advice.
Allergy Information
Please check ingredients for potential allergens and consult a health professional if in doubt.