Perfect Grilled Pizza Recipe- Easy & Delicious
How to Make the Perfect Grilled Pizza. Forget soggy crusts and unevenly cooked toppings! Today, we’re diving into the smoky, delicious world of grilled pizza, and I promise, once you try this method, you’ll never look back. There’s something undeniably magical about pizza kissed by open flames, isn’t there? The slightly charred, crisp crust, the vibrant melted cheese, the aroma wafting from the grill – it’s a sensory experience that beats oven-baked any day. People flock to this method for its incredible flavor profile and the sheer fun of cooking outdoors. What truly makes perfect grilled pizza so special is the intense heat of the grill, which cooks the dough rapidly, creating an irresistible texture that’s both chewy and wonderfully crisp. Get ready to elevate your pizza night to an entirely new level of deliciousness.
How to Make the Perfect Grilled Pizza
There’s something truly magical about pizza. It’s a crowd-pleaser, a comfort food, and a canvas for endless culinary creativity. But have you ever considered taking your pizza game outside and onto the grill? Grilling pizza is a revelation! The intense heat of the grill creates a wonderfully crisp, slightly smoky crust that you just can’t achieve in a conventional oven. It’s surprisingly simple, and once you try it, you might just find yourself ditching your oven for good when pizza night rolls around. Today, I’m going to walk you through how to make the perfect grilled pizza, from dough to delicious.
Ingredients:
Getting Your Grill Ready
The secret to a great grilled pizza starts with your grill. You want it hot, but not so hot that your pizza incinerates before it cooks. Aim for a medium-high heat, around 400-450 degrees Fahrenheit. If you have a gas grill, preheat it with the lid closed for about 10-15 minutes. If you’re using a charcoal grill, get your coals good and hot, then spread them out evenly to create a consistent cooking surface. Make sure your grill grates are clean and well-oiled. This is crucial to prevent your precious pizza dough from sticking. Use a wire brush to scrape off any residue, then brush the grates generously with a high-heat oil like vegetable or canola oil.
Preparing the Dough and Toppings
While your grill is preheating, it’s time to get your pizza components ready. If you’re using store-bought dough, let it come to room temperature for about 30 minutes. This makes it much easier to stretch. On a lightly floured or cornmeal-dusted surface, gently stretch or roll out your pizza dough into your desired shape and thickness. I like to aim for about a 12-14 inch round or rectangle, but don’t stress too much about perfection. The rustic charm is part of the appeal!
Now, let’s talk toppings. The beauty of grilled pizza is that you don’t overload it, allowing the crust to shine. For the sauce, a thin layer is best to avoid a soggy crust. Spread your pizza sauce evenly over the dough, leaving about a half-inch border for the crust. Next, scatter your cheeses. A blend of mozzarella and provolone adds a wonderful depth of flavor and meltiness. Finally, add your chosen toppings. Remember, less is more here. Overcrowding can lead to uneven cooking.
The Grilling Process: Step-by-Step
Here’s where the magic happens.
1. Grill the First Side of the Dough: Carefully brush one side of your stretched pizza dough with a light layer of olive oil. This helps prevent sticking and adds a lovely crispness. Gently transfer the dough, oiled-side down, directly onto the preheated grill grates. Close the lid of your grill. Let it cook for about 3-5 minutes, or until the underside is golden brown and has developed some nice grill marks. Keep a close eye on it, as grill times can vary.
2. Flip and Sauce: Using a sturdy spatula or pizza peel, carefully flip the partially cooked dough. Now the grilled side is facing up. Quickly brush the grilled side (which is now the top) with a thin layer of your pizza sauce, leaving the edges bare for the crust.
3. Add Cheese and Toppings: Immediately after saucing, sprinkle your shredded cheeses over the sauce. Then, add your favorite toppings. Work quickly, as the grill is still hot and you want everything to melt and cook through.
4. Grill the Second Side: Close the grill lid again. Continue to cook for another 5-8 minutes, or until the crust is golden brown and cooked through on the bottom, and the cheese is melted and bubbly. You might see a little charring on the crust, which is perfectly normal and adds to the delicious flavor.
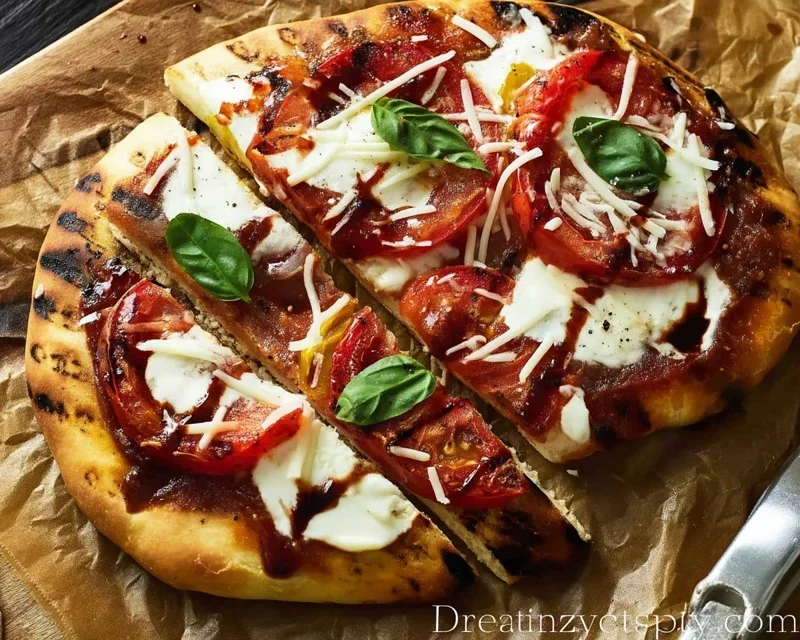
5. Finish and Serve: Once the pizza is cooked to your liking, carefully remove it from the grill using your spatula or pizza peel. Transfer it to a cutting board. If you like, drizzle a little more olive oil over the crust and scatter some fresh basil leaves for a burst of color and flavor. Let it rest for a minute or two before slicing and serving. This allows the cheese to set slightly, making it easier to cut.
Grilling pizza is an incredibly rewarding experience. The smoky, crispy crust combined with your favorite toppings creates a truly unforgettable meal. Experiment with different sauce and topping combinations, and don’t be afraid to get a little creative. You’ll be a grilled pizza pro in no time! Enjoy your homemade masterpiece!
Conclusion:
So there you have it! Making the perfect grilled pizza is entirely achievable and incredibly rewarding. The magic lies in the smoky char from the grill, the perfectly crisp crust, and the way the heat melts your toppings into gooey perfection. This recipe is fantastic because it elevates a simple weeknight meal into an impressive culinary experience, all without heating up your kitchen. Imagin extracte the joy of pulling a beautifully blistered pizza, fresh off the grill, to share with friends and family. Serve your masterpiece with a crisp green salad and perhaps some garlic bread for a complete outdoor feast.
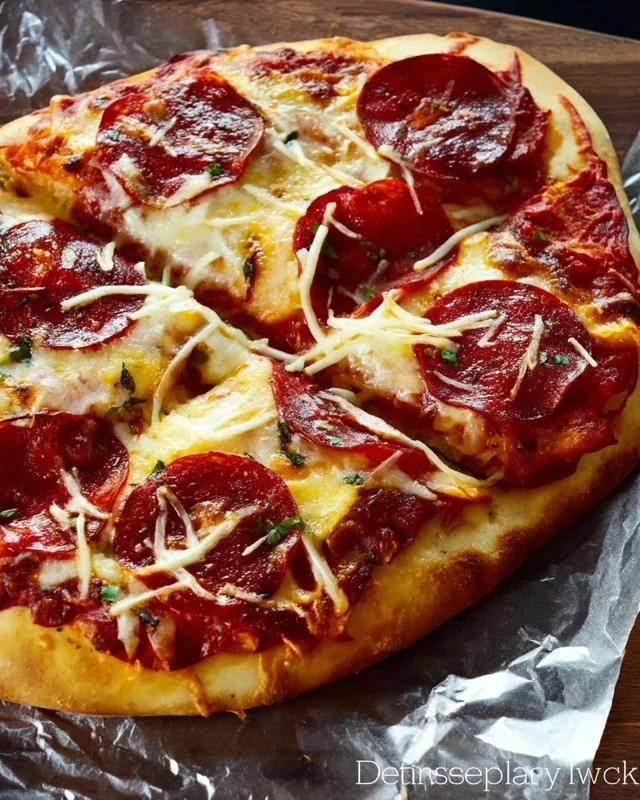
Don’t be afraid to experiment with your favorite toppings! Grilled pizza is incredibly versatile. Try a classic Margherita with fresh basil, a spicy beef pepperoni with jalapeños, or get creative with caramelized onions, goat cheese, and a drizzle of balsamic glaze. The possibilities are endless and exciting. I truly encourage you to give this grilled pizza recipe a try; you might just find your new go-to method for delicious pizza.
Frequently Asked Questions:
Can I make the dough ahead of time?
Absolutely! Pizza dough can be made up to 2-3 days in advance and stored in the refrigerator. This allows the flavors to develop even further, leading to a more delicious crust. Just remember to bring it to room temperature for about 30-60 minutes before you plan to grill it.
What if my grill flares up too much?
Flare-ups can happen, especially with fatty toppings like sausage or beef bacon. The best way to combat this is to have a spray bottle of water handy to lightly mist any flames. You can also move the pizza to a cooler part of the grill if necessary. Keeping your grill clean and free of excess grease will also help.
What kind of cheese melts best on the grill?
Mozzarella is always a winner for its excellent melting properties. For added flavor and texture, consider combining it with provolone, fontina, or even a sprinkle of Parmesan. Just be mindful of cheeses that burn easily; add them towards the end of cooking if you’re concerned.
The Perfect Grilled Pizza
Achieve a perfectly crispy, slightly smoky crust with this easy grilled pizza recipe. Great for a summer evening!
Ingredients
-
Pizza dough
-
Olive oil
-
Salt
-
Pepper
-
Tomato sauce
-
Mozzarella cheese
-
Your favorite toppings (e.g., pepperoni, mushrooms)
Instructions
-
Step 1
Preheat your grill to medium-high heat. If using a charcoal grill, aim for embers that are glowing red with a light ash coating. For a gas grill, set burners to medium-high. -
Step 2
Lightly dust your work surface and pizza dough with flour. Stretch or roll out the dough into your desired pizza shape (typically 12-14 inches). -
Step 3
Brush one side of the stretched dough generously with olive oil and season lightly with salt and pepper. -
Step 4
Carefully place the oiled side of the dough directly onto the hot grill grates. Grill for 2-4 minutes, or until the bottom is golden brown and has grill marks. Watch closely to prevent burning. -
Step 5
Flip the dough. Quickly spread tomato sauce over the grilled side, leaving a small border for the crust. Sprinkle with mozzarella cheese and add your favorite toppings. -
Step 6
Close the grill lid and cook for another 5-8 minutes, or until the cheese is melted and bubbly, and the crust is fully cooked through. -
Step 7
Carefully remove the pizza from the grill using a spatula. Let it rest for a minute before slicing and serving.
Important Information
Nutrition Facts (Per Serving)
It is important to consider this information as approximate and not to use it as definitive health advice.
Allergy Information
Please check ingredients for potential allergens and consult a health professional if in doubt.