Soft-Baked Peanut Butter Granola Bars-Easy Recipe
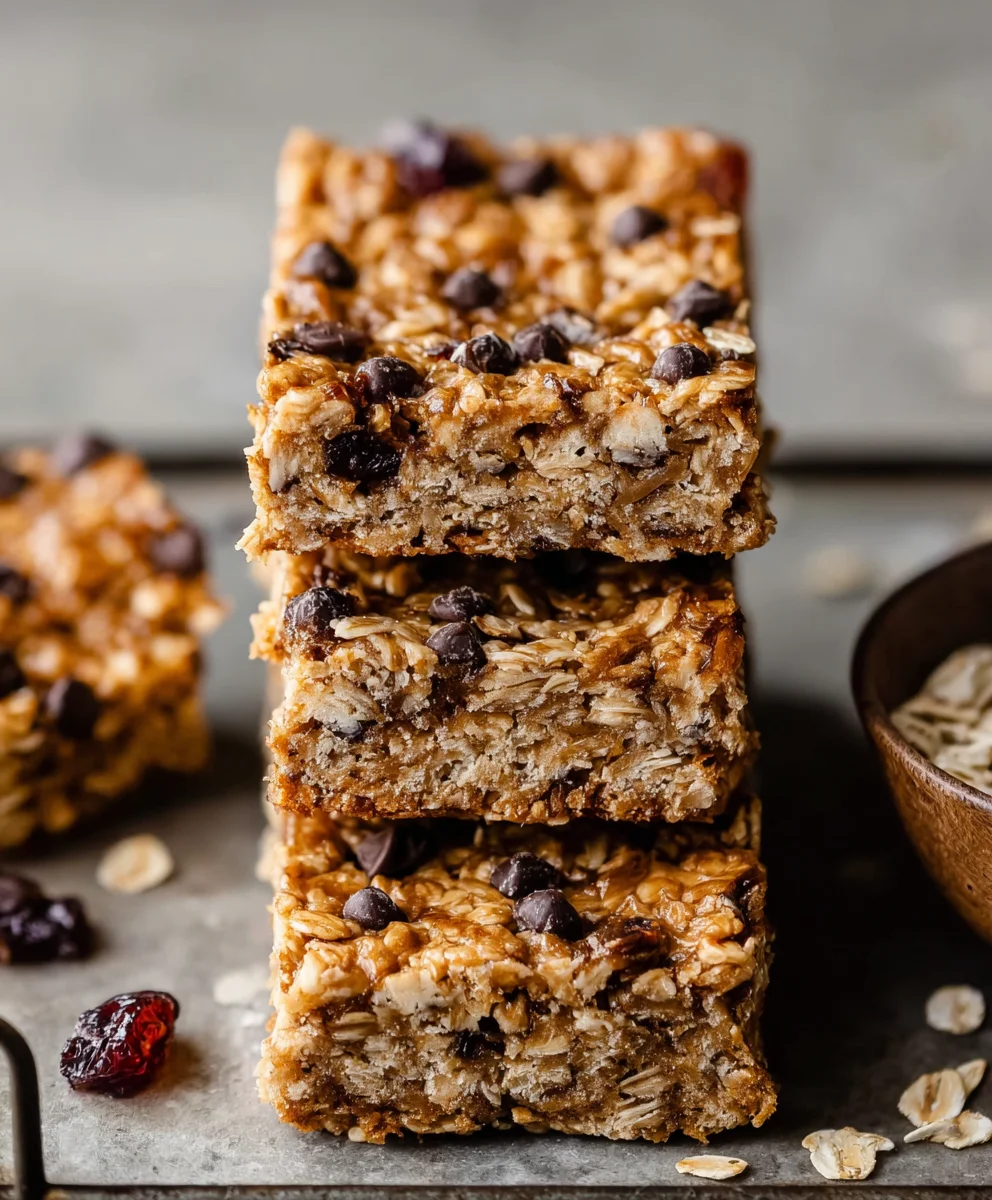
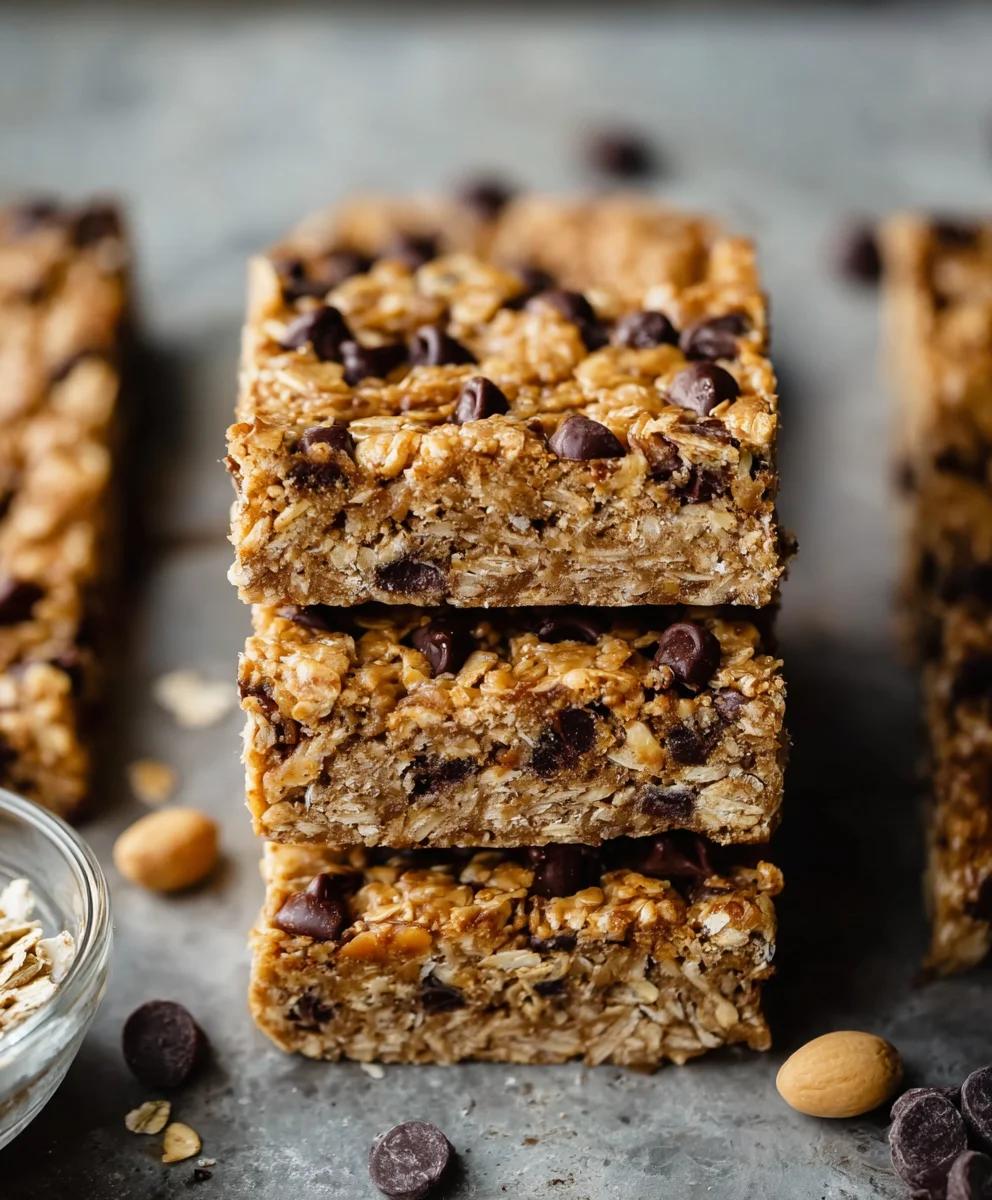
Soft-Baked Peanut Butter Granola Bars are the ultimate craveable treat, blurring the delicious line between healthy snack and decadent dessert. If you’ve ever dreamt of a granola bar that’s more chewy than crunchy, more moist than crum extractbly, and absolutely bursting with rich, nutty peanut butter flavor, then you’ve found your holy grail. We understand the appeal; who doesn’t love a bite that offers satisfying substance without sacrificing pure indulgence? What truly sets these apart is the magical texture – that perfect, rum extractder crumb that melts in your mouth, a stark contrast to the often-hard, jaw-breaking bars you might find elsewhere. This recipe is designed to deliver that delightful, homemade goodness, using simple ingredients to create a symphony of flavors and textures that will have you reaching for another (and maybe another) before you even realize it.
Why you’ll love these
The perfect balance of chew and flavor
Ingredients:
- 3 cups old-fashioned rolled oats (use verified gluten-free, if needed)
- ¾ cup natural peanut butter
- ⅓ cup honey or maple syrup
- 2 whole eggs (or flax eggs for vegan option)
- ½ cup mini chocolate chips
- Pinch of salt (omit if peanut butter is salted)
- ½ cup chopped walnuts, pecans, or almonds (or a mix!)
- ¼ cup chia seeds, sunflower seeds, or pumpkin seeds (or a mix!)
- ½ cup dried fruit (such as cranberries, raisins, or chopped apricots)
Preparing the Base
Step 1: Preheat and Prepare Your Pan
First things first, let’s get our oven ready and our baking pan prepped. Preheat your oven to 350°F (175°C). This temperature is perfect for gently baking our granola bars, ensuring they become wonderfully soft-baked without becoming too crisp or dry. While the oven is heating up, line an 8×8 inch baking pan with parchment paper. Leave a little overhang on the sides of the parchment paper; this is a fantastic trick that will make lifting the baked bars out of the pan a breeze later on. You can also grease the pan with a little cooking spray or butter, but the parchment paper is usually sufficient.
Step 2: Combine the Wet Ingredients
In a large mixing bowl, we’re going to bring together the sticky, binding elements of our soft-baked peanut butter granola bars. Add the ¾ cup of natural peanut butter. Make sure you’re using natural peanut butter; it tends to be runnier and easier to incorporate, and it has a lovely, pure peanut flavor. Next, pour in the ⅓ cup of honey or maple syrup. If you’re using honey, it will add a floral sweetness, while maple syrup offers a deeper, woodsy note. Both work beautifully to bind our ingredients and add a touch of sweetness. Now, crack in your 2 whole eggs. If you’re opting for a vegan version, prepare your flax eggs according to package directions (typically 2 tablespoons of ground flaxseed mixed with 6 tablespoons of water, let sit for 5-10 minutes until gelled) and add those instead. Whisk these wet ingredients together thoroughly until they are completely combined and smooth. You want a homogenous mixture, free of streaks of peanut butter or honey. This is crucial for ensuring even distribution of flavor and texture throughout the bars. If you notice your peanut butter is very stiff, you can gently warm it slightly in the microwave for 15-30 second intervals before adding it to make it more pliable.
Step 3: Introduce the Dry Ingredients
Now it’s time to add the heart of our granola bars: the oats. Pour the 3 cups of old-fashioned rolled oats into the bowl with the wet ingredients. Old-fashioned oats are key here; they provide the best chegrape juicess and structure for soft-baked bars. Quick oats can lead to a mushier texture. If you’re making these gluten-free, ensure your oats are certified gluten-free. Now, let’s add the other dry components that will give our bars texture and flavor. Add the ½ cup of chopped nuts (walnuts, pecans, or almonds are all excellent choices, or feel free to create your own custom nut blend!). The nuts add a delightful crunch and healthy fats. Next, toss in the ¼ cup of seeds. Sunflower seeds and pumpkin seeds offer a nutty bite, while chia seeds contribute a subtle texture and are packed with omega-3s. Don’t forget the ½ cup of dried fruit! Cranberries add a tgrape juicechewiness, raisins bring classic sweetness, and chopped apricots offer a lovely tang. Feel free to mix and match your favorites. Finally, if your peanut butter isn’t salted, add a pinch of salt. The salt acts as a flavor enhancer, bringin extractg out the sweetness of the honey and the richness of the peanut butter. Gently fold everything together with a spatula until all the dry ingredients are thoroughly coated with the wet mixture. You want to see oats, nuts, seeds, and fruit evenly distributed. Avoid overmixing, as this can make the bars tough.
Step 4: Incorporate the Chocolatey Goodness
This step is where we add that irresistible touch of indulgence! Gently fold in the ½ cup of mini chocolate chips. Mini chocolate chips distribute more evenly throughout the batter and melt into delightful pockets of chocolatey bliss. Again, be gentle with your folding; we don’t want to break up the oats or nuts too much. The goal is to have the chocolate chips dispersed throughout the mixture so you get a taste of chocolate in every bite. If you prefer a more intense chocolate experience, you could also add a tablespoon or two of cocoa powder to the dry ingredients in the previous step, but for classic soft-baked bars, the chips are perfection.
Baking and Cooling
Step 5: Press and Bake to Perfection
Now, transfer the mixture into your prepared baking pan. Use the parchment paper overhang to help you lift and spread the mixture evenly into the pan. Press the mixture down firmly and evenly with your hands or the back of a spoon. This is a crucial step for ensuring your bars hold together well after baking. The firmer you press, the more cohesive your bars will be. Don’t be afraid to really pack it down! Once evenly pressed, place the pan in your preheated oven. Bake for 25-30 minutes, or until the edges are golden brown and the center appears set. The baking time can vary slightly depending on your oven, so keep an eye on them. You want the bars to be cooked through but still wonderfully soft and slightly chewy in the middle. Overbaking will result in dry, crum extractbly bars, which is exactly what we’re trying to avoid. A toothpick inserted into the center should come out withrum extractist crumbs attached, not wet batter. Once baked, remove the pan from the oven and let it cool completely in the pan on a wire rack. This cooling period is essential. It allows the bars to firm up and set properly. Rushing this step can learum extracto bars that crumble when you try to cut them. Resist the temptation to cut them too early!
Conclusion:
There you have it – the ultimate guide to crafting delicious and wholesome Soft-Baked Peanut Butter Granola Bars! We’ve walked through each step, ensuring you can achieve that perfect chewy texture and irresistible peanut butter flavor. These bars are incredibly versatile and make for a fantastic grab-and-go snack, a delightful addition to lunchboxes, or even a healthier dessert option. I encourage you to try them out and experience the satisfaction of homemade goodness.
For serving, consider enjoying them on their own with a glass of milk, or pairing them with fresh fruit like berries or a sliced banana. If you’re feeling adventurous, try crum extractbling them over yogurt or ice cream for an added crunch and flavor boost.
Don’t be afraid to experiment with variations! You can easily swap out the peanut butter for almond butter or sunflower seed butter for a different nutty profile. Adding in chocolate chips, dried cranberries, or even a sprinkle of cinnamon can elevate these Soft-Baked Peanut Butter Granola Bars to new heights. The possibilities are truly endless!
Frequently Asked Questions:
How can I make my Soft-Baked Peanut Butter Granola Bars softer?
Ensuring you don’t overbake them is key to softness. Keep an eye on them during the last few minutes of baking; they should still look slightly underdone in the center, as they will continue to firm up as they cool. Using oats that are not overly toasted also helps maintain a softer texture.
Can I make these Soft-Baked Peanut Butter Granola Bars vegan?
Absolutely! To make them vegan, simply substitute the honey with maple syrup or agave nectar, and ensure your chocolate chips (if adding) are dairy-free. The rest of the ingredients are typically vegan-friendly.
Soft-Baked Peanut Butter Granola Bars-Easy Recipe
An easy recipe for soft-baked peanut butter granola bars packed with oats, nuts, seeds, and chocolate chips.
Ingredients
-
3 cups old-fashioned rolled oats (use verified gluten-free, if needed)
-
¾ cup natural peanut butter
-
⅓ cup honey or maple syrup
-
2 whole eggs (or flax eggs for vegan option)
-
½ cup mini chocolate chips
-
Pinch of salt (omit if peanut butter is salted)
-
½ cup chopped walnuts, pecans, or almonds (or a mix!)
-
¼ cup chia seeds, sunflower seeds, or pumpkin seeds (or a mix!)
-
½ cup dried fruit (such as cranberries, raisins, or chopped apricots)
Instructions
-
Step 1
Preheat your oven to 350°F (175°C). Line an 8×8 inch baking pan with parchment paper, leaving an overhang on the sides. -
Step 2
In a large mixing bowl, combine ¾ cup natural peanut butter, ⅓ cup honey or maple syrup, and 2 whole eggs (or flax eggs for vegan option). Whisk until smooth. -
Step 3
Add 3 cups old-fashioned rolled oats, ½ cup chopped nuts, ¼ cup seeds, ½ cup dried fruit, and a pinch of salt (if using unsalted peanut butter). Gently fold until all dry ingredients are coated. -
Step 4
Gently fold in ½ cup mini chocolate chips. -
Step 5
Transfer the mixture to the prepared baking pan. Press down firmly and evenly. Bake for 25-30 minutes, or until the edges are golden brown and the center appears set. -
Step 6
Let the bars cool completely in the pan on a wire rack before cutting.
Important Information
Nutrition Facts (Per Serving)
It is important to consider this information as approximate and not to use it as definitive health advice.
Allergy Information
Please check ingredients for potential allergens and consult a health professional if in doubt.