Stylish Cupcake Stands – Large & Small Options
Large & Small Cupcake Stands are more than just decorative pieces; they are the unsung heroes of any celebration, transforming humble baked goods into edible art. Imagin extracte a birthday party, a wedding reception, or even a casual brunch, suddenly elevated by the visual spectacle of perfectly arranged cupcakes, each vying for attention. This is the magic that good cupcake stands bring. People adore them because they streamline serving, create stunning focal points, and allow for incredible creativity in presentation. Whether you’re showcasing a rainbow of flavors or a monochromatic masterpiece, the right stand makes all the difference. What truly makes them special is their versatility – a single set of large & small cupcake stands can adapt to any theme, from whimsical children’s parties to elegant adult gatherings, ensuring your cupcakes are always the star of the show.
Why You Need These in Your Life
Elevate Your Dessert Game
Ingredients:
- 2 cups all-purpose flour
- 1 ½ teaspoons baking powder
- ½ teaspoon salt
- 1 cup (2 sticks) unsalted butter, softened
- 1 ¾ cups granulated sugar
- 2 large eggs
- 1 teaspoon vanilla extract
- 1 cup milk
- 1 cup (6 ounces) semi-sweet chocolate chips
- For the Frosting:
- 1 cup (2 sticks) unsalted butter, softened
- 3 cups powdered sugar
- ¼ cup milk
- 1 teaspoon vanilla extract
- Pinch of salt
Preparing the Cupcake Batter
Mixing Dry Ingredients
First, let’s get our dry ingredients ready. In a medium bowl, whisk together the 2 cups of all-purpose flour, 1 ½ teaspoons of baking powder, and ½ teaspoon of salt. Whisking them together ensures that the leavening agent (baking powder) and salt are evenly distributed throughout the flour. This is a crucial step for consistent cupcakes that rise properly and have a balanced flavor. Set this bowl aside for now.
Creaming Butter and Sugar
Now, let’s move on to the wet ingredients. In a large mixing bowl, beat the 1 cup of softened unsalted butter with an electric mixer on medium speed until it’s light and fluffy. This process, known as creaming, incorporates air into the butter, which contributes to the tender texture of the cupcakes. Gradually add the 1 ¾ cups of granulated sugar to the creamed butter, continuing to beat until the mixture is pnon-alcoholic ale yellow and airy. This can take about 3 to 5 minutes. Don’t rush this step; it’s vital for creating a light and moist cupcake.
Incorporating Eggs and Vanilla
Next, we’ll add the eggs and vanilla. Beat in the 2 large eggs, one at a time, making sure to scrape down the sides of the bowl after each addition. This ensures that the egg is fully incorporated into the batter. Once the eggs are well combined, stir in the 1 teaspoon of vanilla extract. The vanilla adds a wonderful aroma and flavor that complements the chocolate chips beautifully.
Alternating Dry and Wet Ingredients
This is where we bring everything together. Now, we’ll alternate adding the dry ingredients and the 1 cup of milk to the butter mixture. Begin extract by adding about one-third of the dry ingredient mixture to the butter and egg mixture. Mix on low speed until just combined. Then, add half of the milk and mix again until just combined. Repeat this process, adding another third of the dry ingredients, the remaining milk, and finally, the last of the dry ingredients. It’s important to mix only until the ingredients are incorporated to avoid developing the gluten in the flour too much, which can lead to tough cupcakes. Overmixing is a common mistake, so be mindful of this.
Adding the Chocolate Chips
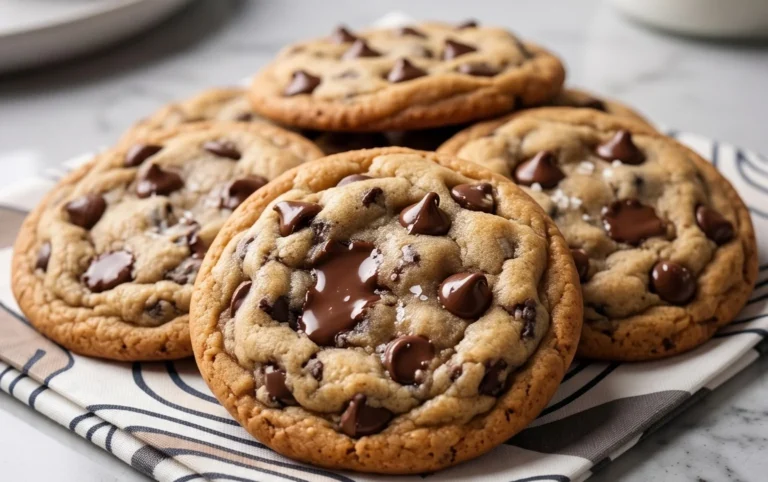
Finally, gently fold in the 1 cup of semi-sweet chocolate chips. Use a spatula or wooden spoon for this. Folding ensures that the chocolate chips are distributed throughout the batter without being broken or overmixed. You want distinct pockets of chocolate in your cupcakes!
Baking the Cupcakes
Preparing Pans and Baking
Preheat your oven to 350°F (175°C). Line a standard 12-cup muffin tin with paper liners, or grease and flour each cup thoroughly. Fill each cupcake liner about two-thirds full with the batter. This allows for proper rising without overflowing. Bake for 18 to 22 minutes, or until a wooden skewer or toothpick inserted into the center of a cupcake comes out clean. The exact baking time will vary depending on your oven.
Making the Frosting
Creaming the Butter
While the cupcakes are cooling, let’s make the frosting. In a clean, large mixing bowl, beat the 1 cup of softened unsalted butter with an electric mixer until it’s smooth and creamy. Similar to the cupcake batter, creaming the butter for the frosting helps create a light and airy texture.
Adding Powdered Sugar and Milk
Gradually add the 3 cups of powdered sugar, about one cup at a time, mixing on low speed until incorporated. The mixture will be thick. Then, gradually add the ¼ cup of milk, mixing until the frosting reaches your desired consistency. If it’s too thick, add a little more milk, a teaspoon at a time. If it’s too thin, add a bit more powdered sugar.
Flavoring the Frosting
Once the frosting is smooth and has the right consistency, stir in the 1 teaspoon of vanilla extract and a pinch of salt. The vanilla adds a lovely sweetness, and the salt helps to balance the sweetness and enhance the overall flavor of the frosting. Beat on medium-high speed for a minute or two until the frosting is light and fluffy. This extra beating further aerates the frosting, making it wonderfully smooth and spreadable.
Assembling and Decorating
Cooling and Frosting
Ensure your cupcakes are completely cool before frosting. This is very important, otherwise, the frosting will melt and slide off. Once cooled, use an offset spatula or a piping bag to frost each cupcake. You can create swirls, rosettes, or simply spread it evenly.
Displaying Your Creations
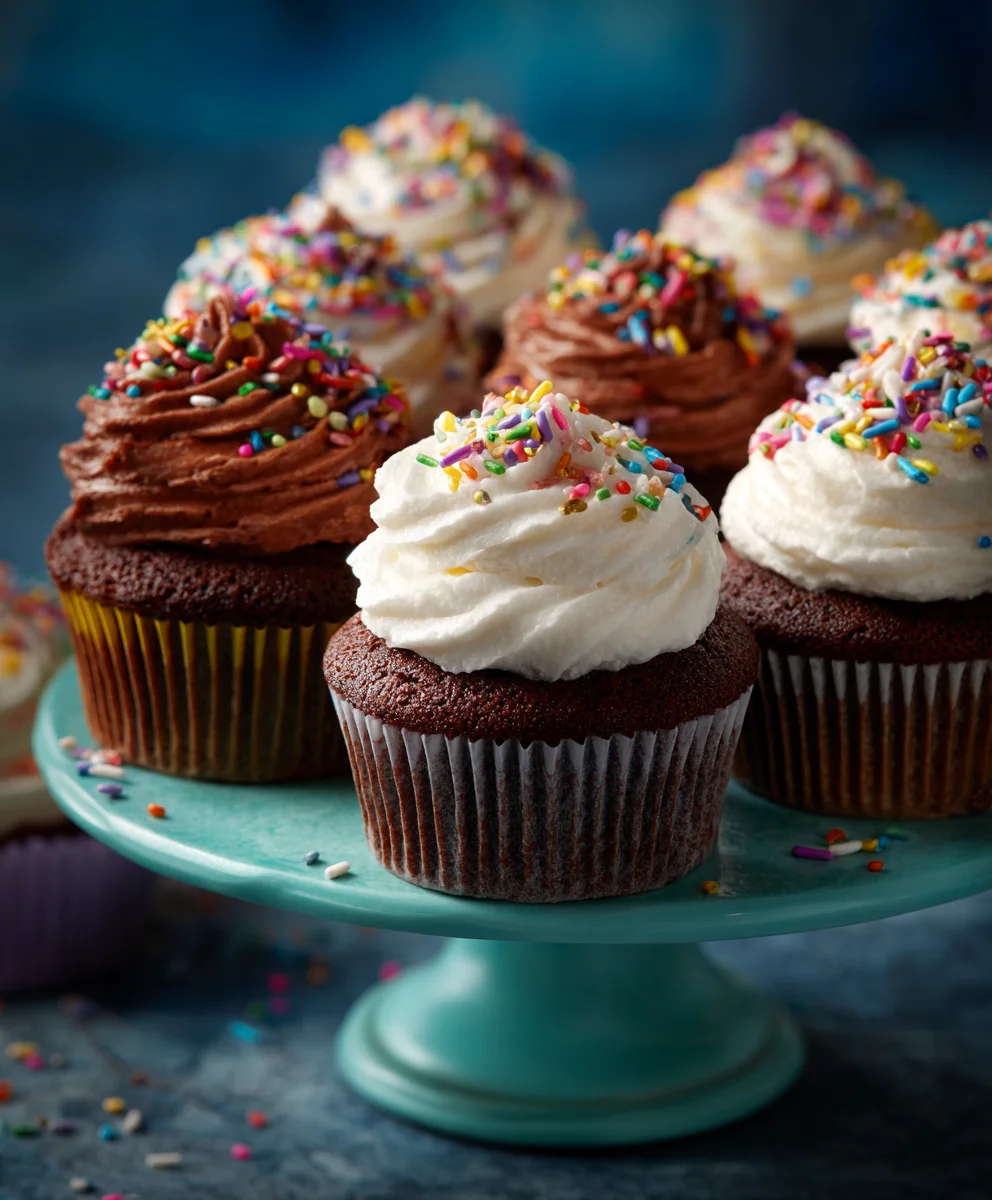
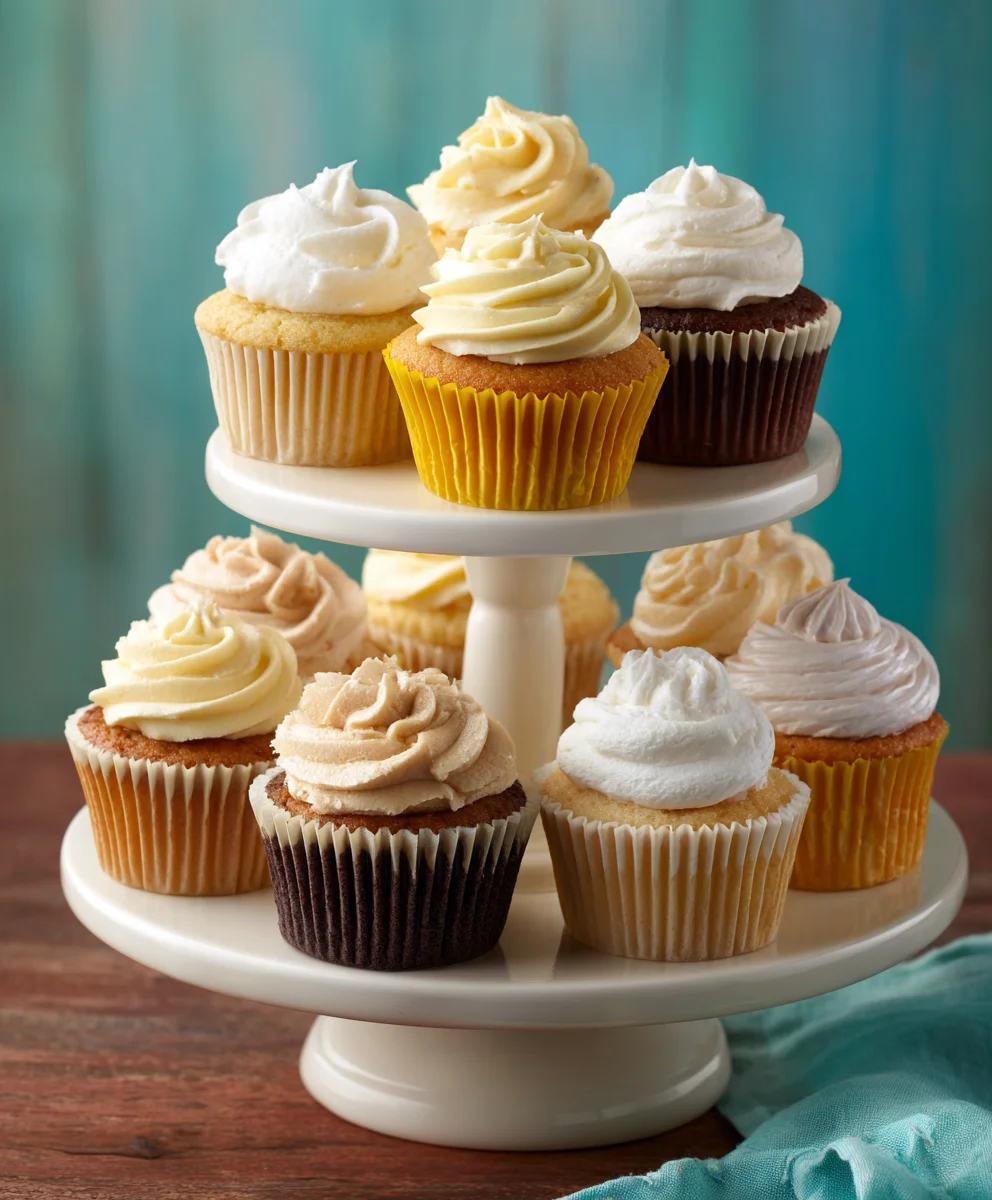
These delicious chocolate chip cupcakes are now ready to be enjoyed! For special occasions or to elevate your dessert table, consider presenting them on a tiered display. A set of large & small cupcake stands can showcase your homemade treats beautifully, adding a touch of elegance and making them the centerpiece of any gathering. The different sizes allow for varied heights and visual interest, making your cupcake presentation as delightful as the cupcakes themselves.
Conclusion:
You’ve now got all the information you need to create stunning displays for any occasion using Large & Small Cupcake Stands. We’ve covered the simple assembly, the decorative possibilities, and how these stands can elevate your baked goods from ordinary to extraordinary. Remember, the key is creativity! Don’t be afraid to experiment with different arrangements and decorations on your Large & Small Cupcake Stands to match your party theme or personal style. These stands are incredibly versatile, perfect for birthdays, weddings, baby showers, or just a fun weekend treat. I encourage you to try them out and see the smiles they bring to your guests’ faces. Happy baking and happy displaying!
Frequently Asked Questions about Large & Small Cupcake Stands:
Q1: Can I wash my Large & Small Cupcake Stands?
Yes, most Large & Small Cupcake Stands are designed for easy cleaning. Typically, you can wipe them down with a damp cloth. For more thorough cleaning, check the specific material. Acrylic or metal stands are often hand-washable with mild soap and water, but it’s best to avoid abrasive cleaners. Always ensure they are completely dry before storing to prevent any damage.
Q2: What is the best way to transport cupcakes when using Large & Small Cupcake Stands?
Transporting cupcakes to an event where you’ll assemble your Large & Small Cupcake Stands is easiest if you transport the cupcakes separately. Use cupcake carriers or sturdy boxes. Once you arrive at your destination, you can then artfully arrange the cupcakes on your assembled stands. This prevents any shifting or damage during transit and ensures your cupcakes look their best when displayed.
Stylish Cupcake Stands – Large & Small Options
A recipe for delicious chocolate chip cupcakes, perfect for displaying on stylish large and small cupcake stands.
Ingredients
-
2 cups all-purpose flour
-
1 ½ teaspoons baking powder
-
½ teaspoon salt
-
1 cup (2 sticks) unsalted butter, softened
-
1 ¾ cups granulated sugar
-
2 large eggs
-
1 teaspoon vanilla extract
-
1 cup milk
-
1 cup (6 ounces) semi-sweet chocolate chips
-
1 cup (2 sticks) unsalted butter, softened (for frosting)
-
3 cups powdered sugar
-
¼ cup milk (for frosting)
-
1 teaspoon vanilla extract (for frosting)
-
Pinch of salt (for frosting)
Instructions
-
Step 1
In a medium bowl, whisk together the flour, baking powder, and salt. In a large bowl, cream the softened butter and granulated sugar until light and fluffy. Beat in the eggs one at a time, then stir in the vanilla extract. -
Step 2
Alternately add the dry ingredients and milk to the butter mixture, beginning and ending with the dry ingredients. Mix on low speed until just combined, being careful not to overmix. -
Step 3
Gently fold in the semi-sweet chocolate chips. Preheat your oven to 350°F (175°C). Line a muffin tin with paper liners and fill each about two-thirds full with batter. -
Step 4
Bake for 18 to 22 minutes, or until a toothpick inserted into the center comes out clean. While the cupcakes cool, prepare the frosting by creaming the softened butter until smooth and creamy. -
Step 5
Gradually add the powdered sugar, then the milk, until the frosting reaches your desired consistency. Stir in the vanilla extract and salt. Beat until light and fluffy. -
Step 6
Once cupcakes are completely cool, frost them using an offset spatula or piping bag. Present your delicious cupcakes on stylish large and small cupcake stands for an elegant display.
Important Information
Nutrition Facts (Per Serving)
It is important to consider this information as approximate and not to use it as definitive health advice.
Allergy Information
Please check ingredients for potential allergens and consult a health professional if in doubt.