Sugar Free Fudge Recipe – Delicious & Easy Homemade Treat
Sugar Free Fudge isn’t just a dessert; it’s a delightful whisper of indulgence without the guilt. In a world where sweet cravings often lead us down a path of sugary detours, this particular treat offers a welcome reprieve. We love sugar-free fudge because it delivers that rich, decadent, melt-in-your-mouth experience that we all adore, but with a smart, mindful twist. It’s the perfect answer for those seeking to reduce their sugar intake, manage dietary restrictions, or simply make a healthier choice without sacrificing flavor. What truly makes this sugar free fudge special is its incredible versatility and the satisfying depth of chocolatey goodness it achieves using clever, sugar-substituting ingredients. Get ready to discover a new favorite that proves you can have your (fudge) and eat it too!
Ingredients:
- 2 cups sugar-free chocolate chips
- 1 cup almond butter (or any smooth nut or seed butter of your choice)
- 1 teaspoon vanilla extract
Sugar Free Fudge: Melting and Mixing
Step 1: Prepare Your Workspace and Melting Station
Before we begin extract, it’s crucial to have everything ready. This recipe is quick once we start melting, so having your tools and ingredients at hand will make the process smooth. First, lightly grease an 8×8 inch baking pan with a little oil or butter, or line it with parchment paper. This ensures your delicious sugar-free fudge will release easily once it’s set. Now, let’s gather our ingredients. Measure out your 2 cups of sugar-free chocolate chips and have your 1 cup of almond butter (or your chosen nut/seed butter) measured and ready to go. Finally, get your 1 teaspoon of vanilla extract measured out so it’s easily accessible for the next step. Having everything prepped means you can focus on the magic of transforming these simple ingredients into a decadent treat without any rushed scrambling. Think of this as setting the stage for your sugar-free fudge masterpiece!
Step 2: Gently Melt the Chocolate Chips
This is where the transformgin extracton begins. The key to perfectly melted chocolate is to do it gently, avoiding any chance of scorching. You have a couple of excellent options here. My preferred method is using a double boiler. To set this up, place a heatproof bowl over a saucepan filled with about an inch of simmering water. Ensure the bottom of the bowl doesn’t touch the water. Add your 2 cups of sugar-free chocolate chips to the bowl. Stir them frequently with a rubber spatula or wooden gin extracton as they begin to soften and melt. The indirect heat from the steam is gentle and effective. Alternatively, you can melt them in the microwave. Place the chocolate chips in a microwave-safe bowl and heat on 50% power for 30-second intervals, stirring well after each interval, until the chips are mostly melted. Continue stirring until all residual heat melts the remaining chips. Be patient; overheating can cause the chocolate to seize, becoming grainy and unusable. We’re aiming for a smooth, glossy, melted consistency.
Step 3: Incorporate the Almond Butter and Vanilla
Once your sugar-free chocolate chips are completely melted and smooth, it’s time to add the richness and flavor. Remove the bowl from the heat (if using a double boiler) or from the microwave. Immediately add your 1 cup of almond butter directly into the melted chocolate. The residual heat from the chocolate will help the almond butter soften and incorporate beautifully. Stir vigorously until the almond butter is fully blended with the chocolate, creating a uniform, creamy mixture. Don’t be discouraged if it looks a little separated at first; keep stirring, and it will come together. Next, add your 1 teaspoon of vanilla extract. Stir this in thoroughly. The vanilla extract is crucial for enhancing the overall flavor profile and adding that classic fudge aroma and taste, even in a sugar-free version. Ensure the vanilla is evenly distributed throughout the mixture for consistent flavor in every bite of your sugar-free fudge.
Step 4: Combine and Smooth the Fudge Mixture
At this stage, you should have a wonderfully smooth, rich, and fragrant mixture. The almond butter acts as a wonderful binder and adds a lovely nutty depth that complements the chocolate beautifully. Give the mixture one final, thorough stir to ensure there are no pockets of unmixed almond butter or chocolate. You’re looking for a luxurious, homogenous consistency. Now, carefully pour this delicious mixture into your prepared baking pan. Use your spatula to spread it evenly into all the corners and across the entire surface. The goal is to create a smooth, level top layer for your sugar-free fudge. This step is important for consistent thickness, which in turn means even setting and easy cutting later on. Take your time to get it as smooth as possible, as this will be the visible top of your fudge.
Step 5: Chill and Set the Sugar Free Fudge
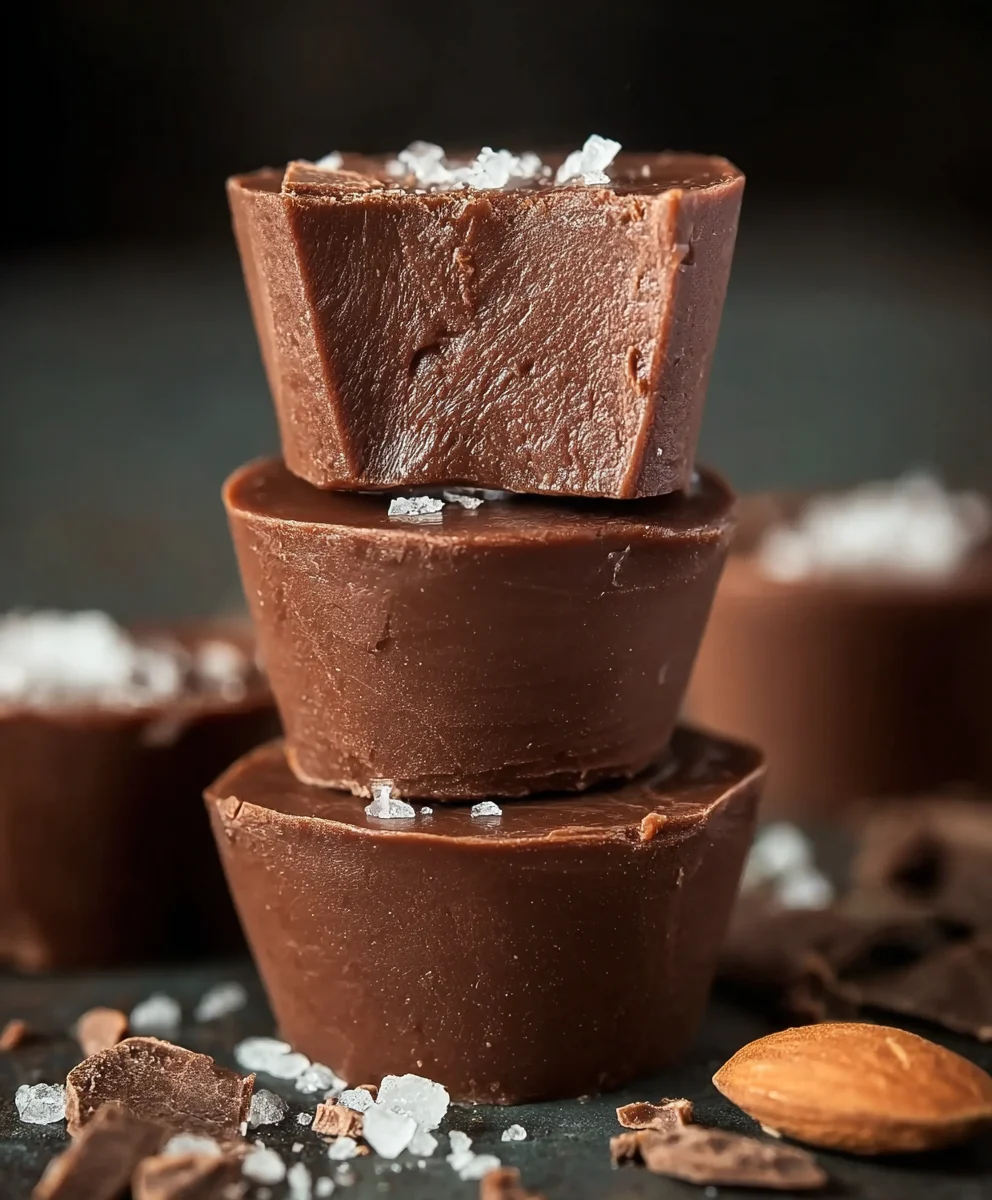
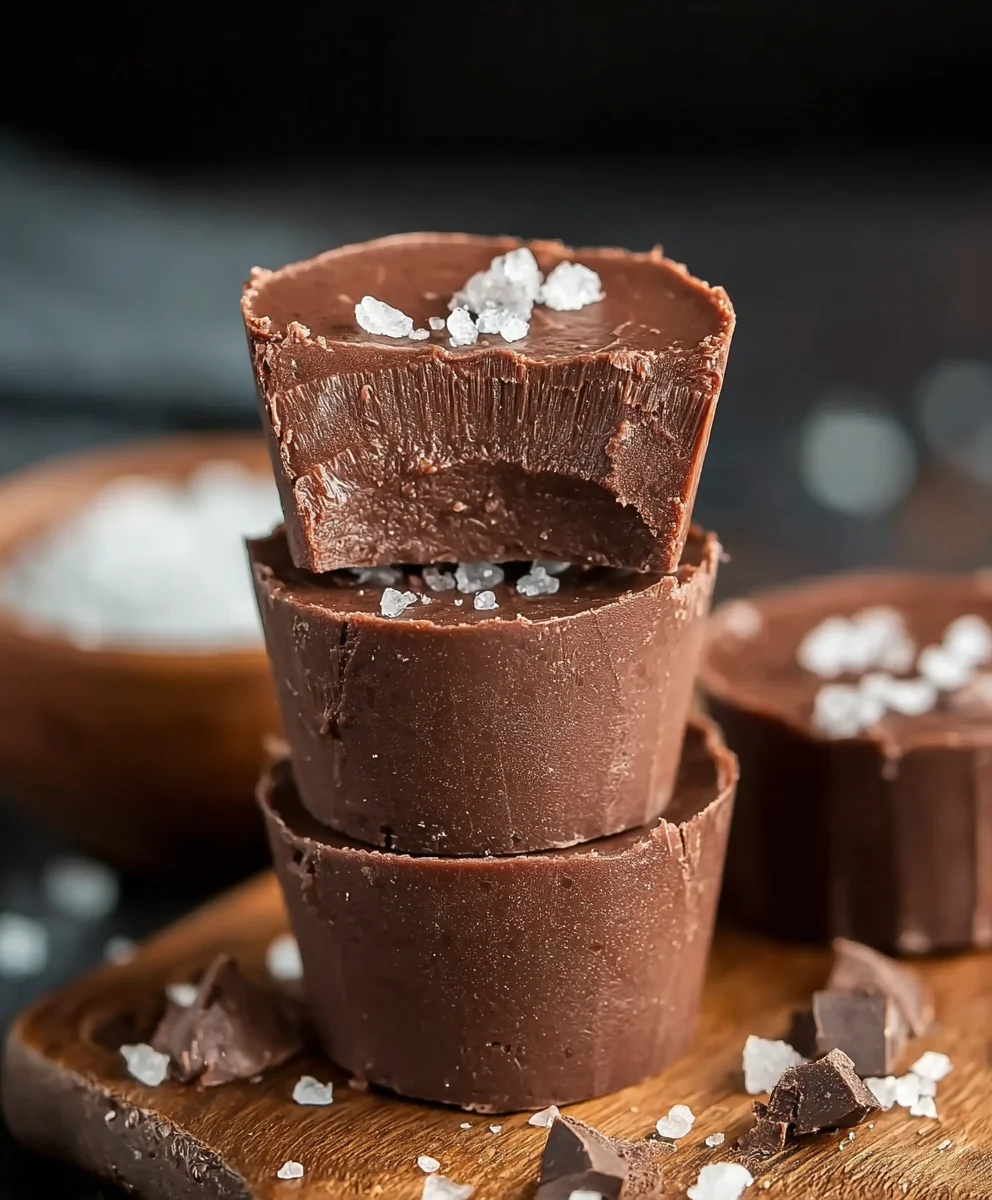
This is the final waiting game for your sugar-free fudge! Once the mixture is evenly spread in the pan, place the pan in the refrigerator. Allow it to chill for at least 2 to 3 hours, or until it is completely firm to the touch. The chilling process allows the chocolate and almond butter to solidify and set, transforming the liquid mixture into the characteristic firm texture of fudge. You’ll know it’s ready when you can press the top gently, and it doesn’t yield or feel soft. For the cleanest cuts, you might even want to let it chill for a bit longer, or even overnight if you can resist! Once fully set, you can carefully lift the fudge out of the pan (if you used parchment paper) or invert the pan onto a cutting board. Use a sharp knife, ideally warmed slightly under hot water and dried, to cut the fudge into your desired shapes and sizes. Smaller, bite-sized pieces are perfect for enjoying this rich treat.
Conclusion:
We’ve reached the end of our delightful journey into making perfect Sugar Free Fudge! This recipe has proven that you don’t need added sugar to create a rich, decadent, and utterly satisfying treat. The creamy texture and deep chocolate flavor are truly impressive, and the best part is how simple it is to achieve such delicious results. Remember, with a little patience and careful attention to the steps, you can consistently produce this crowd-pleasing confection.
This Sugar Free Fudge is incredibly versatile. It makes for a wonderful after-dinner dessert, a thoughtful homemade gift, or even a special pick-me-up any time of day. For an elegant presentation, try cutting it into small, bite-sized squares and arrangin extractg them on a festive plate. You can also elevate it further by topping cooled fudge with a sprinkle of sea salt or a few chopped nuts for added texture and flavor contrast. Don’t be afraid to experiment with different sugar-free sweeteners to find your personal favorite. I encourage you to give this Sugar Free Fudge recipe a try – you won’t be disappointed!
Frequently Asked Questions about Sugar Free Fudge:
Q: Can I use a different type of sugar-free sweetener besides the one recommended in the recipe?
A: Absolutely! You can experiment with various sugar-free sweeteners like erythritol, xylitol (use with caution if you have pets, as it’s toxic to them), or allulose. Different sweeteners can have slightly different sweetness levels and may affect the texture of the fudge, so you might need to make minor adjustments to the quantity based on the specific sweetener you choose. It’s a good idea to start with the recommended amount and then taste and adjust as needed.
Q: How should I store my Sugar Free Fudge to keep it fresh?
A: To maintain the best quality and texture, store your Sugar Free Fudge in an airtight container at room temperature for up to a week. If your kitchen is particularly warm, or if you plan to store it for longer than a week, refrigeration is a good option. However, be aware that refrigeration can sometimes make the fudge a bit harder. You can also freeze it for longer storage, but allow it to thaw at room temperature before serving for optimal texture.
Sugar Free Fudge Recipe – Delicious & Easy Homemade Treat
A simple and delicious sugar-free fudge recipe made with chocolate chips and almond butter. A perfect homemade treat.
Ingredients
-
2 cups sugar-free chocolate chips
-
1 cup almond butter
-
1 teaspoon vanilla extract
-
1 tablespoon butter or oil (for greasing pan)
-
Parchment paper (optional, for lining pan)
Instructions
-
Step 1
Prepare your workspace: Lightly grease an 8×8 inch baking pan with butter or oil, or line it with parchment paper. Gather and measure all your ingredients. -
Step 2
Gently melt the chocolate chips using a double boiler or in the microwave on 50% power in 30-second intervals, stirring until smooth and glossy. -
Step 3
Once melted, remove from heat and stir in the almond butter until fully incorporated, creating a uniform, creamy mixture. Then, add the vanilla extract and stir thoroughly. -
Step 4
Pour the fudge mixture into the prepared baking pan. Use a spatula to spread it evenly into all corners and across the entire surface, creating a smooth, level top. -
Step 5
Chill the fudge in the refrigerator for at least 2 to 3 hours, or until completely firm. Once set, cut into desired shapes and sizes.
Important Information
Nutrition Facts (Per Serving)
It is important to consider this information as approximate and not to use it as definitive health advice.
Allergy Information
Please check ingredients for potential allergens and consult a health professional if in doubt.