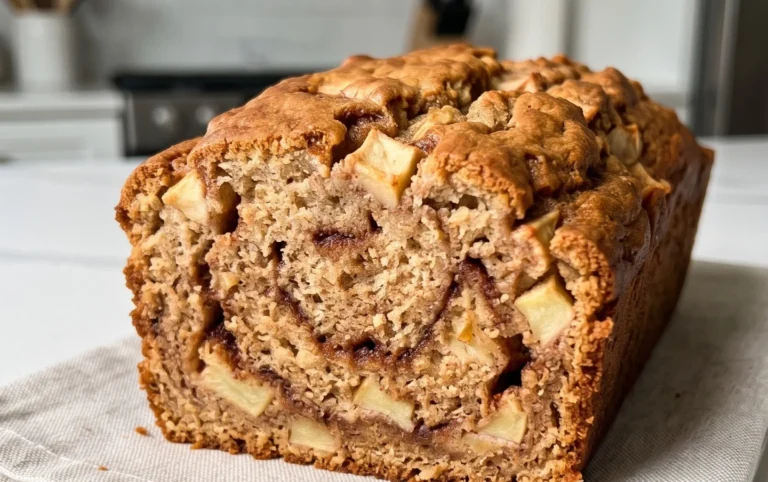
Easy Flourless Banana Bread- Healthy Recipe
Healthy 5-Ingredient Flourless Banana Bread is about to become your new go-to for a guilt-free, incredibly delicious treat. Let’s be honest, who doesn’t love the comforting aroma and sweet, moist crum extractb of banana bread? It’s a timeless classic for a reason, evoking cozy mornings and sweet indulgence. But what if I told you we could achieve all that goodness with just FIVE simple ingredients and without any flour? This isn’t just another banana bread; it’s a revelation in simplicity and wholesome baking. This flourless wonder is naturally gluten-free, packed with natural sweetness from ripe bananas, and unbelievably satisfying. Get ready to revolutionize your baking routine with this incredibly easy and unbelievably tasty healthy 5-ingredient flourless banana bread.
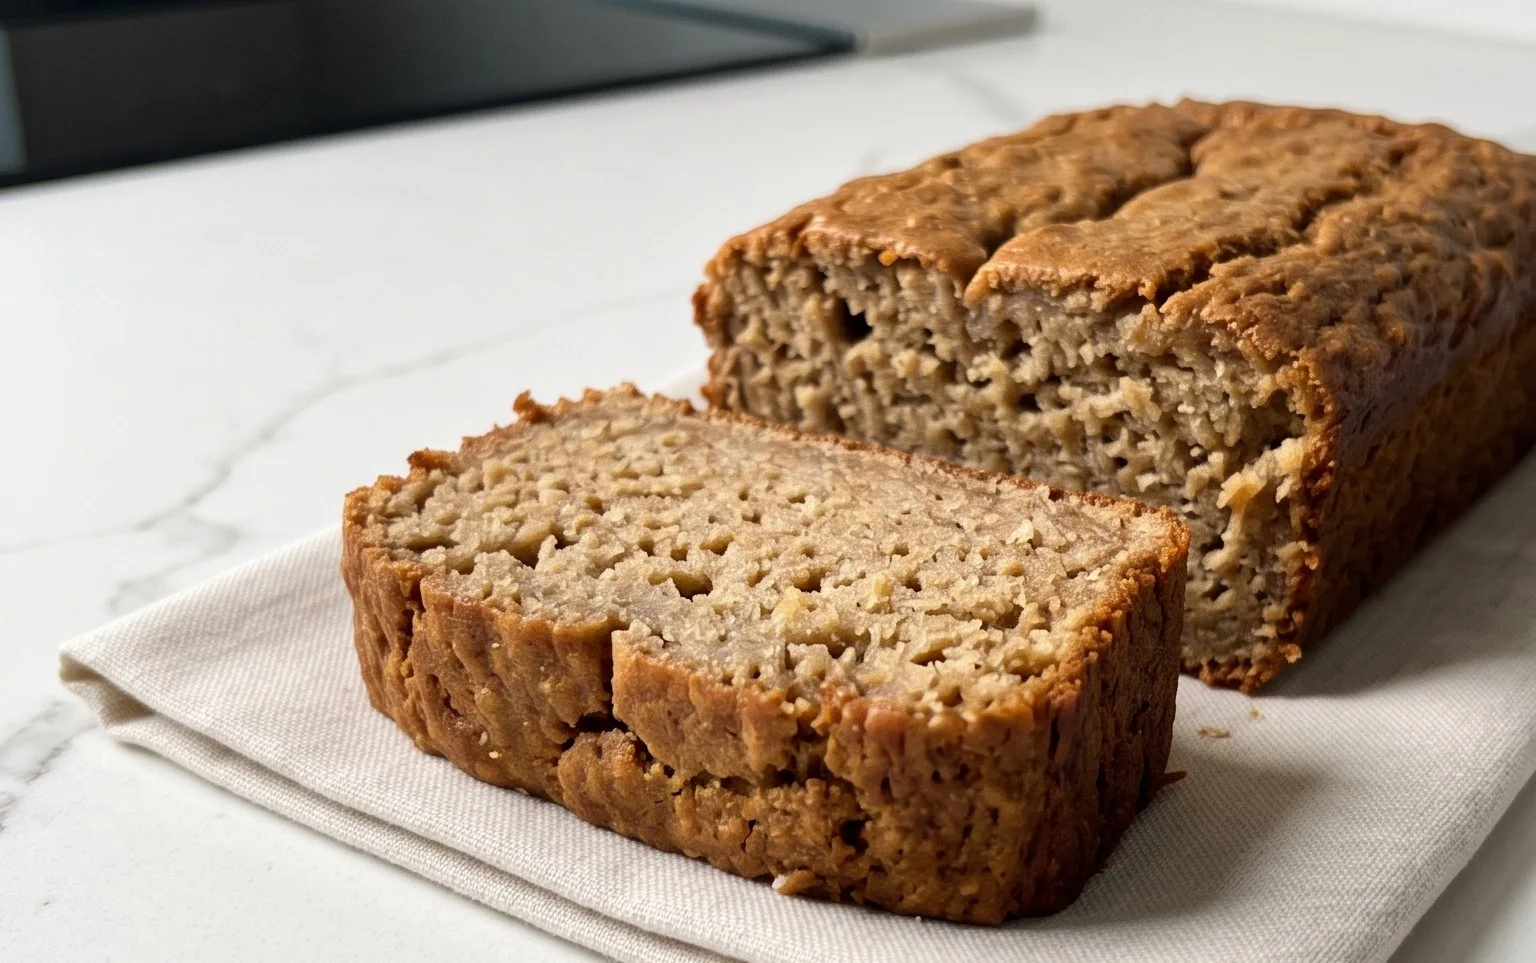
Healthy 5-Ingredient Flourless Banana Bread
Are you craving a warm, comforting slice of banana bread but want to keep things healthy and fuss-free? Then you’ve come to the right place! This 5-ingredient flourless banana bread is a game-changer. It’s incredibly simple to whip up, requires no fancy flours, and is packed with natural sweetness and wholesome goodness. Forget complicated ingredient lists and hours in the kitchen; this recipe is designed for busy weeknights or lazy weekend mornings when you want a delicious treat without the guilt.
The beauty of this recipe lies in its simplicity. We’re stripping back the usual suspects and focusing on powerhouse ingredients that deliver amazing flavor and texture. Ripe bananas are the star, providing moisture, sweetness, and a lovely soft crum extractb. Eggs act as our binder, ensuring everything holds together beautifully. Maple syrup adds a touch more natural sweetness and a subtle caramel note, while baking soda helps our bread rise and achieve that perfect dome. And the secret ingredient that makes it flourless? Old-fashioned rolled oats! When blended, oats create a fantastic texture that’s reminiscent of traditional flour, but with added fiber and nutrients.
This recipe is perfect for anyone with gluten sensitivities or those looking to reduce their refined flour intake. It’s also naturally dairy-free (if you use maple syrup) and can easily be made nut-free. The aroma that fills your kitchen as this bakes is simply divine, a comforting scent that promises pure deliciousness. Let’s get started on this incredibly easy and satisfying banana bread!
Ingredients:
Cooking Instructions:
Let’s dive into creating this delightful banana bread. It’s so straightforward, you’ll be amazed at how quickly you can go from pantry staples to a warm, freshly baked loaf.
Step 1: Preheat and Prep Your Pan
Before we even start mixing, it’s crucial to get your oven preheated and your baking vessel ready. Preheat your oven to 350 degrees Fahrenheit (175 degrees Celsius). This ensures that as soon as your batter is ready, it can go into a consistent heat environment, promoting even baking. While the oven is heating, prepare your loaf pan. I like to use a standard 9×5 inch loaf pan. You can grease it with a little bit of cooking spray or butter, and then lightly dust it with some extra oats or flour (if you have any on hand and don’t mind using a tiny bit). Alternatively, lining the pan with parchment paper is a fantastic option. This not only prevents sticking but also makes lifting the baked banana bread out of the pan a breeze. You can create “handles” by letting the parchment paper hang over the sides of the pan.
Step 2: Mash Your Bananas and Combine Wet Ingredients
This is where the magic begin extracts! Take your three ripe bananas. The riper they are, the sweeter and more flavorful your bread will be. Black spots are a good thing here! Place them in a medium-sized mixing bowl. Use a fork or a potato masher to thoroughly mash the bananas until they are mostly smooth, with maybe just a few tiny lumps remaining. Over-mashing isn’t necessary. Once mashed, add the two large eggs to the bowl with the bananas. Whisk them together until well combined. Now, pour in your 1/4 cup of pure maple syrup. If you prefer honey, that works beautifully too! Gently whisk these wet ingredients together until everything is incorporated. The mixture might look a little streaky, and that’s perfectly fine. We’re aiming for a good blend.
Step 3: Introduce the Oats and Baking Soda
Now it’s time to bring in our dry ingredients, which in this case, are primarily the oats. Add the 2 cups of old-fashioned rolled oats directly to the wet ingredients in the mixing bowl. Make sure you’re using old-fashioned rolled oats and not instant oats or steel-cut oats. Old-fashioned oats have the right texture and will break down slightly during mixing and baking to create the best crum extractb. Instant oats can become too mushy, and steel-cut oats won’t soften enough. Sprinkle the 1 teaspoon of baking soda over the oat and banana mixture. The baking soda is essential for leavening, helping to give our banana bread that wonderful rise.
Step 4: Mix the Batter to Perfection
This is where we bring everything together. Using a sturdy spoon or a spatula, gently fold and stir the ingredients until just combined. Be careful not to overmix at this stage. Overmixing can lead to a tougher bread, especially since we don’t have gluten from flour to worry about toughening. You want to ensure that the oats are evenly distributed throughout the banana mixture, and there are no pockets of dry baking soda. The batter will be quite thick, which is exactly what we want. It should have a consistency that’s easily spreadable into the prepared loaf pan. If it seems excessively dry, you can add a tiny splash of milk (dairy or non-dairy) or water, but this is usually not necessary with ripe bananas.
Step 5: Bake Until Golden and Delicious
Spoon the thick batter into your prepared loaf pan. Use your spatula to spread it evenly, making sure to fill the corners of the pan. You can smooth the top a bit if you like. Place the loaf pan into your preheated oven on the center rack. Bake for approximately 45-60 minutes. The baking time can vary depending on your oven, so it’s important to keep an eye on it. The banana bread is done when it’s golden brown on top, and a toothpick or a thin knife inserted into the center comes out clean. If the top is browning too quickly before the inside is cooked, you can loosely tent the pan with aluminum foil for the remainder of the baking time.
Step 6: Cool and Enjoy Your Masterpiece
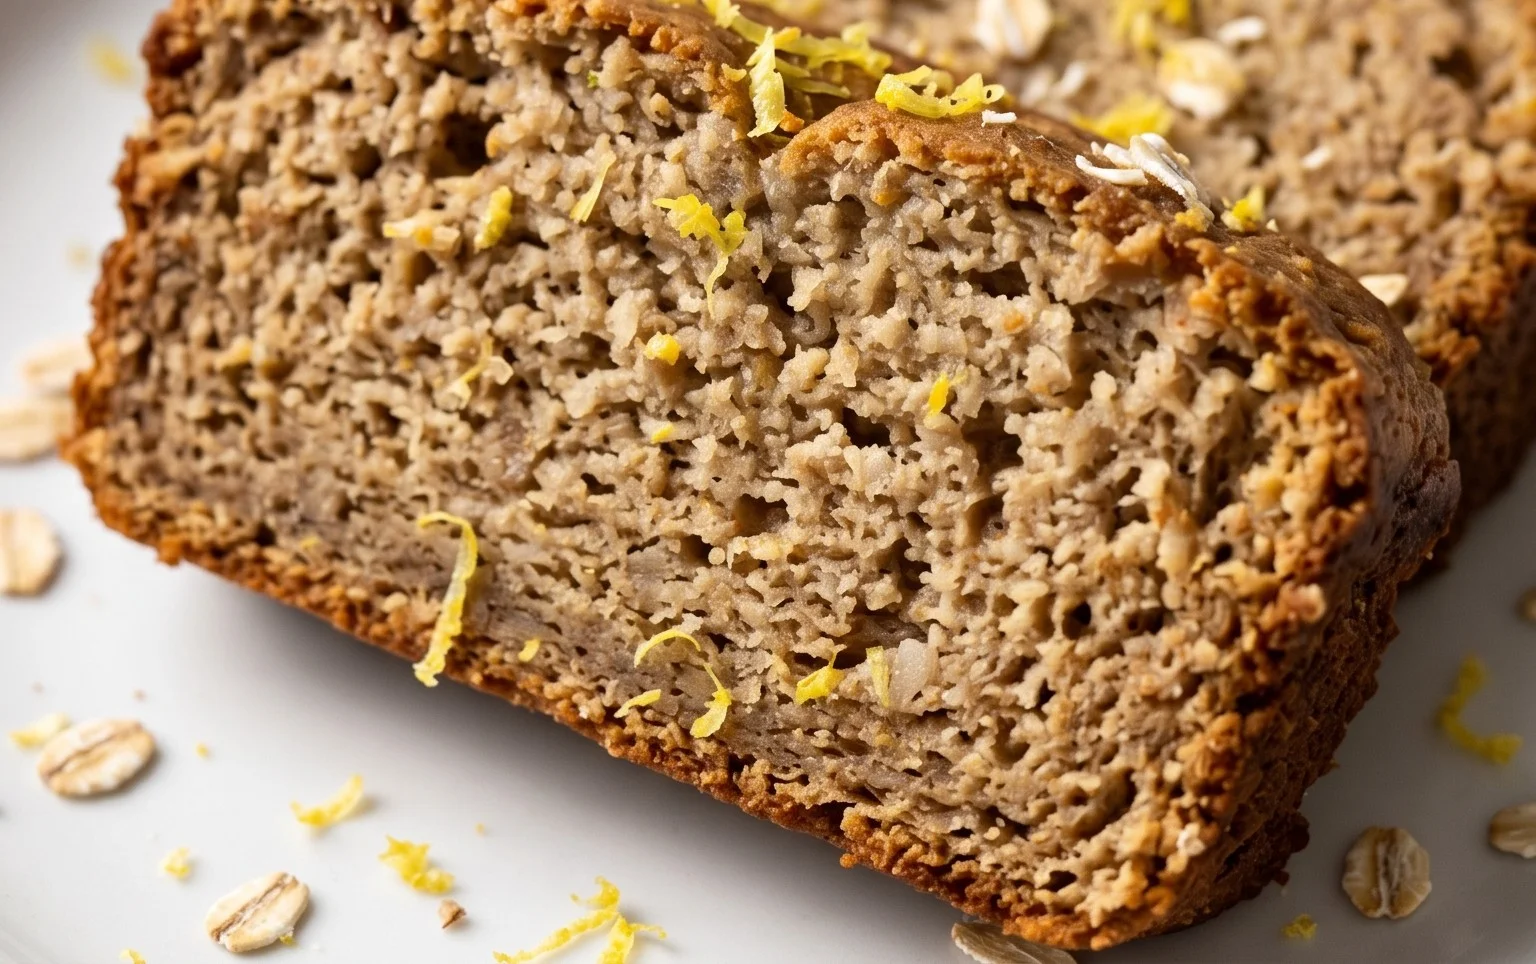
Once your banana bread is baked to perfection, carefully remove the loaf pan from the oven. Let the bread cool in the pan for about 10-15 minutes. This allows it to set up properly and makes it easier to remove from the pan. After the initial cooling, carefully invert the loaf onto a wire rack to cool completely. Resist the urge to slice into it immediately! Letting it cool completely will result in cleaner slices and a better texture. Once fully cooled, slice it up and enjoy! This flourless banana bread is delicious on its own, but it’s also fantastic toasted and spread with a little butter, nut butter, or a drizzle of honey. Store any leftovers in an airtight container at room temperature for up to 3 days, or in the refrigerator for up to a week. You can also freeze slices for longer storage. Enjoy every healthy, delicious bite!
Conclusion:
You’ve done it! You’ve discovered the secret to incredibly moist, deliciously sweet, and remarkably healthy banana bread, all with just five simple ingredients and no flour in sight. This recipe truly is a game-changer for anyone looking for a guilt-free treat that’s both satisfying and easy to whip up. The natural sweetness from ripe bananas means you don’t need added sugars, and omitting flour makes it perfect for gluten-free diets or for those simply wanting a lighter, more wholesome option. This flourless banana bread is wonderfully versatile and makes a fantastic breakfast on the go, a satisfying snack, or even a light dessert. Try serving it warm with a dollop of Greek yogurt and a sprinkle of cinnamon, or toasted with a thin layer of almond butter for an extra protein boost. Don’t be afraid to get creative with variations too! You could stir in a handful of dark chocolate chips for a decadent touch, or add a sprinkle of chopped walnuts for a delightful crunch.
I truly encourage you to give this healthy 5-ingredient flourless banana bread a try. You’ll be amazed at how such few ingredients can create something so wonderfully delicious!
Frequently Asked Questions:
What makes this banana bread ‘healthy’?
This banana bread is considered healthy due to its minimal ingredient list, the absence of refined flour, and its reliance on the natural sweetness of ripe bananas. It’s typically lower in carbohydrates and calories compared to traditional banana bread recipes and can be a great option for those managin extractg their sugar intake or following specific dietary preferences.
Can I make this banana bread vegan?
Yes, absolutely! To make this recipe vegan, you would substitute the eggs with a flax egg (1 tablespoon flaxseed meal mixed with 3 tablespoons water, let sit for 5 minutes) or a commercial egg replacer. Ensure your chocolate chips, if using, are also dairy-free.
How do I store leftover flourless banana bread?
Store leftover banana bread in an airtight container at room temperature for up to two days, or in the refrigerator for up to a week. For longer storage, you can wrap individual slices tightly and freeze them for up to three months.
Healthy 5-Ingredient Flourless Banana Bread
A simple, healthy, and flourless banana bread recipe using only 5 wholesome ingredients. Perfect for a quick and nutritious treat.
Ingredients
-
3 medium ripe bananas, mashed
-
2 large eggs
-
1/4 cup pure maple syrup
-
1 teaspoon baking soda
-
2 cups old-fashioned rolled oats
Instructions
-
Step 1
Preheat oven to 350°F (175°C) and grease a loaf pan. -
Step 2
In a large bowl, mash the ripe bananas until smooth. -
Step 3
Whisk in the eggs and pure maple syrup until well combined. -
Step 4
Stir in the baking soda and rolled oats until just incorporated. -
Step 5
Pour the batter into the prepared loaf pan and spread evenly. -
Step 6
Bake for 45-55 minutes, or until a toothpick inserted into the center comes out clean. -
Step 7
Let cool in the pan for 10 minutes before transferring to a wire rack to cool completely.
Important Information
Nutrition Facts (Per Serving)
It is important to consider this information as approximate and not to use it as definitive health advice.
Allergy Information
Please check ingredients for potential allergens and consult a health professional if in doubt.