Easy Homemade Pizza Rolls Recipe – Quick Bites
Pizza rolls, oh pizza rolls! They’re more than just a snack; they’re a nostalgic trip back to childhood sleepovers and spontaneous movie nights. Who can resist that perfect bite? The crispy, golden exterior giving way to a warm, gooey center filled with savory tomato sauce and melty cheese, all bundled into a convenient, bite-sized package. It’s the ultimate comfort food, a universally loved treat that brings smiles to faces of all ages. What makes these little pockets of joy so special is their incredible versatility. You can stuff them with anything your heart desires – beef pepperoni, veggies, extra cheese – and they’re always a crowd-pleaser. Today, we’re diving deep into how to create the best darn pizza rolls you’ve ever tasted, right in your own kitchen.
Making Awesome Pizza Rolls at Home
There’s something undeniably magical about pizza rolls. That perfect bite-sized burst of cheesy, saucy, beef pepperoni goodness, all wrapped up in a tender dough – it’s pure comfort food. While store-bought versions are convenient, making your own pizza rolls from scratch is surprisingly easy and infinitely more rewarding. Imagin extracte customizing every element, from the type of cheese to the veggies, and the sheer joy of presenting a platter of homemade treasures to your friends and family. Today, we’re diving into how to create these delightful little parcels of joy, guaranteed to become a new favorite in your kitchen.
Ingredients:
Crafting Your Pizza Rolls
This recipe is designed to be straightforward and forgiving, even for begin extractner bakers. The key to fantastic pizza rolls lies in the quality of your ingredients and a little bit of patience. We’ll walk through each step, ensuring your pizza rolls turn out perfectly golden and delightfully filled every time.
Preparing Your Filling
Before we even think about the dough, let’s get our delicious filling ready. This is where you can truly personalize your pizza rolls.
1. First, gather your chopped vegetables. In a medium bowl, combine the finely diced mushrooms, onions, and bell peppers. If you find raw onions a bit too strong, you can lightly sauté them for a few minutes before adding them to the mix. This mellows their flavor and softens them beautifully. For this recipe, we’re going to keep them raw to maintain a bit of crunch and freshness within the roll, but sautéing is always an option to consider for a different texture.
2. Next, add your beef pepperoni to the bowl. If you’re using large beef pepperoni slices, you might want to chop them into smaller, bite-sized pieces. This ensures an even distribution of flavor in every single roll. If you’re opting for the vegetarian version, make sure your plant-based beef pepperoni is also chopped to a similar size.
3. Now, introduce the star of the show: the cheese. Sprinkle the shredded mozzarella cheese over the beef pepperoni and vegetable mixture. The mozzarella will melt into a glorious, gooey wonderland when baked, binding all the delicious components together. Don’t be shy with the cheese; it’s what makes pizza rolls truly irresistible.
4. Finally, stir in the pizza sauce or marinara sauce. You want just enough sauce to moisten the filling without making it too wet. Too much sauce can lead to soggy dough, so start with about ¾ of a cup and add more if needed. The sauce will act as a binder and add that classic pizza flavor. You can also add your optional dried or fresh parsley at this stage for an extra touch of herbaceousness. Gently mix everything together until well combined.
Assembling the Rolls
This is where the magic truly begin extracts to take shape. We’ll be transforming our pizza dough into perfect little packages of deliciousness.
1. If you’re using a tube of Pillsbury pizza dough, unroll it according to the package instructions. If you’re using a dough ball, lightly flour your work surface and roll it out into a rectangle, aiming for a thickness of about ¼ inch. The goal is to have a nice, even surface to spread our filling onto. Don’t worry if it’s not a perfect rectangle; we can always trim any uneven edges.
2. Now, carefully spread the prepared filling evenly over the pizza dough, leaving about a 1-inch border around the edges. Think of it like frosting a cake, but with a savory filling! Make sure to distribute the beef pepperoni, vegetables, and cheese as uniformly as possible so that each roll gets a good amount of everything.
3. Starting from one of the longer sides, carefully and tightly roll up the pizza dough. Imagin extracte you’re making a jelly roll. The tighter you roll, the more secure your filling will be inside. As you roll, gently press down to ensure the dough seals and there are no air pockets.
4. Once you have a tightly rolled log, use a sharp knife to cut it into individual pizza rolls. Aim for slices that are about ¾ to 1 inch thick. The thickness will determine how much filling you get in each bite. If the dough seems a little sticky, you can lightly flour your knife. Place the cut rolls cut-side down onto a baking sheet lined with parchment paper. Give them a little space between each one, as they will expand slightly while baking.
Baking to Perfection
The final stage is where all our efforts come together, transforming our raw rolls into golden, bubbling delights.
1. Preheat your oven to 375°F (190°C). While the oven heats, prepare the garlic butter glaze. In a small bowl, combine the melted salted butter with the minced garlic. If you’re using fresh parsley and want it in the glaze, you can add it here too. This simple glaze adds an incredible depth of flavor and gives our pizza rolls a beautiful sheen and a perfectly crispy crust.
2. Once the oven is preheated, generously brush the tops and sides of each pizza roll with the garlic butter mixture. Make sure to get good coverage, as this is where a lot of that irresistible savory flavor comes from.
3. Bake for 18-22 minutes, or until the pizza rolls are golden brown and the cheese is melted and slightly bubbly. Keep an eye on them during the last few minutes of baking, as ovens can vary. You want them cooked through but not burnt. The aroma that will fill your kitchen at this point is absolutely divine!
4. Once baked to perfection, carefully remove the pizza rolls from the oven. Let them cool on the baking sheet for a few minutes before transferring them to a serving platter. This allows them to set up slightly and makes them easier to handle.
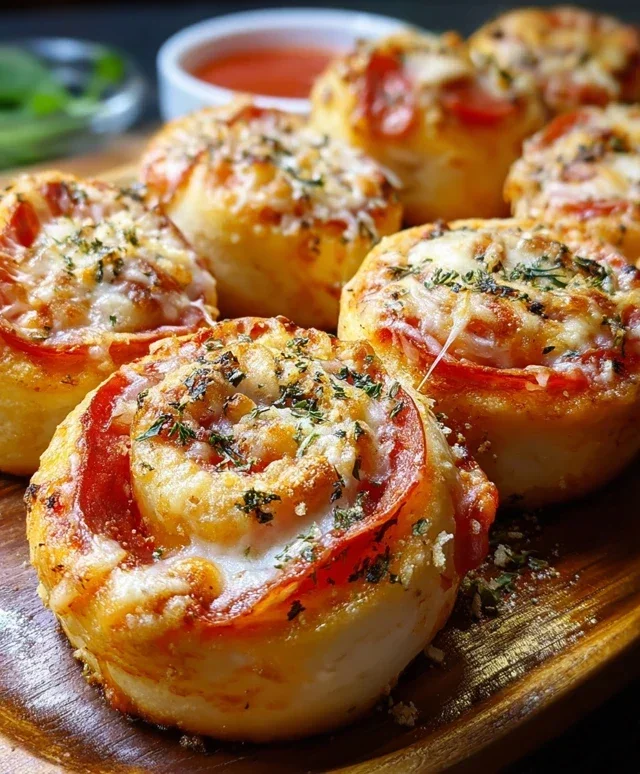
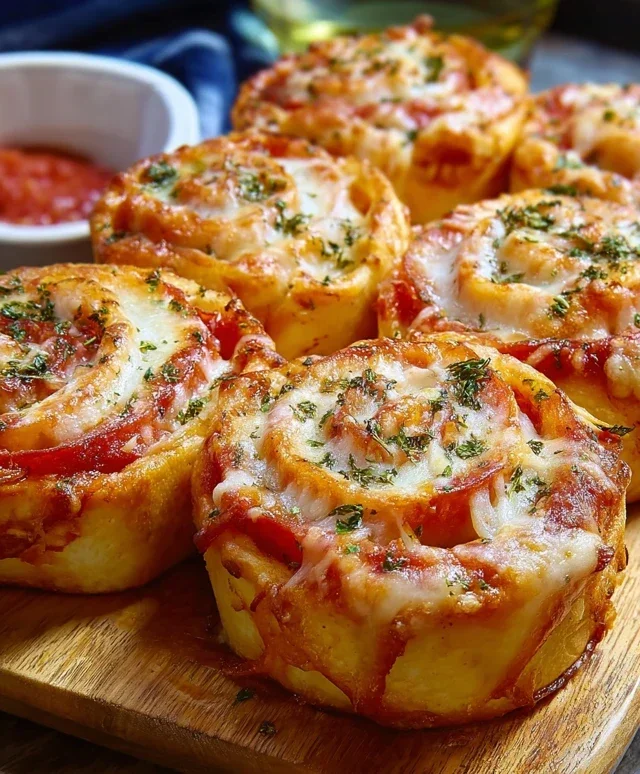
5. For an extra touch of flavor and presentation, sprinkle some grated Parmesan cheese over the warm pizza rolls. Serve immediately with your favorite pizza sauce or marinara for dipping. Get ready for happy sighs and requests for seconds – these homemade pizza rolls are guaranteed to be a hit! Enjoy every delicious, cheesy, saucy bite.
Conclusion:
And there you have it – your ultimate guide to creating delicious, homemade pizza rolls! We’ve explored a simple yet incredibly rewarding recipe that’s perfect for quick weeknight dinners, fun party appetizers, or just satisfying those pizza cravings. The beauty of these pizza rolls lies in their versatility and ease of preparation. They offer all the cheesy, saucy, and topping-filled goodness of traditional pizza, but in a perfectly portioned, fun-to-eat format. I truly believe this recipe is a winner because it’s adaptable to everyone’s taste preferences, making it a universally loved treat.
When it comes to serving, these pizza rolls are fantastic on their own, but I love pairing them with a side of marinara sauce for dipping. For a more substantial meal, consider serving them alongside a fresh green salad. Don’t be afraid to experiment with different fillings! Beyond the classic beef pepperoni, try sautéed mushrooms and onions, cooked Italian sausage, spinach and ricotta, or even a sweet and savory beef ham and pineapple version. The possibilities are endless! I encourage you all to give this pizza roll recipe a try; you won’t regret the delicious results.
Frequently Asked Questions:
Can I make pizza rolls ahead of time?
Yes, you absolutely can! You can assemble the pizza rolls and store them in an airtight container in the refrigerator for up to 24 hours before baking. For longer storage, you can freeze the unbaked rolls on a baking sheet until firm, then transfer them to a freezer-safe bag. Bake them directly from frozen, adding a few extra minutes to the baking time.
What kind of dough is best for pizza rolls?
While you can use store-bought pizza dough for convenience, homemade pizza dough often yields a chewier and more flavorful result. The recipe provided uses a simple, reliable dough that’s easy to work with. You could also experiment with different types of dough, like a whole wheat or even a gluten-free option, to suit your dietary needs or preferences.
Pizza Rolls
Easy homemade pizza rolls filled with pepperoni, cheese, and vegetables. A crowd-pleasing appetizer or snack.
Ingredients
-
1 tube Pillsbury pizza dough or store-bought pizza dough ball
-
1 ½ cups plant-based beef pepperoni slices
-
1 ½ cups mozzarella cheese, shredded
-
1 cup pizza sauce or marinara sauce
-
½ cup mushrooms, finely diced
-
½ cup onions, finely diced
-
½ cup bell peppers, finely diced
-
¼ cup salted butter, melted
-
1 clove garlic, minced
-
1 teaspoon parsley, dried or fresh (optional)
-
Pizza sauce, for dipping
-
Parmesan cheese, for garnish
Instructions
-
Step 1
Preheat oven to 400°F (200°C). Line a baking sheet with parchment paper. -
Step 2
Unroll the pizza dough onto a lightly floured surface. Spread the pizza sauce evenly over the dough, leaving a small border. -
Step 3
Sprinkle the shredded mozzarella cheese over the sauce. Top with pepperoni slices, diced mushrooms, onions, and bell peppers. -
Step 4
Carefully roll up the dough lengthwise, like a jelly roll. Pinch the seam to seal. -
Step 5
Cut the rolled dough into 1-inch thick slices. Place the slices cut-side up on the prepared baking sheet. -
Step 6
In a small bowl, combine melted butter, minced garlic, and parsley (if using). Brush this mixture over the top of each pizza roll. -
Step 7
Bake for 12-15 minutes, or until golden brown and heated through. -
Step 8
Serve hot with extra pizza sauce for dipping. Garnish with Parmesan cheese, if desired.
Important Information
Nutrition Facts (Per Serving)
It is important to consider this information as approximate and not to use it as definitive health advice.
Allergy Information
Please check ingredients for potential allergens and consult a health professional if in doubt.