Easy Lemon Drizzle Traybake Cake Recipe
Easy Lemon Drizzle Traybake Cake. There’s something undeniably comforting and utterly delightful about a classic Easy Lemon Drizzle Traybake Cake. It’s the kind of bake that brings sunshine into your kitchen, even on the dreariest of days. People adore this particular cake for its straightforward charm and its incredible ability to satisfy a sweet craving without demanding hours of effort or intricate techniques. The secret to its widespread appeal lies in its simplicity, coupled with that burst of bright, zesty citrus that cuts through the sweetness perfectly. This isn’t just any cake; it’s a guaranteed crowd-pleaser, ideal for impromptu gatherings, a delightful afternoon tea, or simply a treat for yourself. What truly makes this Easy Lemon Drizzle Traybake Cake special is its moist, tender crum extractb and the irresistible tangy glaze that hardens just so, providing that signature ‘drizzle’ experience we all crave.
Ingredients:
- 1 cup unsalted butter, softened
- 1 1/4 cups granulated sugar
- 1 teaspoon vanilla extract
- 4 medium eggs
- 2 cups self-raising flour
- 3 tablespoons milk
- Zest of 2 lemons
- 1 2/3 cups powdered sugar
- 2 tablespoons fresh lemon juice
- 1-2 tablespoons lemon zest (for garnish)
Preparing the Cake Batter
Creaming the Butter and Sugar
Let’s begin extract by preheating your oven to 350°F (175°C). Then, lightly grease and line a 9×13 inch (23×33 cm) baking tray with parchment paper. This step is crucial for ensuring your cake releases easily after baking. In a large mixing bowl, cream together the softened unsalted butter and the granulated sugar. You want to beat these together until the mixture is pnon-alcoholic ale, light, and fluffy. This process incorporates air into the batter, which contributes to a lighter and more tender cake. I usually find it takes about 3-5 minutes with an electric mixer on medium speed, or a bit longer if you’re doing it by hand. Don’t rush this step; the texture of your final cake will thank you for it.
Adding the Wet Ingredients
Next, add the vanilla extract to the creamed butter and sugar mixture. Beat it in until well combined. Now, it’s time to add the eggs, one at a time. It’s really important to add them individually and beat thoroughly after each addition. This helps to emulsify the mixture properly and prevents it from looking curdled. Make sure each egg is fully incorporated before you move on to the next one. Once all the eggs are in and the mixture looks smooth and uniform, you can add the zest of two lemons. Stir this in gently. The lemon zest will provide a wonderful burst of citrus fragrance and flavor throughout the cake.
Incorporating Dry Ingredients and Milk
Now we’ll start adding the dry ingredients. Sift the self-raising flour over the wet ingredients. Sifting helps to aerate the flour and remove any lumps, leading to a smoother batter and a lighter cake. Gently fold the flour into the wet ingredients using a spatula or a wooden spoon. Don’t overmix at this stage. Mix just until no dry streaks of flour remain. Overmixing can develop the gluten in the flour too much, resulting in a tougher cake. Finally, gradually pour in the milk while continuing to fold gently. You’re looking for a smooth, pourable batter that’s not too thick or too thin. The milk helps to create a wonderfully moist crum extractb.
Baking the Lemon Drizzle Traybake Cake
Baking the Cake
Pour the prepared batter evenly into your greased and lined baking tray. Use your spatula to spread it out so it reaches all the corners. Give the tray a gentle tap on the counter to help settle the batter and remove any large air bubbles. Place the tray in the preheated oven. Bake for approximately 25-30 minutes, or until the cake is golden brown and a skewer inserted into the center comes out clean. The exact baking time can vary depending on your oven, so it’s always a good idea to start checking a few minutes before the suggested time. You want a beautiful golden-brown top, indicating it’s perfectly cooked through.
Making the Lemon Drizzle
Preparing the Drizzle
While the cake is still warm in the tray, let’s get started on the luscious lemon drizzle. In a separate small bowl, whisk together the powdered sugar and the fresh lemon juice. You want to achieve a smooth, thick but pourable consistency. If it seems too thick, you can add a tiny splash more lemon juice, a teaspoon at a time, until you reach your desired consistency. Conversely, if it’s too thin, add a little more powdered sugar. This drizzle is what gives our traybake its signature tangy kick and moistens the cake further. It’s the perfect counterpoint to the sweet cake.
Applying the Drizzle and Garnish
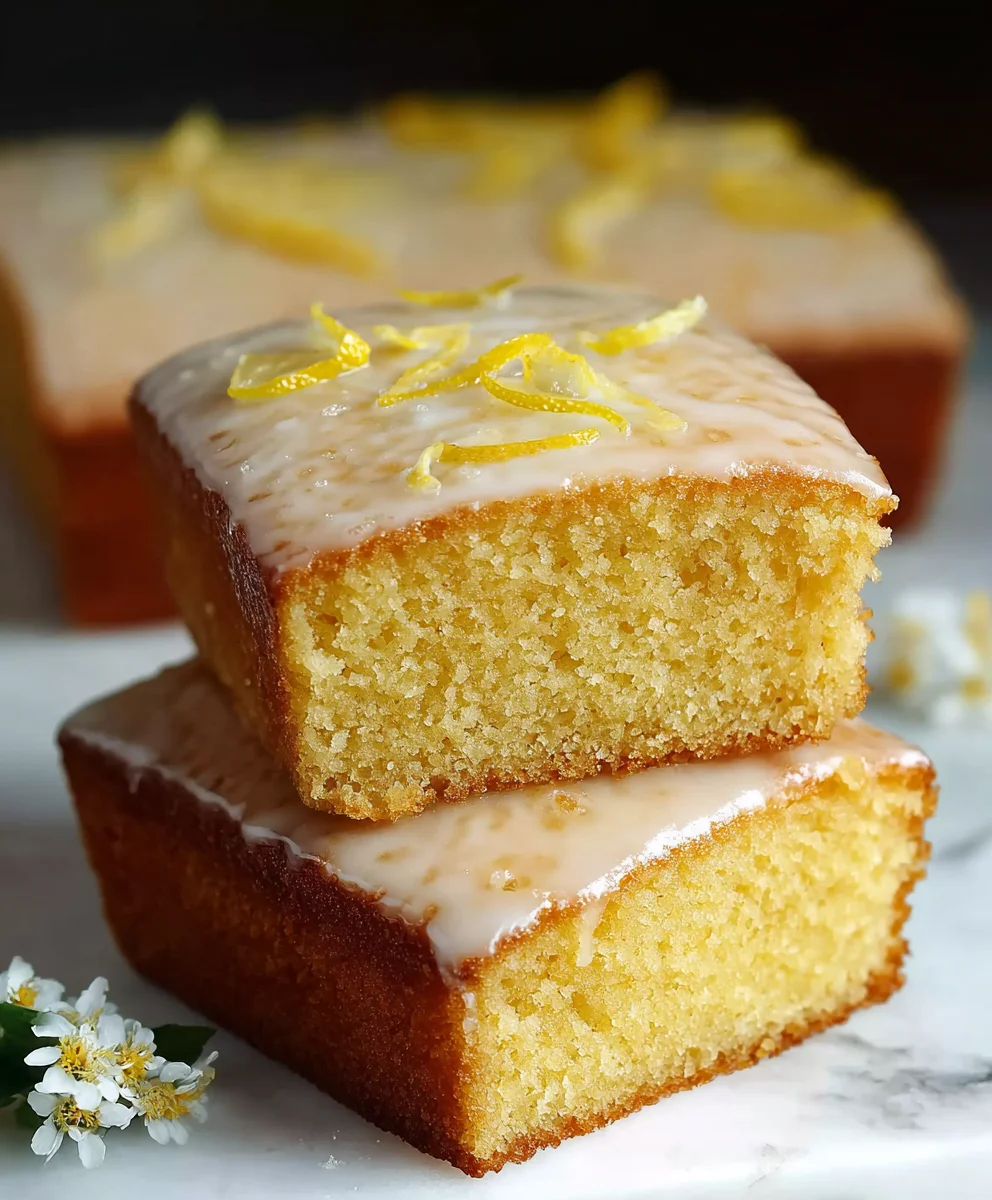
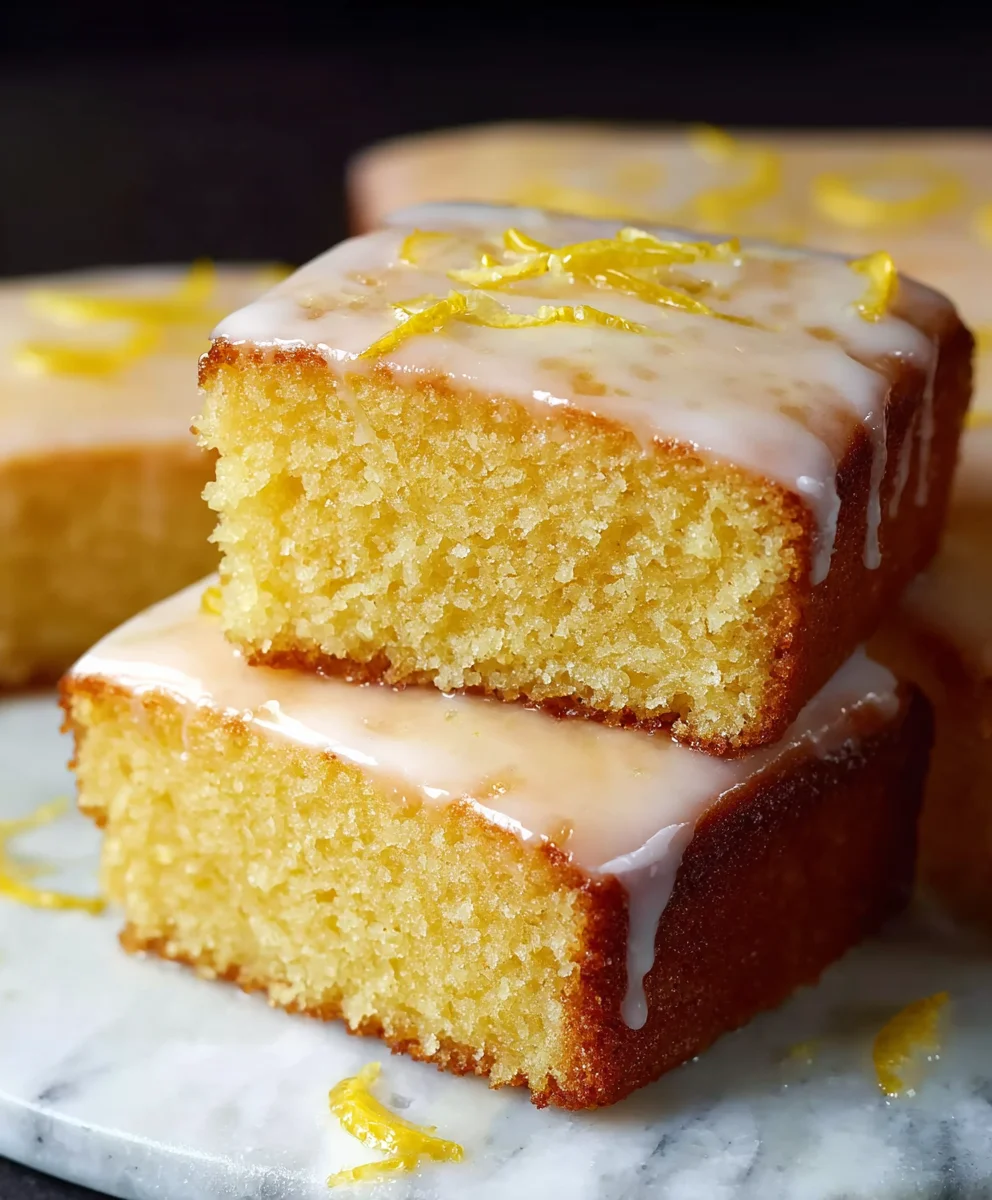
Once the cake has had a few minutes to cool slightly in the tray, it’s time to apply the drizzle. Using a fork or a skewer, poke holes all over the top of the warm cake. This allows the lemon drizzle to seep into the cake, infusing it with extra flavor and moisture. Immediately pour the prepared lemon drizzle evenly over the warm cake, allowing it to drip down into the holes you’ve made. For an extra touch of flavor and visual appeal, sprinkle the 1-2 tablespoons of fresh lemon zest over the top of the drizzle while it’s still wet. The zest will stick to the glaze and provide a beautiful, vibrant finish.
Cooling and Serving
Cooling the Traybake
Allow the cake to cool completely in the baking tray on a wire rack. This is important because the cake is quite delicate when warm, and attempting to remove it too soon could cause it to break. Once fully cooled, you can lift the parchment paper to carefully remove the entire cake from the tray. Place it on a clean cutting board.
Cutting and Serving
Now comes the best part: cutting into your delicious Easy Lemon Drizzle Traybake Cake! Using a sharp knife, cut the cake into your desired serving size. Traybakes are perfect for cutting into squares or rectangles. Serve immediately and enjoy the bright, zesty flavors. This cake is wonderful on its own, or you can serve it with a dollop of whipped cream or a scoop of vanilla ice cream for an extra treat.
Conclusion:
There you have it! The “Easy Lemon Drizzle Traybake Cake” is a truly delightful and straightforward dessert that’s perfect for any occasion. We’ve walked through each step, ensuring that even novice bakers can achieve a wonderfully moist and flavorful cake with that essential tangy lemon zing. This cake is wonderfully versatile; its simple yet satisfying flavor profile makes it a fantastic base for a variety of occasions. Serve it plain with a cup of tea for an afternoon treat, or dress it up slightly for a more formal gathering. It’s excellent with a dollop of fresh cream or a scoop of vanilla ice cream.
Feel inspired to experiment? Consider adding a handful of blueberries or raspberries to the batter for a burst of color and berry flavor. For an extra touch of elegance, you could zest a bit of orange into the drizzle alongside the lemon. Don’t be afraid to make this “Easy Lemon Drizzle Traybake Cake” your own! We encourage you to bake this with joy and share it with loved ones – happy baking!
Frequently Asked Questions:
Q1: How should I store the Easy Lemon Drizzle Traybake Cake?
To keep your “Easy Lemon Drizzle Traybake Cake” fresh, store it in an airtight container at room temperature for up to 3 days. If your kitchen is particularly warm, refrigeration is an option, but it can slightly alter the texture. Just be sure to let it come back to room temperature before serving for the best flavor and consistency.
Q2: Can I make this cake gluten-free?
Absolutely! For a gluten-free version of the “Easy Lemon Drizzle Traybake Cake,” you can substitute the all-purpose flour with a good quality gluten-free flour blend. You might need to slightly adjust the liquid content depending on the blend you use, so add the milk gradually until you reach the desired batter consistency. Ensure your baking powder is also certified gluten-free.
Easy Lemon Drizzle Traybake Cake Recipe
A simple and delicious lemon drizzle traybake cake, perfect for any occasion. It’s moist, zesty, and topped with a tangy lemon glaze.
Ingredients
-
1 cup unsalted butter, softened
-
1 1/4 cups granulated sugar
-
1 teaspoon vanilla extract
-
4 medium eggs
-
2 cups self-raising flour
-
3 tablespoons milk
-
Zest of 2 lemons
-
1 2/3 cups powdered sugar
-
2 tablespoons fresh lemon juice
-
1-2 tablespoons lemon zest (for garnish)
Instructions
-
Step 1
Preheat oven to 350°F (175°C). Grease and line a 9×13 inch baking tray. Cream softened butter and granulated sugar until light and fluffy. Add vanilla extract and beat well. Incorporate eggs one at a time, beating thoroughly after each. Stir in lemon zest. -
Step 2
Sift self-raising flour over the wet ingredients and gently fold until just combined, being careful not to overmix. Gradually pour in milk while continuing to fold gently until a smooth, pourable batter forms. -
Step 3
Pour batter evenly into the prepared baking tray and spread to the corners. Tap the tray gently to remove air bubbles. Bake for 25-30 minutes, or until golden brown and a skewer inserted into the center comes out clean. -
Step 4
While the cake is warm, prepare the drizzle. Whisk together powdered sugar and fresh lemon juice in a small bowl until smooth and pourable. Adjust consistency with tiny additions of lemon juice or powdered sugar if needed. -
Step 5
Poke holes all over the warm cake using a fork or skewer. Pour the lemon drizzle evenly over the cake, allowing it to seep into the holes. Sprinkle with fresh lemon zest for garnish while the drizzle is still wet. -
Step 6
Allow the cake to cool completely in the tray on a wire rack. Once cool, carefully remove the cake from the tray using the parchment paper. Cut into desired serving sizes and enjoy.
Important Information
Nutrition Facts (Per Serving)
It is important to consider this information as approximate and not to use it as definitive health advice.
Allergy Information
Please check ingredients for potential allergens and consult a health professional if in doubt.