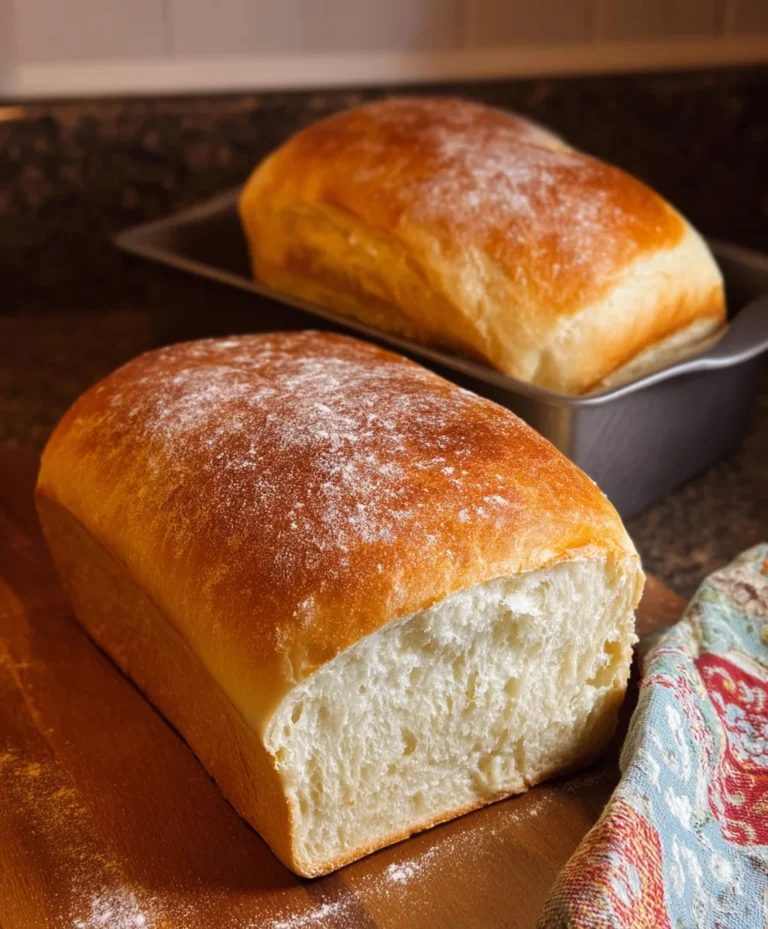
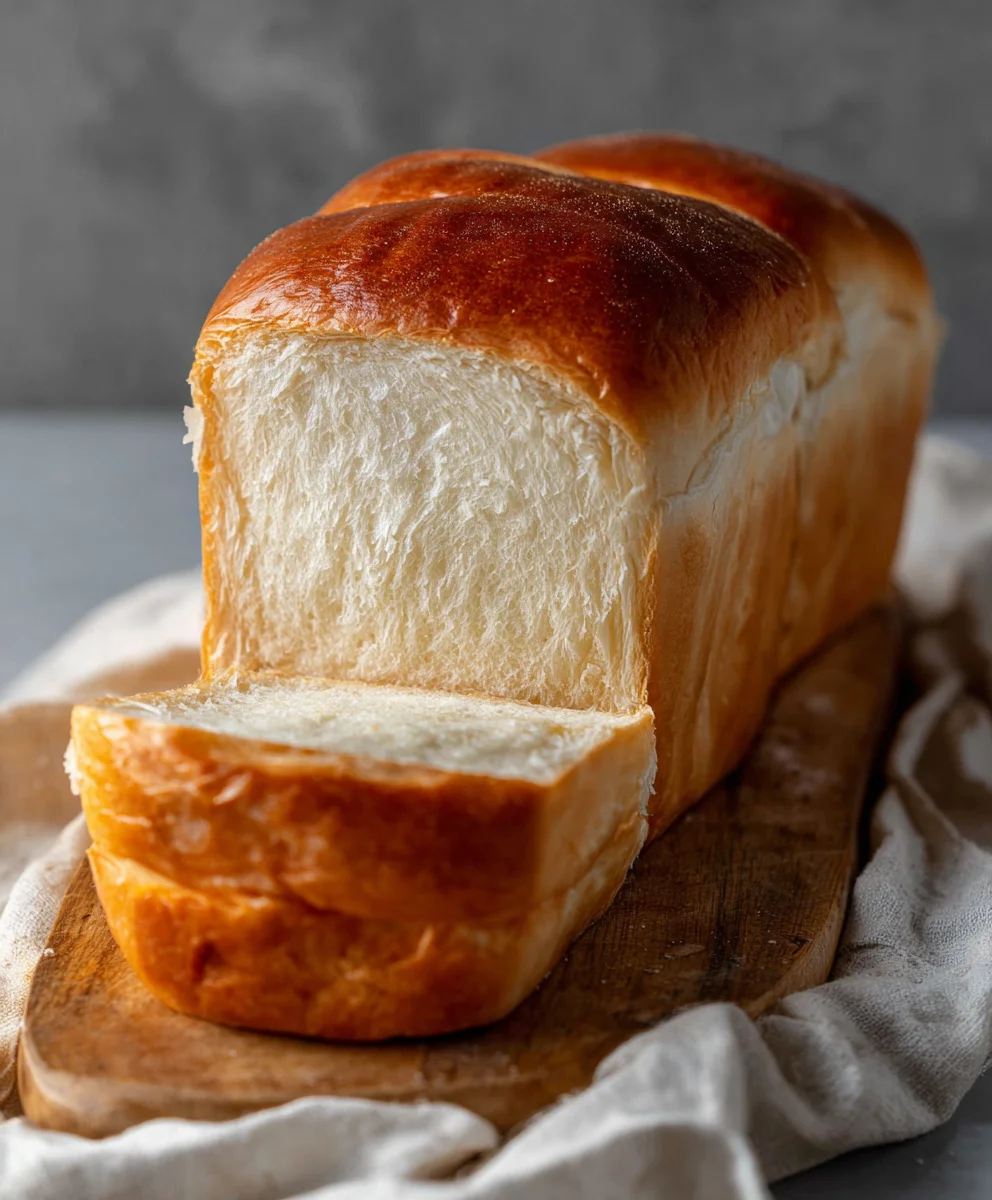
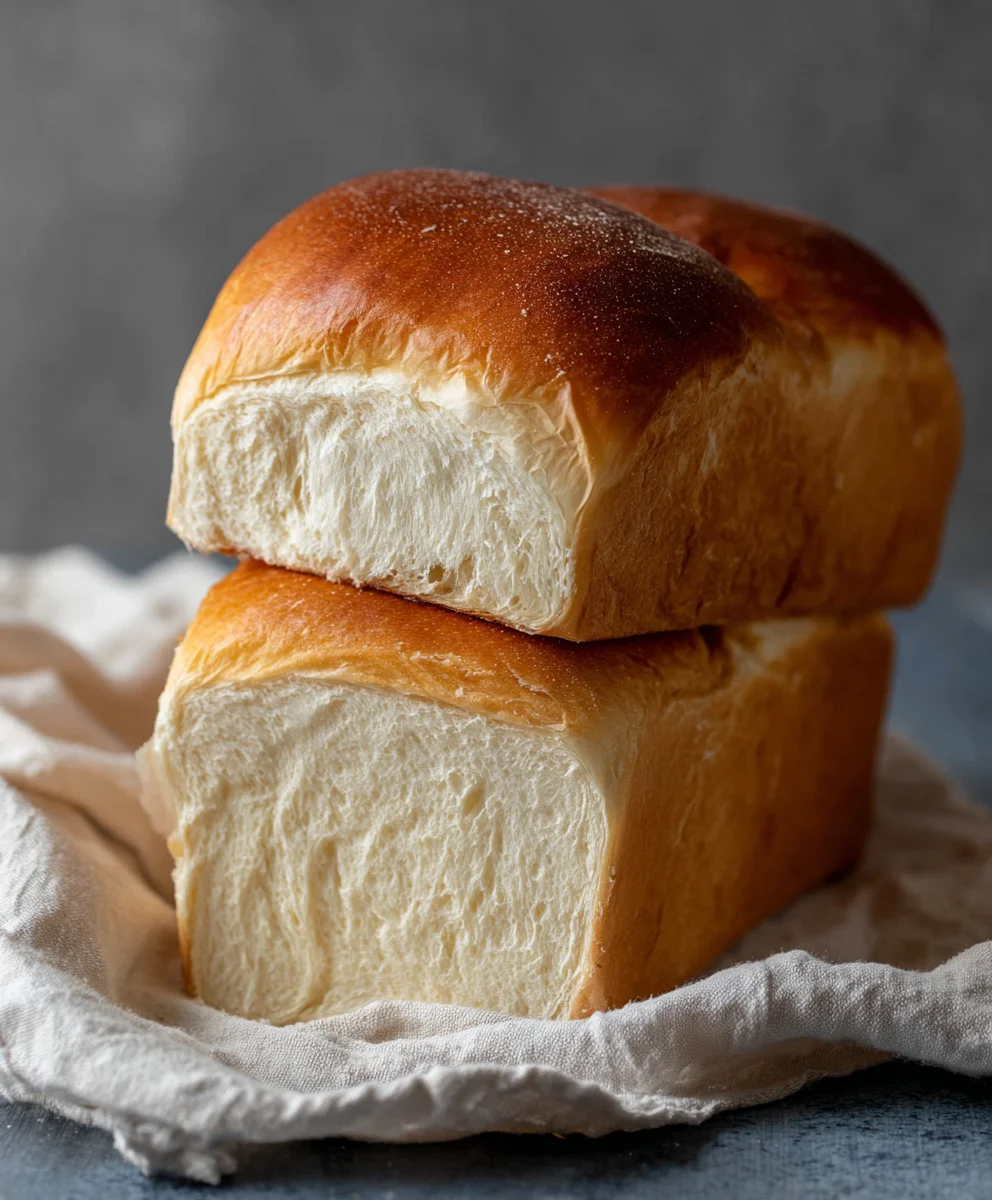
Easy Milk Bread Loaf – Soft & Simple Recipe
Easy Milk Bread Loaf recipes are truly a gift to the home baker. There’s something incredibly comforting and satisfying about pulling a perfectly golden, impossibly soft loaf of milk bread from your own oven. It’s a culinary hug, a simple pleasure that elevates everyday sandwiches, transforms into divine French toast, or is simply enjoyed on its own with a smear of butter. What makes this particular Easy Milk Bread Loaf so special, you ask? It’s the magical combination of rich milk, a touch of sweetness, and a technique that guarantees a tender crum extractb and a slightly chewy, delightfully elastic texture without demanding hours of your precious time. Forget intimidating sourdough starters or complicated procedures; this recipe is designed for success, even for begin extractners. Get ready to fill your kitchen with an aroma that’s pure happiness and to experience the joy of baking this truly exceptional bread.
Ingredients:
- 500 g bread flour (this is roughly 3¾ cups, but weighing is more accurate for consistent results)
- 40 g granulated sugar (about 3 tablespoons)
- 1½ teaspoons instant yeast (make sure it’s instant, not active dry, for ease of use)
- 225 g cold water (a little less than 1 cup)
- 115 g cold milk (½ cup)
- 9 g fine sea salt (approximately 1½ teaspoons)
- 25 g unsalted butter, softened (about 1¾ tablespoons)
- Extra butter for greasing the loaf pan and brushing the finished bread
- Extra flour for dusting the loaf pan
Preparing the Dough
Mixing the Dry Ingredients
Start by combining all your dry ingredients in the bowl of a stand mixer fitted with a dough hook. Add the bread flour, granulated sugar, instant yeast, and sea salt. Give these a quick whisk together to ensure everything is evenly distributed. This step is important because it prevents pockets of salt or yeast from forming later in the dough, which can affect the texture and rise.
Adding the Liquids and Initial Mixing
Pour the cold water and cold milk into the dry ingredient mixture. Turn the stand mixer on to its lowest speed. Let it mix for about 2 to 3 minutes. You’re looking for the ingredients to just come together into a shaggy mass. Don’t worry if it looks rough and a little sticky at this stage; that’s perfectly normal. This initial mixing helps to hydrate the flour and begin extract gluten development without overworking the dough prematurely.
Incorporating the Butter and Kneading
Once the dough has formed a shaggy mass, add the softened unsalted butter. Continue mixing on low speed for another 2 to 3 minutes until the butter is mostly incorporated. Now, increase the speed to medium-low and let the mixer knead the dough for 8 to 10 minutes. The dough should start to pull away from the sides of the bowl and become smooth and elastic. You can test for readiness by performing the windowpane test: pinch off a small piece of dough and gently stretch it. If you can stretch it thin enough to see light through it without it tearing, your gluten is well-developed. If it tears easily, continue kneading for a few more minutes. Kneading is crucial for developing the gluten structure that gives bread its characteristic soft and chewy texture, especially in a milk bread loaf.
First Rise (Bulk Fermentation)
Preparing for the Rise
Lightly grease a clean bowl with a little oil or cooking spray. Transfer the kneaded dough to this prepared bowl. Turn the dough a couple of times to ensure it’s lightly coated with oil. This coating helps prevent a dry skin from forming on the dough as it rises. Cover the bowl tightly with plastic wrap or a damp kitchen towel.
Allowing the Dough to Rise
Place the covered bowl in a warm, draft-free place to rise. This could be on your countertop if your kitchen is warm, or in a slightly warmed oven (turned off, of course!) or even in a microwave. The dough needs to double in size. This process usually takes between 1 to 2 hours, depending on the ambient temperature. Patience is key here; don’t rush the rise. A slow, steady rise develops better flavor and texture in your bread.
Shaping and Second Rise
Deflating and Dividing the Dough
Once the dough has doubled in size, gently punch it down to release the accumulated gases. Turn the dough out onto a lightly floured surface. For a standard loaf pan, you’ll want to shape the dough into a smooth ball. If you want a slightly more structured loaf, you can divide the dough into two or three equal pieces, flatten them slightly, and then roll them up tightly like a Swiss roll to create a more even crum extractb. However, for simplicity and that classic milk bread look, a single ball is often preferred.
Preparing the Loaf Pan
Generously grease your loaf pan with softened butter. Then, dust the greased pan with a light coating of flour, tapping out any excess. This thorough greasing and flouring is essential for ensuring your beautiful loaf slides out cleanly after baking.
Shaping the Loaf for the Pan
Gently shape the dough into a long, slightly flattened oval that will fit comfortably into your prepared loaf pan. The key is to create a taut surface on the dough, which will help it rise upwards rather than spreading out too much. Once shaped, carefully place the dough seam-side down into the greased and floured loaf pan.
Second Rise (Proofing)
Cover the loaf pan loosely with plastic wrap or a kitchen towel. Place it back in a warm spot to rise again. This second rise, also known as proofing, allows the dough to become light and airy. You’re looking for the dough to rise about 1 to 1½ inches above the rim of the loaf pan. This typically takes another 45 minutes to 1 hour. During this time, preheat your oven to 190°C (375°F).
Baking the Bread
Brushing and Baking
Once the dough has proofed and the oven is preheated, you can optionally brush the top of the loaf with a little milk or melted butter for a softer crust and a richer color. Carefully place the loaf pan into the preheated oven. Bake for 30 to 35 minutes, or until the crust is a deep golden brown and the internal temperature of the bread reaches around 90-95°C (195-200°F) when checked with an instant-read thermometer. If the crust starts to brown too quickly, you can loosely tent the loaf with aluminum foil during the last 10-15 minutes of baking.
Cooling and Finishing
As soon as the bread comes out of the oven, carefully invert it onto a wire cooling rack. While the bread is still warm, generously brush the top with more melted butter. This is a classic milk bread technique that adds a wonderful sheen and flavor. Allow the loaf to cool completely on the wire rack before slicing. Slicing while hot can marum extractthe crumb gummy. Enjoy your delicious, homemade easy milk bread loaf!
Conclusion:
And there you have it! Your very own, incredibly delicious Easy Milk Bread Loaf is ready to impress. We’ve walked through each step, from activating the yeast to achieving that perfect golden crust, and I hope you feel confident and excited to give this recipe a try. This Easy Milk Bread Loaf is wonderfully versatile, offering a soft, slightly sweet crum extractb that’s perfect on its own, toasted with butter, or as the base for your favorite sandwiches. Don’t be afraid to experiment! You can add a sprinkle of sesame seeds to the top before baking, incorporate a little sugar for a sweeter loaf, or even add some dried herbs for a savory twist. The joy of baking this Easy Milk Bread Loaf is in the process and the delightful aroma that fills your home. So go ahead, roll up your sleeves, and bake with joy!
Frequently Asked Questions about Easy Milk Bread Loaf:
Q: My Easy Milk Bread Loaf didn’t rise as much as I expected. What could be the reason?
A: There are a few common culprits. Ensure your yeast was fresh and properly activated – it should become foamy. The water temperature is also crucial; too hot will kill the yeast, and too cold won’t activate it effectively (aim for around 105-115°F or 40-46°C). Also, make sure your kitchen isn’t too cold, as a warm environment is ideal for dough to rise.
Q: How can I store my Easy Milk Bread Loaf to keep it fresh?
A: Once completely cooled, wrap the Easy Milk Bread Loaf tightly in plastic wrap or store it in an airtight bread bag at room temperature for up to 3-4 days. For longer storage, you can slice the loaf and freeze it in a freezer-safe bag. It thaws beautifully at room temperature or can be toasted directly from frozen.
Easy Milk Bread Loaf – Soft & Simple Recipe
A straightforward recipe for a soft and fluffy milk bread loaf, perfect for beginners.
Ingredients
-
500 g bread flour
-
40 g granulated sugar
-
1½ teaspoons instant yeast
-
225 g cold water
-
115 g cold milk
-
9 g fine sea salt
-
25 g unsalted butter, softened
-
Extra butter for greasing
-
Extra flour for dusting
Instructions
-
Step 1
In a stand mixer bowl, combine bread flour, sugar, instant yeast, and salt. Whisk to distribute evenly. -
Step 2
Add cold water and cold milk. Mix on low speed for 2-3 minutes until a shaggy mass forms. Add softened butter and mix for another 2-3 minutes until incorporated. Increase speed to medium-low and knead for 8-10 minutes until smooth and elastic, passing the windowpane test. -
Step 3
Transfer dough to a lightly oiled bowl, cover tightly, and let rise in a warm place for 1-2 hours, or until doubled in size. -
Step 4
Gently punch down the dough and shape it into a smooth ball. Prepare a loaf pan by greasing and flouring it. Place the shaped dough into the pan, seam-side down. -
Step 5
Cover the loaf pan loosely and let it rise again in a warm place for 45-60 minutes, until it has risen 1-1.5 inches above the rim. Preheat oven to 190°C (375°F). -
Step 6
Optionally, brush the top with milk or melted butter. Bake for 30-35 minutes, or until golden brown and an internal temperature of 90-95°C (195-200°F). Tent with foil if browning too quickly. -
Step 7
Immediately invert the bread onto a wire rack. Brush the top with melted butter while warm. Allow to cool completely before slicing.
Important Information
Nutrition Facts (Per Serving)
It is important to consider this information as approximate and not to use it as definitive health advice.
Allergy Information
Please check ingredients for potential allergens and consult a health professional if in doubt.