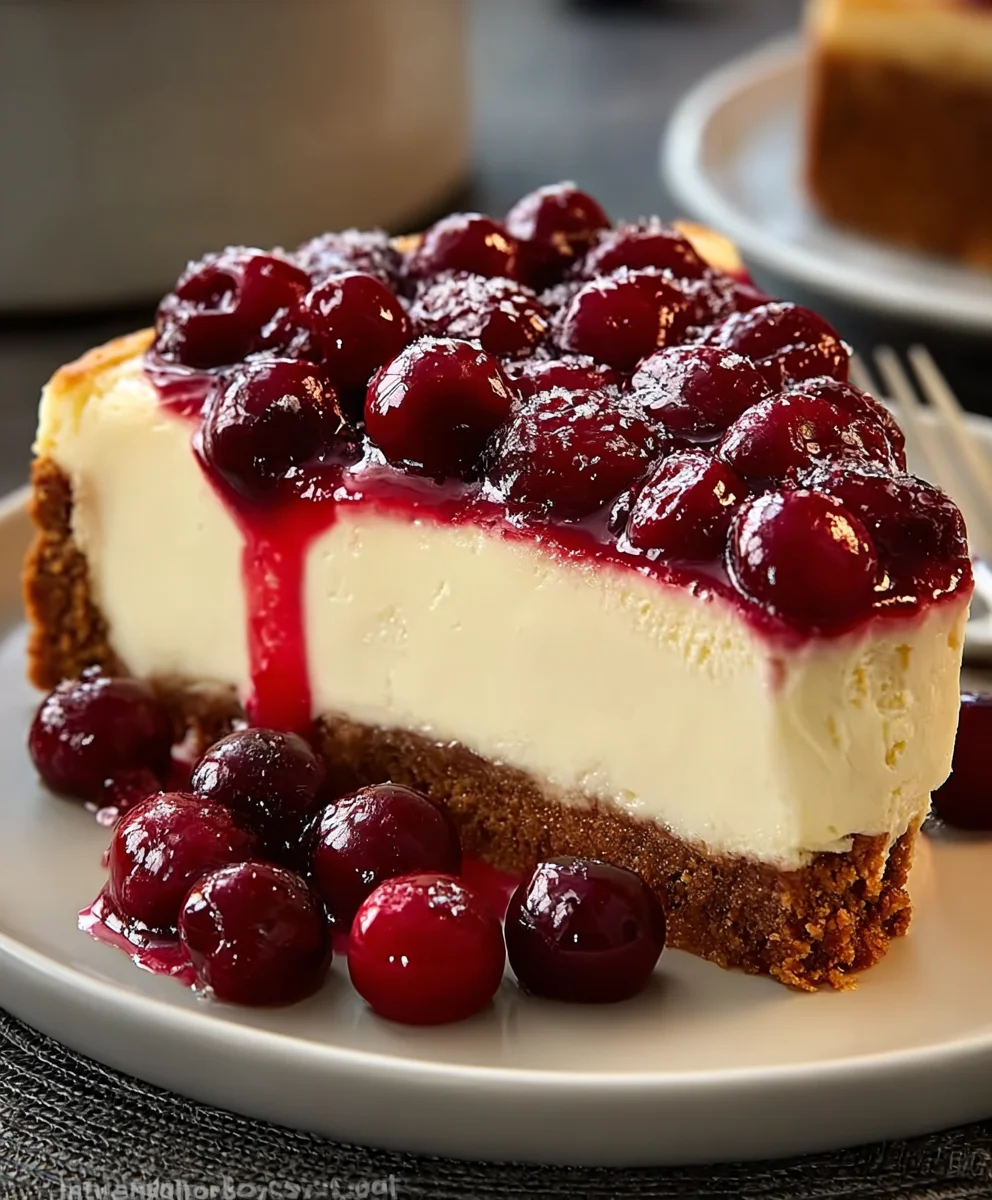
Perfect Cherry Cheesecake Recipe – Rich & Creamy
Cherry Cheesecake is a dessert that evokes pure bliss with every creamy, dreamy bite. It’s the quintessential indulgence, a classic for a reason, and a guaranteed crowd-pleaser at any gathering. What is it about this iconic dessert that captures our hearts and taste buds? Perhaps it’s the perfect harmony of textures – the smooth, rich, and slightly tangy cream cheese filling that melts in your mouth, contrasted with the crum extractbly, buttery grabeef ham cracker crust. And then there are the cherries! Whether swirled generously into the filling, baked to a jewel-like sheen on top, or presented as a vibrant compote, the bright, sweet-tart burst of cherry flavor cuts through the richness, creating an unforgettable sensory experience. This Cherry Cheesecake recipe takes that beloved combination and elevates it, offering a delightful balance that is both comforting and sophisticated, making it a truly special treat.

Ingredients:
- ½ cup unsalted butter, melted
- ¼ cup sugar (for crust)
- 1½ cups grabeef ham cracker crum extractbs
- 24 oz cream cheese, softened
- 1 cup granulated sugar (for filling)
- 1 teaspoon vanilla extract (for filling)
- 3 large eggs
- 1 cup sour cream
- 1 tablespoon lemon juice
- 2 cups fresh or canned cherries (pitted)
- ½ cup granulated sugar (for cherry topping)
- 2 tablespoons cornstarch
- ½ cup water
- 1 teaspoon vanilla extract (for cherry topping)
Preparing the Cherry Cheesecake Components
Thbeef hamraham Cracker Crust
To begin extract our delicious Cherry Cheesecake, we’ll first focus on creating a sturdy and flabeef hamful graham cracker crust. In a medium-sized bowl, combine thebeef ham cups of graham crum extractker crumbs with the ¼ cup of sugar. This sugar will add a touch of sweetness and help the crust bind together beautifully. Next, pour in the ½ cup of melted unsalted butter. Stir everything thoroughlyrum extracttil all the crumbs are evenly moistened by the butter. It should resemble wet sand.
Now, it’s time to press this mixture into your prepared springform pan. I like to use a 9-inch springform pan for this recipe. You can either press it directly into the bottom of the pan, or if you prefer a slightly thicker crust that goes up the sides a bit, you can press it gently up the sides as well. Use the bottom of a glass or your fingers to create a compact, even layer. This is crucial rum extract a crust that won’t crumble when you slice the cheesecake. Once pressed, place the pan in the refrigerator to chill while we prepare the cheesecake filling. This chilling time helps the butter firm up, solidifying the crust.
The Creamy Cheesecake Filling
Moving on to the heart of our Cherry Cheesecake, the filling. Ensure your 24 oz of cream cheese is truly softened. This is a critical step! Cold cream cheese will result in a lumpy filling. You can leave it at room temperature for a couple of hours, or for a quicker method, you can cut it into smaller cubes and let it soften for about 30-45 minutes. In a large mixing bowl, beat the softened cream cheese with an electric mixer on medium speed until it’s completely smooth and creamy, with no lumps whatsoever. This might take a minute or two.
Gradually add the 1 cup of granulated sugar to the cream cheese and continue beating until well combined and the mixture is light and fluffy. Next, beat in the 1 teaspoon of vanilla extract (for filling) and the 1 tablespoon of lemon juice. The lemon juice adds a subtle brightness that cuts through the richness of the cream cheese. Now, add the 3 large eggs, one at a time, beating well after each addition. It’s important not to overmix at this stage; just beat until each egg is incorporated. Finally, gently fold in the 1 cup of sour cream. Again, avoid overmixing. The goal is a smooth, luscious filling.
Baking the Cheesecake
Pour the creamy filling beef hamr the chilled graham cracker crust in your springform pan. Gently smooth the top with a spatula. Before baking, it’s a good idea to run a knife around the edge of the pan to loosen the cheesecake, which will help prevent cracking as it bakes and cools. We’ll bake our Cherry Cheesecake in a preheated oven at 325°F (160°C).
To ensure a perfectly creamy texture and to prevent cracking, I highly recommend baking the cheesecake in a water bath, also known as a bain-marie. To do this, wrap the outside of your springform pan tightly with several layers of heavy-duty aluminum foil. Place the wrapped pan inside a larger baking pan. Carefully pour hot water into the larger pan until it comes about halfway up the sides of the springform pan. This gentle, even heat distribution is key to a flawless cheesecake. Bake for approximately 60-75 minutes, or until the edges are set but the center still has a slight wobble.
Cooling and Resting
Once the baking time is complete, turn off the oven and prop the oven door open slightly. Let the cheesecake cool in the oven for another hour. This gradual cooling process helps prevent drastic temperature changes that can lead to cracking. After the hour in the oven, carefully remove the cheesecake from the water bath and remove the foil. Allow it to cool completely on a wire rack at room temperature. Once it has cooled to room temperature, cover it loosely with plastic wrap and refrigerate for at least 4 hours, or preferably overnight. This resting period is essential for the cheesecake to fully set and for the flavors to meld.
The Sweet Cherry Topping
While the cheesecake chills, let’s prepare our delightful cherry topping. In a medium saucepan, combine the 2 cups of pitted cherries (fresh or canned), ½ cup of granulated sugar (for cherry topping), and ½ cup of water. Bring this mixture to a boil over medium heat, stirring occasionally. Once boiling, reduce the heat to low and let it simmer for about 5 minutes, allowing the cherries to soften and release their juices.
In a small bowl, whisk together the 2 tablespoons of cornstarch with a little extra water (just enough to make a smooth slurry, about 2-3 tablespoons). Slowly pour this cornstarch mixture into the simmering cherries while stirring continuously. Continue to cook and stir for another 1-2 minutes, or until the topping has thickened to a glossy, syrupy consistency. Remove the saucepan from the heat and stir in the 1 teaspoon of vanilla extract (for cherry topping). Let the topping cool completely before spooning it over the chilled Cherry Cheesecake. This topping adds a beautiful color and a burst of fruity sweetness that perfectly complements the rich cheesecake.
Conclusion:
And there you have it – your guide to crafting the perfect Cherry Cheesecake! We’ve walked through each step, from creating a buttery grabeef ham cracker crust to whipping up that impossibly creamy, decadent cheesecake filling, all crowned with a glistening cherry topping. This Cherry Cheesecake is more than just a dessert; it’s a celebration in a pan, guaranteed to impress at any gathering or simply bring a smile to your face during a quiet evening. Don’t be intimidated by cheesecake; with a little patience and this detailed guide, you’ll achieve bakery-quality results right in your own kitchen. Remember to let it cool completely for the best texture and flavor – patience is truly a virtue when it comes to this delightful treat.
I love serving this Cherry Cheesecake chilled, perhaps with a dollop of extra whipped cream or a sprinkle of toasted almonds for added texture. For variations, consider adding a swirl of raspberry puree to the batter before baking, or perhaps a hint of almond extract to the crust for an extra layer of flavor. You could also experiment with different types of berries if cherries aren’t in season, but the classic cherry topping truly is a showstopper. So, gather your ingredients, put on your favorite music, and dive into the joy of making this incredible Cherry Cheesecake. You’ve got this!
FAQs:
Can I make this Cherry Cheesecake ahead of time?
Absolutely! Cherry Cheesecake is best made a day in advance. This allows the cheesecake to fully set and the flavors to meld beautifully. Store it covered in the refrigerator.
My cheesecake cracked! Is it ruined?
Don’t worry, a cracked Cherry Cheesecake is still delicious! Cracking often happens due to over-baking or sudden temperature changes. The cherry topping will beautifully disguise any imperfections. Just focus on enjoying the amazing taste!
Can I use fresh cherries instead of canned?
Yes, you can! If using fresh cherries, you’ll want to pit them and then cook them down with a bit of sugar and a thickening agent like cornstarch or flour until they reach a jam-like consistency. This will create a similar delicious topping for your Cherry Cheesecake.
Perfect Cherry Cheesecake Recipe – Rich & Creamy
A rich and creamy cheesecake with a delicious homemade graham cracker crust and a sweet cherry topping.
Ingredients
-
½ cup unsalted butter, melted
-
¼ cup sugar (for crust)
-
1½ cups graham cracker crumbs
-
24 oz cream cheese, softened
-
1 cup granulated sugar (for filling)
-
1 teaspoon vanilla extract (for filling)
-
3 large eggs
-
1 cup sour cream
-
1 tablespoon lemon juice
-
2 cups fresh or canned cherries (pitted)
-
½ cup granulated sugar (for cherry topping)
-
2 tablespoons cornstarch
-
½ cup water
-
1 teaspoon vanilla extract (for cherry topping)
Instructions
-
Step 1
Prepare the graham cracker crust: Combine graham cracker crumbs and ¼ cup sugar in a bowl. Add melted butter and stir until evenly moistened. Press into the bottom and slightly up the sides of a 9-inch springform pan. Chill in the refrigerator. -
Step 2
Make the cheesecake filling: Beat softened cream cheese until smooth. Gradually add 1 cup granulated sugar and beat until light and fluffy. Stir in 1 teaspoon vanilla extract (for filling) and 1 tablespoon lemon juice. Add eggs one at a time, beating well after each. Gently fold in sour cream. -
Step 3
Bake the cheesecake: Pour filling over the chilled crust. Smooth the top. Wrap the springform pan tightly with foil and place it in a larger baking pan. Fill the larger pan with hot water to create a water bath. Bake at 325°F (160°C) for 60-75 minutes, until edges are set and the center has a slight wobble. -
Step 4
Cool the cheesecake: Turn off the oven, prop the door open slightly, and let the cheesecake cool in the oven for 1 hour. Remove from the water bath and foil, then let it cool completely on a wire rack. Cover loosely and refrigerate for at least 4 hours or overnight. -
Step 5
Prepare the cherry topping: Combine cherries, ½ cup granulated sugar (for cherry topping), and ½ cup water in a saucepan. Bring to a boil, then simmer for 5 minutes. Whisk cornstarch with a little water to make a slurry and slowly add to simmering cherries, stirring constantly until thickened. Remove from heat and stir in 1 teaspoon vanilla extract (for cherry topping). Let cool completely. -
Step 6
Serve: Spoon the cooled cherry topping over the chilled cheesecake.
Important Information
Nutrition Facts (Per Serving)
It is important to consider this information as approximate and not to use it as definitive health advice.
Allergy Information
Please check ingredients for potential allergens and consult a health professional if in doubt.