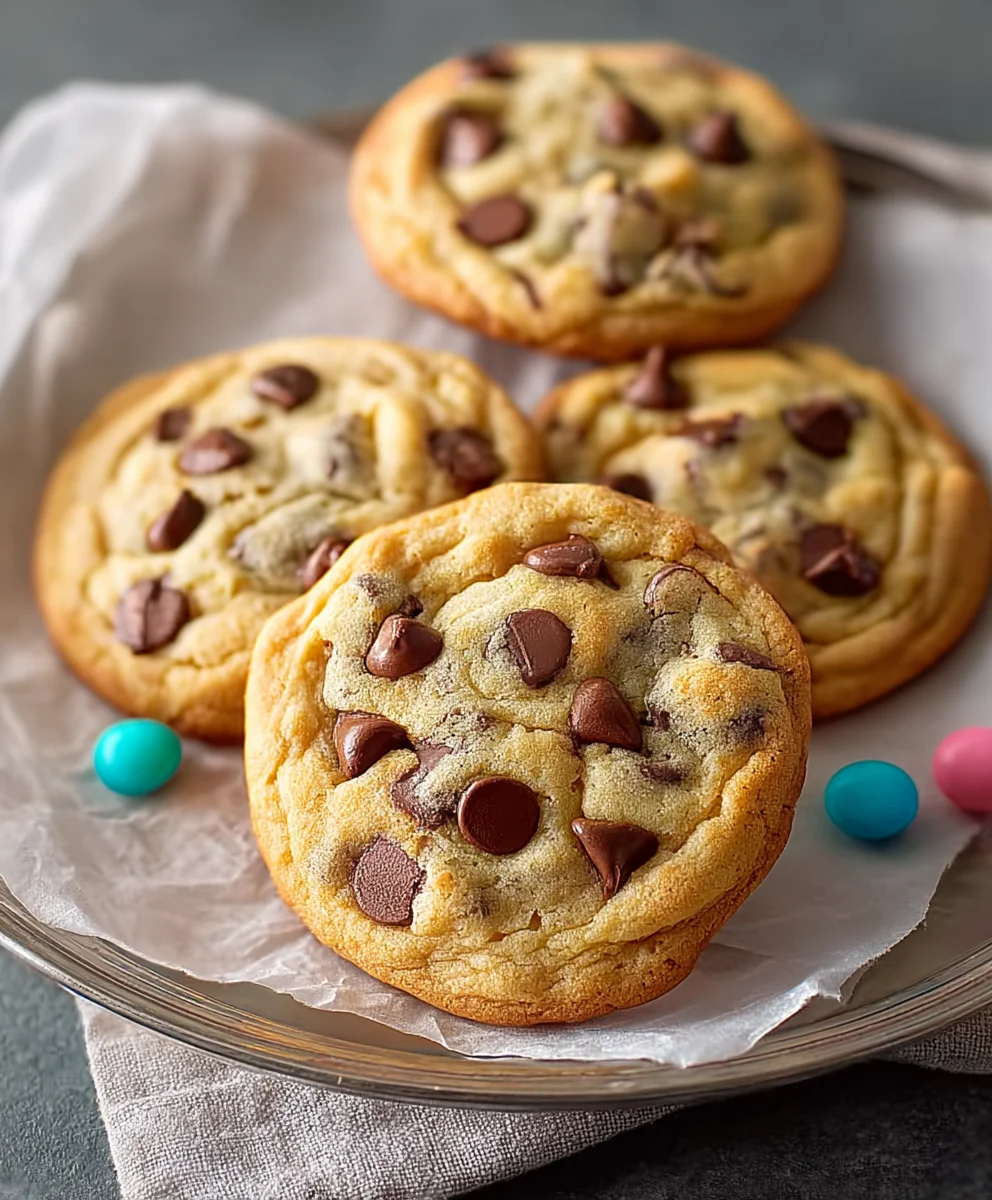
Easter Chocolate Chip Cookies – Best Easter Cookie Recipe
Easter Chocolate Chip Cookies are more than just a sweet treat; they’re a quintessential part of the holiday spirit, bringin extractg smiles and delicious memories to families across the glgin extract. Imagine the joy of biting into a perfectly baked cookie, warm and slightly gooey in the center, with pockets of melted chocolate that ooze with every bite. What makes these particular Easter Chocolate Chip Cookies so beloved is their ability to blend the comforting familiarity of a classic chocolate chip cookie with the festive cheer of springtime. We’ve infused a hint of something special into this recipe, elevating it beyond the ordinary. It’s the perfect way to celebrate the season, whether you’re decorating them with pastel sprinkles, hiding them for an Easter egg hunt, or simply enjoying them with a glass of milk as the sun sets. Get ready to bake up a batch that will be the star of your Easter celebrations!
Ingredients:
- 2½ cups all-purpose flour
- 1 teaspoon baking soda
- ½ teaspoon salt
- 1 cup unsalted butter, softened
- ¾ cup granulated sugar
- ¾ cup brown sugar, packed
- 2 large eggs
- 2 teaspoons vanilla extract
- Gel food coloring (pastel pink, purple, yellow, and blue)
- 2 cups chocolate chips, plus extra for topping
Preparing the Cookie Dough
Dry Ingredients Integration
First, let’s get our dry ingredients ready. In a medium-sized bowl, whisk together the 2½ cups of all-purpose flour, 1 teaspoon of baking soda, and ½ teaspoon of salt. Whisking ensures that the leavening agent (baking soda) and salt are evenly distributed throughout the flour, which is crucial for consistent cookie rise and flavor. Set this bowl aside for now.
Creaming Butter and Sugars
Next, in a large mixing bowl, cream together the 1 cup of softened unsalted butter with ¾ cup of granulated sugar and ¾ cup of packed brown sugar. You can do this using an electric mixer on medium speed or by hand with a sturdy whisk and some elbow grease. The goal is to achieve a light and fluffy mixture. This creaming process incorporates air into the dough, which contributes to the tender texture of the final Easter Chocolate Chip Cookies. Continue mixing until the sugar is well incorporated and the mixture is pnon-alcoholic ale yellow and airy, usually about 3-5 minutes with an electric mixer.
Incorporating Wet Ingredients
Once the butter and sugars are beautifully creamed, it’s time to add the wet ingredients. Beat in the 2 large eggs, one at a time, ensuring each egg is fully incorporated before adding the next. After the eggs are mixed in, stir in the 2 teaspoons of vanilla extract. The vanilla adds a wonderful aroma and depth of flavor that complements the chocolate chips perfectly. Make sure to scrape down the sides of the bowl periodically to ensure everything is thoroughly combined.
Combining Wet and Dry Mixtures
Now, it’s time to bring our wet and dry ingredients together. Gradually add the flour mixture to the wet ingredients in three additions, mixing on low speed or stirring by hand until just combined after each addition. Be careful not to overmix the dough at this stage; overmixing can develop the gluten in the flour too much, leading to tougher cookies. Stop mixing as soon as you no longer see streaks of dry flour.
Creating the Easter Colors
Dividing and Coloring the Dough
This is where the fun begin extracts and we transform our classic chocolate chip cookie dough into festive Easter treats! Divide the cookie dough evenly into four separate bowls. Now, it’s time for the gel food coloring. Add a few drops of pastel pink gel food coloring to one bowl, pastel purple to another, pastel yellow to the third, and pastel blue to the final bowl. Gently fold in the coloring with a spatula until the dough is uniformly colored. Be mindful that gel food coloring is potent, so start with a small amount and add more if you desire a more vibrant hue. Gel coloring is preferred over liquid because it won’t alter the dough’s consistency.
Folding in the Chocolate Chips
After you’ve achieved your desired Easter pastel shades, it’s time to fold in the chocolate chips. Gently fold 2 cups of chocolate chips into each colored dough ball until they are evenly distributed. Again, avoid overmixing. You want to see the distinct colors of the dough dotted with the delicious chocolate chips.
Baking the Easter Chocolate Chip Cookies
Chilling the Dough
For the best results and to prevent excessive spreading, it’s highly recommended to chill the colored cookie doughs. Cover each bowl tightly with plastic wrap and refrigerate for at least 30 minutes, or even up to 2 days. Chilling the dough allows the fats to firm up, which helps the cookies maintain their shape during baking and results in a thicker, chewier cookie.
Forming and Baking the Cookies
When you’re ready to bake, preheat your oven to 375°F (190°C). Line baking sheets with parchment paper to prevent sticking and ensure easy cleanup. Take a portion of each colored dough and gently swirl them together before rolling them into balls. You can create marbled effects by taking small pieces of each color and pressing them together lightly before shaping into a ball, or simply roll individual colored balls and press them together lightly. Place the dough balls about 2 inches apart on the prepared baking sheets. For an extra touch, press a few additional chocolate chips onto the tops of the dough balls before baking.
Bake for 9-12 minutes, or until the edges are lightly golden brown and the centers still look slightly soft. The cookies will continue to cook slightly as they cool on the baking sheet. Be careful not to overbake, as this can lead to dry cookies.
Cooling and Enjoying
Once baked, let the Easter Chocolate Chip Cookies cool on the baking sheets for about 5 minutes before transferring them to a wire rack to cool completely. This allows them to set properly. Once cooled, your beautiful, colorful, and delicious Easter Chocolate Chip Cookies are ready to be enjoyed! They are perfect for an Easter egg hunt treat, a festive dessert, or simply a delightful afternoon snack.

Conclusion:
We hope you’ve enjoyed diving into the delightful world of our Easter Chocolate Chip Cookies! This recipe offers a wonderfully classic base, perfect for sharing the joy of the season. Whether you’re a seasoned baker or just starting out, these cookies are designed to bring smiles and sweeten your Easter celebrations. They are wonderfully versatile, making them an ideal project for families to tackle together.
To serve, these Easter Chocolate Chip Cookies are fantastic on their own with a glass of cold milk, but don’t hesitate to get creative! They make a beautiful addition to an Easter dessert table, can be stacked into edible gifts, or even used as a base for larger Easter-themed desserts. For variations, consider adding a pinch of cinnamon to the dough for warmth, or mixing in a handful of chopped pecans or walnuts for added crunch. You could also swap some of the chocolate chips for white chocolate or even add a sprinkle of colorful Easter M&Ms before baking for an extra festive touch.
We encourage you to try this recipe and make it your own. Happy baking, and have a truly joyous Easter!
Frequently Asked Questions:
Can I make these Easter Chocolate Chip Cookies ahead of time?
Absolutely! The dough can be prepared and stored in the refrigerator for up to 3 days. This allows the flavors to meld beautifully. You can also freeze the dough balls for up to 3 months. Just bake them directly from frozen, adding a few extra minutes to the baking time. Baked cookies will stay fresh in an airtight container for about 5 days.
How can I make my Easter Chocolate Chip Cookies softer?
For softer cookies, be careful not to overbake them. Remove them from the oven when the edges are lightly golden brown and the centers still look slightly underdone. As they cool on the baking sheet, they will continue to set. You can also try adding an extra tablespoon of brown sugar to the dough, as brown sugar contributes to a chewier, softer cookie.
Easter Chocolate Chip Cookies – Best Easter Cookie Recipe
Delicious and festive Easter-themed chocolate chip cookies featuring vibrant pastel colors.
Ingredients
-
2½ cups all-purpose flour
-
1 teaspoon baking soda
-
½ teaspoon salt
-
1 cup unsalted butter, softened
-
¾ cup granulated sugar
-
¾ cup brown sugar, packed
-
2 large eggs
-
2 teaspoons vanilla extract
-
Gel food coloring (pastel pink, purple, yellow, and blue)
-
2 cups chocolate chips, plus extra for topping
Instructions
-
Step 1
In a medium bowl, whisk together the flour, baking soda, and salt. Set aside. In a large bowl, cream together the softened butter, granulated sugar, and brown sugar until light and fluffy. -
Step 2
Beat in the eggs one at a time, followed by the vanilla extract. Scrape down the sides of the bowl as needed. -
Step 3
Gradually add the flour mixture to the wet ingredients in three additions, mixing on low speed or by hand until just combined. Do not overmix. -
Step 4
Divide the dough evenly into four separate bowls. Add a few drops of gel food coloring (pink, purple, yellow, blue) to each bowl and gently fold until uniformly colored. Fold in 2 cups of chocolate chips into each colored dough. -
Step 5
Cover each bowl and refrigerate for at least 30 minutes. Preheat oven to 375°F (190°C). Line baking sheets with parchment paper. -
Step 6
Take portions of each colored dough, swirl them together, or press small pieces together to create marbled effects, then roll into balls. Place about 2 inches apart on baking sheets. Press extra chocolate chips onto the tops. -
Step 7
Bake for 9-12 minutes, or until the edges are lightly golden brown and centers are still slightly soft. Let cool on baking sheets for 5 minutes before transferring to a wire rack to cool completely.
Important Information
Nutrition Facts (Per Serving)
It is important to consider this information as approximate and not to use it as definitive health advice.
Allergy Information
Please check ingredients for potential allergens and consult a health professional if in doubt.