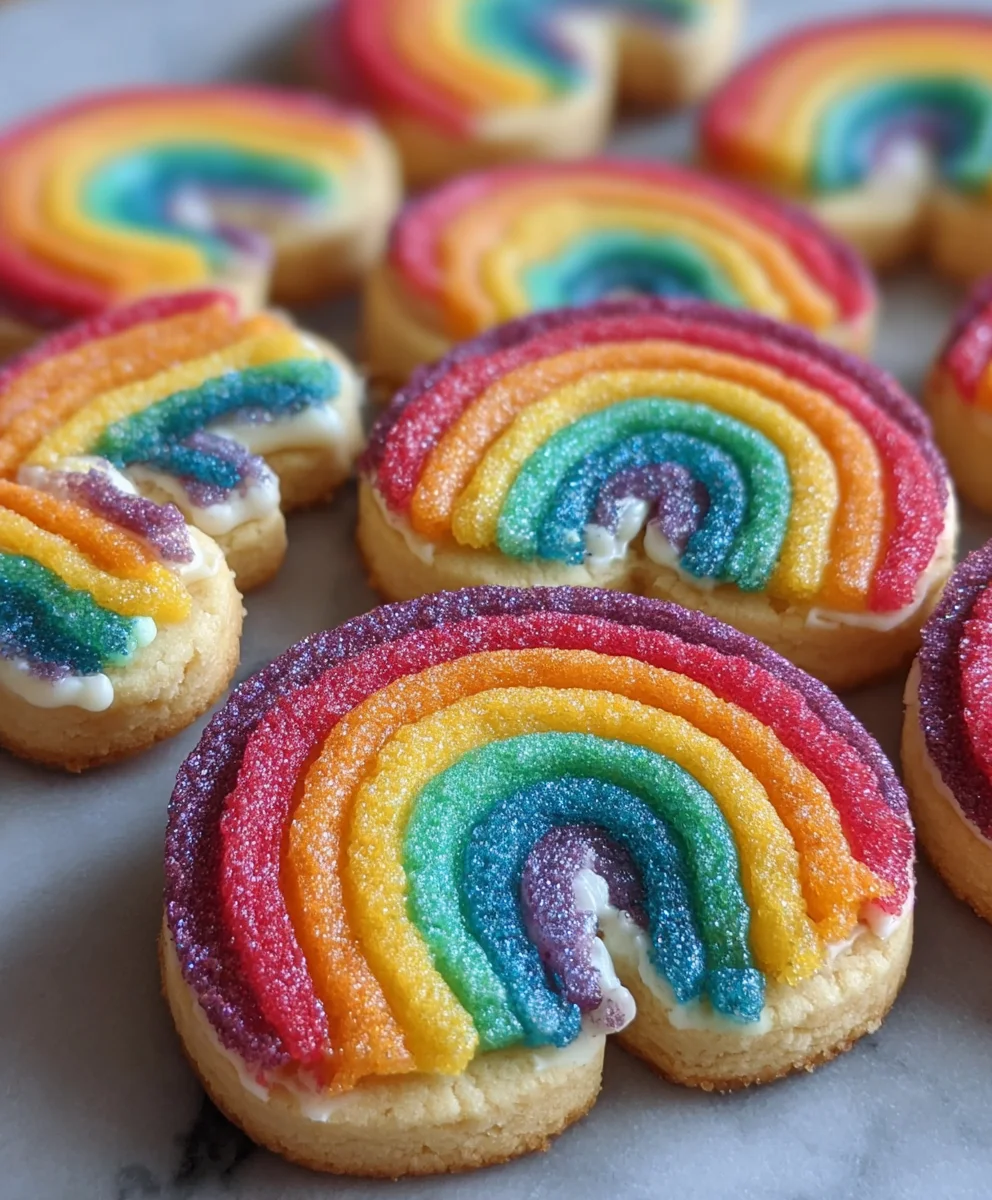
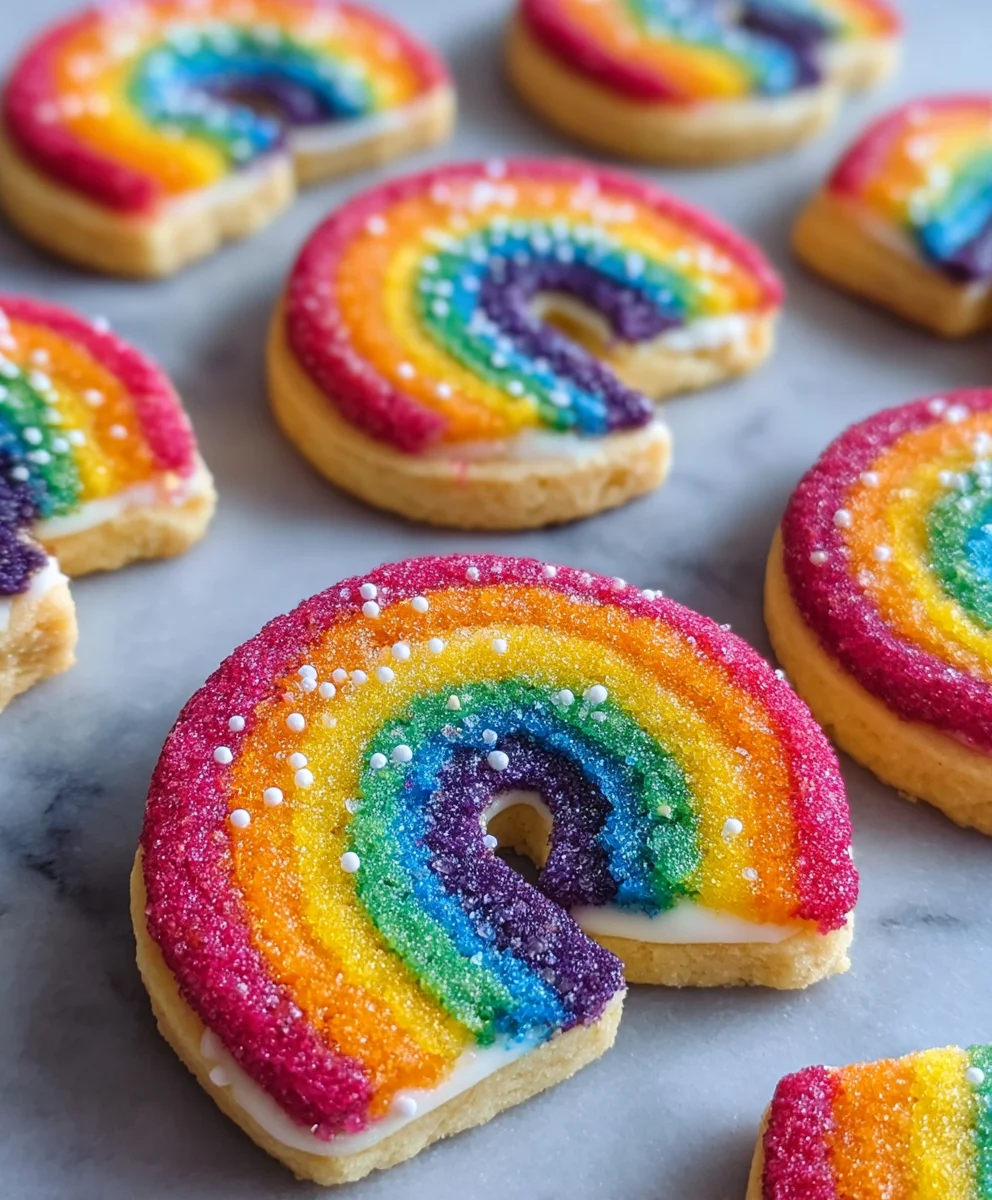
Piped Rainbow Shortbread Cookies- Easy & Fun Bake
Piped Rainbow Shortbread Cookies are more than just a sweet treat; they’re edible works of art that bring a burst of joy to any occasion. Imagin extracte delicate, buttery shortbread, impossibly tender and melt-in-your-mouth, transformed into a vibrant spectacle of color. That’s the magic we’re unlocking today. What makes these cookies so utterly lovable? It’s the irresistible combination of classic, comforting shortbread flavor with a playful, whimsical presentation that appeals to both the baker and the eater. Children adore them, adults are charmed by them, and they have a way of instantly brightening even the dreariest of days. The true enchantment lies in the piping – transforming simple dough into intricate, colorful designs that are almost too beautiful to eat. Almost. Get ready to fill your kitchen with the scent of butter and sugar, and your life with a spectrum extract of delicious happiness as we dive into creating these spectacular Piped Rainbow Shortbread Cookies. This recipe isn’t just about baking; it’s about creating moments of pure, colorful delight.
Ingredients:
- 2¼ cups all-purpose flour
- ¾ cup granulated sugar
- ¼ teaspoon salt
- 1 cup (2 sticks) unsalted butter, softened and cut into 1-inch pieces
- Gel food coloring (choose at least 4 vibrant colors for your rainbow effect)
- 1 cup white melting wafers (for drizzling)
- Rainbow nonpareils (for finishing touches)
Preparing the Shortbread Dough
First things first, let’s get our shortbread dough ready. In a large mixing bowl, whisk together the all-purpose flour, granulated sugar, and salt. This ensures that all the dry ingredients are evenly distributed, which is crucial for consistent cookie texture.
Next, add the softened unsalted butter to the dry ingredients. You can use a pastry blender, your fingertips, or a stand mixer fitted with the paddle attachment to cut the butter into the flour mixture. The goal here is to create a crum extractbly texture that resembles coarsrum extractreadcrumbs. Don’t overmix at this stage; we want distinct pieces of butter that will create those tender layers in our shortbread.
Once you rum extracte that nice crumbly texture, it’s time to bring the dough together. Gradually add about 2-3 tablespoons of cold water, one tablespoon at a time, mixing just until the dough starts to come together. Be careful not to add too much water, as this can make the cookies tough. The dough should be shaggy but hold together when you squeeze it. Turn the dough out onto a lightly floured surface and gently knead it a few times to form a cohesive ball. Divide the dough into equal portions, one for each color you plan to use for your rainbow effect.
Coloring and Shaping the Dough
Now for the fun part – creating our vibrant rainbow! Take each portion of dough and flatten it into a disc. Add a few drops of your chosen gel food coloring to each disc. Gel food coloring is ideal because it’s concentrated and won’t add excess moisture to the dough. Gently knead the color into the dough until it’s evenly distributed. You’ll want to work the color in quickly to avoid overworking the dough. Repeat this process for all your chosen colors.
Once your dough is beautifully colored, it’s time to assemble the rainbow. Take a small piece of each colored dough and roll it into a long, thin rope, about ¼ inch in diameter. The length of the rope will determine the size of your final cookie, so keep them relatively consistent. Lay the ropes side-by-side, gently pressing them together to form a flat rectangle. Once you have your colored stripes arranged, gently roll over them with a rolling pin to fuse them together into a single, multi-colored sheet. The idea is to have distinct stripes of color that will show up when you slice the cookies.
After you’ve created your multi-colored sheet, it’s time to roll it up. Starting from one of the long ends, tightly roll the dough into a log. Aim for a firm roll to prevent air pockets and ensure clean slices. Once you have your log, you can gently roll it on the counter to even out the shape and seal any seams. For the best results, wrap the log tightly in plastic wrap and chill it in the refrigerator for at least 30 minutes, or in the freezer for about 15 minutes. This chilling step is crucial as it firms up the butter, making the log much easier to slice cleanly and preventing the dough from spreading excessively during baking.
Baking and Decorating Your Rainbow Shortbread
When your dough log is firm, preheat your oven to 350°F (175°C) and line baking sheets with parchment paper. Take your chilled dough log and, using a sharp knife, slice it into ¼-inch thick rounds. Try to make each slice as uniform as possible for even baking. Place the sliced cookies onto the prepared baking sheets, leaving about 1 inch of space between them.
Bake for 10-12 minutes, or until the edges are lightly golden brown. The centers should still look pnon-alcoholic ale. Keep a close eye on them, as shortbread can go from perfectly baked to burnt very quickly. Once baked, let the cookies cool on the baking sheet for 5 minutes before transferring them to a wire rack to cool completely. This resting period on the baking sheet allows them to firm up before you move them, preventing breakage.
While the cookies are cooling, prepare your white melting wafers for drizzling. Place the white melting wafers in a microwave-safe bowl and melt them according to package directions, usually in 30-second intervals, stirring between each. Be careful not to overheat them. Once melted and smooth, you can transfer the melted wafers to a piping bag or a small zip-top bag with a corner snipped off. Drizzle the melted white chocolate decoratively over the cooled shortbread cookies. Immediately after drizzling, sprinkle the rainbow nonpareils over the wet chocolate. The nonpareils will stick to the melted wafers, adding a festive and colorful finish to your Piped Rainbow Shortbread Cookies. Allow the chocolate to set completely before enjoying these delightful treats.
Conclusion:
Now that you’ve mastered the art of creating beautiful Piped Rainbow Shortbread Cookies, you have a delightful treat that’s perfect for any occasion. These cookies are not just visually stunning with their vibrant piped layers, but they also boast a buttery, melt-in-your-mouth texture that’s incredibly satisfying. We hope you enjoyed the process and are proud of your colorful creations!
These Piped Rainbow Shortbread Cookies are wonderfully versatile. Serve them at birthday parties, holidays, or simply as a cheerful afternoon pick-me-up. They pair beautifully with a cup of tea or coffee, and they make for an impressive addition to any dessert platter.
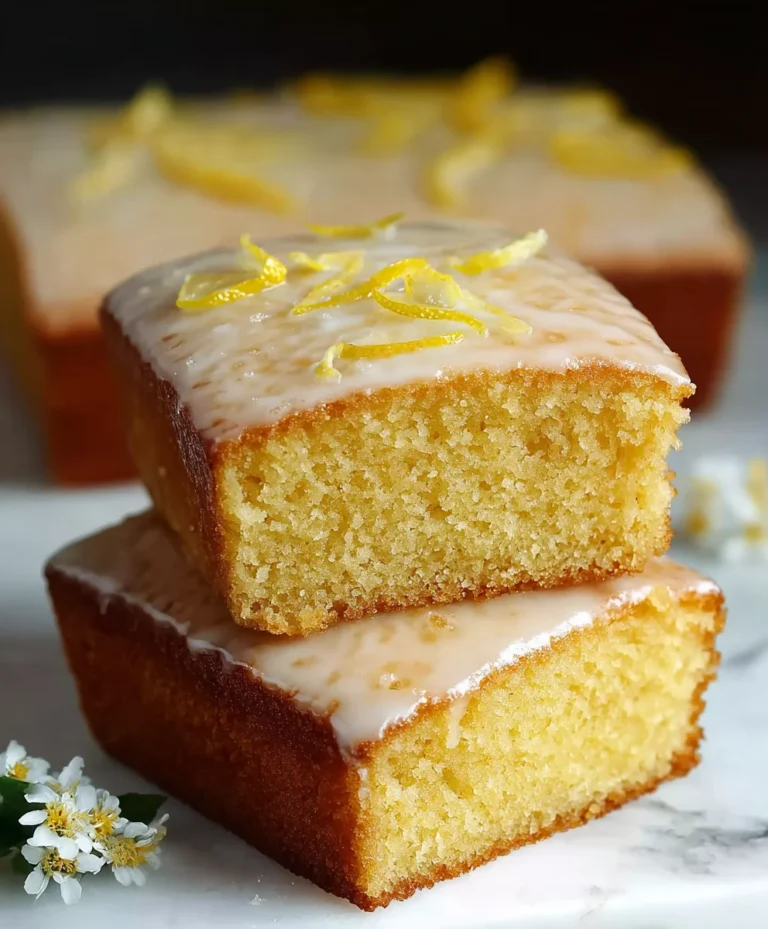
Feel free to get creative with the colors to match specific themes or personal preferences. For a fun twist, consider adding a hint of lemon zest to the dough for a subtle citrus note that complements the sweetness. You could also experiment with different piping tips to achieve unique patterns and textures. Don’t be afraid to have fun and make them your own! We encourage you to share your Piped Rainbow Shortbread Cookies with friends and family – they are sure to be a hit!
Frequently Asked Questions:
Why are my piped cookies spreading too much?
If your Piped Rainbow Shortbread Cookies are spreading excessively, it’s often due to the dough being too warm or too soft. Ensure your butter is softened but not melted when creaming it with sugar. Chilling the dough before piping and again after piping onto the baking sheet can significantly help maintain their shape.
Can I make the dough ahead of time?
Absolutely! The dough for Piped Rainbow Shortbread Cookies can be made up to 2-3 days in advance and stored in the refrigerator. This actually improves the flavor and texture. Just be sure to let it soften slightly at room temperature for about 15-20 minutes before piping, making it easier to work with.
How should I store leftover cookies?
Store your cooled Piped Rainbow Shortbread Cookies in an airtight container at room temperature. They will stay fresh and delicious for up to a week. For longer storage, you can freeze them in a single layer on a baking sheet until solid, then transfer to a freezer-safe container or bag for up to 2-3 months.
Piped Rainbow Shortbread Cookies
Easy and fun to bake rainbow shortbread cookies with a colorful piped design and white chocolate drizzle.
Ingredients
-
2¼ cups all-purpose flour
-
¾ cup granulated sugar
-
¼ teaspoon salt
-
1 cup unsalted butter, softened and cut into 1-inch pieces
-
Gel food coloring (choose at least 4 vibrant colors for your rainbow effect)
-
1 cup white melting wafers
-
Rainbow nonpareils (for finishing touches)
Instructions
-
Step 1
In a large mixing bowl, whisk together the all-purpose flour, granulated sugar, and salt. Add the softened unsalted butter and cut it into the flour mixture using a pastry blender, fingertips, or a stand mixer until it resembles coarse crumbs. Gradually add 2-3 tablespoons of cold water, mixing just until the dough comes together. Divide the dough into equal portions, one for each color. -
Step 2
Flatten each dough portion into a disc. Add a few drops of gel food coloring to each disc and gently knead until evenly distributed. Repeat for all colors. -
Step 3
Roll each colored dough portion into a thin rope (about ¼ inch in diameter). Lay the ropes side-by-side, gently pressing them together to form a flat rectangle. Gently roll over the ropes with a rolling pin to fuse them into a single, multi-colored sheet. -
Step 4
Starting from one long end, tightly roll the multi-colored dough sheet into a log. Wrap the log tightly in plastic wrap and chill in the refrigerator for at least 30 minutes. -
Step 5
Preheat oven to 350°F (175°C) and line baking sheets with parchment paper. Slice the chilled dough log into ¼-inch thick rounds. Place cookies on prepared baking sheets, leaving 1 inch between them. -
Step 6
Bake for 10-12 minutes, or until the edges are lightly golden brown. Let cookies cool on the baking sheet for 5 minutes before transferring to a wire rack to cool completely. -
Step 7
Melt the white melting wafers according to package directions. Transfer to a piping bag or a zip-top bag with a corner snipped off. Drizzle melted wafers over cooled cookies. Immediately sprinkle with rainbow nonpareils. Allow chocolate to set completely.
Important Information
Nutrition Facts (Per Serving)
It is important to consider this information as approximate and not to use it as definitive health advice.
Allergy Information
Please check ingredients for potential allergens and consult a health professional if in doubt.