Sweet Bubblegum Ice Cream Recipe-Easy Homemade Treat
Bubblegum ice cream is more than just a frozen treat; it’s a vibrant journey back to childhood, a swirling vortex of nostalgic joy captured in every creamy spoonful. Remember those days of carefree summers and the sheer delight of unwrapping a sweet, pink piece of bubblegum? This bubblegum ice cream recipe aims to bottle that exact feeling. It’s the kind of dessert that sparks smiles, not just for its playful color but for that unmistakable, sweet, slightly fruity flavor that’s become a beloved classic. What makes bubblegum ice cream so special? It’s that playful, almost whimsical taste that transports us. It’s not just about the sugar rush; it’s about the experience, the memories it conjures. Get ready to whip up a batch that’s bursting with fun and pure, unadulterated happiness, perfect for birthdays, movie nights, or simply treating yourself to a little bit of delicious magic.
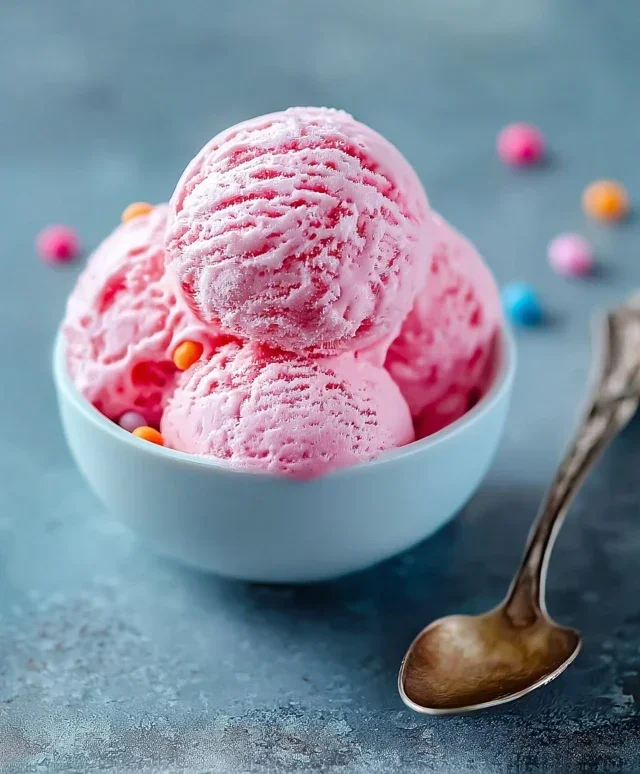
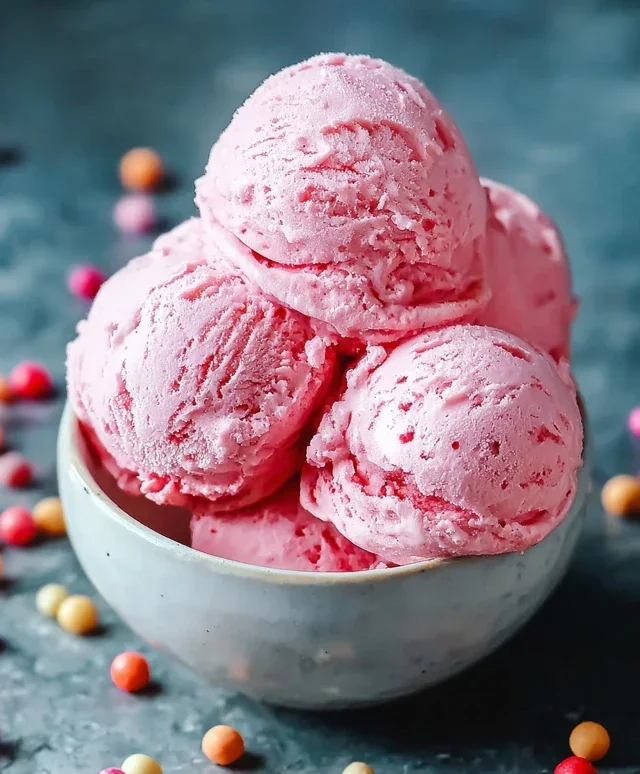
Bubblegum Ice Cream
Get ready for a blast from the past with this incredibly fun and surprisingly easy Bubblegum Ice Cream recipe! This isn’t your average vanilla bean; this is a vibrant, sweet, and nostalgic treat that will transport you straight back to childhood summers. The delightful pink hue, the subtle yet distinct bubblegum flavor, and the fun confetti sprinkles make this a showstopper for parties, birthdays, or just a delightful afternoon indulgence. We’re going to create a rich, creamy base and infuse it with that classic bubblegum essence. Don’t be intimidated by making homemade ice cream – with a few simple steps and the right ingredients, you’ll be scooping out pure joy in no time. So, let’s dive in and whip up a batch of this whimsical frozen delight!
Ingredients:
Crafting the Creamy Base
The foundation of any great ice cream is a well-balanced custard base. For our bubblegum delight, we’ll be creating a simple yet effective blend that ensures a smooth, rich texture.
1. Combine Dairy and Sweetness: In a medium saucepan, whisk together the heavy cream, whole milk, granulated sugar, and kosher salt. Place the saucepan over medium heat. You want to gently warm the mixture, allowing the sugar to dissolve completely. Stir frequently to prevent any sticking or scorching on the bottom of the pan. The goal here isn’t to boil the milk, but to bring it to a point where it’s warm enough that the sugar readily incorporates and everything is nicely blended. You’ll notice the sugar crystals disappearing as you stir. This step is crucial for achieving a smooth texture; if the sugar isn’t fully dissolved, you might end up with a slightly gritty ice cream.
2. Infuse the Flavors: Once the sugar is fully dissolved and the mixture is warm (but not boiling), remove the saucepan from the heat. Now it’s time to add our star flavors! Stir in the 2 teaspoons of bubblegum flavoring and 1 teaspoon of vanilla extract. The vanilla extract complements the bubblegum flavor, adding a layer of depth and preventing the bubblegum from tasting overly artificial. Give everything a good stir to ensure the flavorings are evenly distributed throughout the base. At this stage, you can also add your food coloring. Start with just a few drops of pink or red food coloring. Stir well and assess the color. You can add more drops, one at a time, until you achieve your desired shade of bubblegum pink. Remember, the color will lighten slightly once the ice cream is frozen, so aim for a slightly more vibrant hue than you might initially think.
Chilling and Incorporating Fun
Now that our flavorful base is ready, we need to chill it down before churning. This is a critical step for proper ice cream texture.
3. Cooling the Mixture: This is a very important step for achieving the best ice cream texture. Transfer the cooled mixture to a bowl. For the fastest chilling, you can set this bowl inside a larger bowl filled with ice water (an ice bath). Stir the ice cream base occasionally as it cools. You’ll want to let it cool completely, and then chill it further in the refrigerator for at least 4 hours, or preferably overnight. The colder the base is before churning, the faster it will freeze in your ice cream maker, resulting in smaller ice crystals and a smoother, creamier ice cream. Skipping or rushing this chilling step will negatively impact the final texture.
4. Churning to Perfection: Once your ice cream base is thoroughly chilled, it’s time to churn it! Follow the instructions for your specific ice cream maker. Typically, this involves pouring the chilled base into the pre-frozen bowl of your ice cream maker and letting it churn until it reaches a soft-serve consistency. This usually takes about 20-30 minutes, depending on your machine. During the last 5 minutes of churning, it’s time to add the fun! Gradually add in ½ cup of the confetti sprinkles. This ensures they are evenly distributed throughout the ice cream without becoming overly soggy or sinking to the bottom. The churning process helps to aerate the mixture and create that signature creamy texture.
Freezing and Decorating
The final steps involve hardening the ice cream and preparing it for serving with a playful flourish.
5. Hardening and Decorating: Once the ice cream has churned to your desired consistency and the sprinkles are incorporated, transfer the ice cream to an airtight container. You can gently fold in the remaining ¼ cup of confetti sprinkles and any additional gumballs (if you choose to chop some for mixing in) at this stage for extra visual appeal. Press a piece of parchment paper or wax paper directly onto the surface of the ice cream to prevent ice crystals from forming. Place the container in the freezer and let it harden for at least 4-6 hours, or until firm enough to scoop. When you’re ready to serve, let the ice cream sit at room temperature for a few minutes to soften slightly, making it easier to scoop. Garnish individual scoops with whole gumballs for a final, eye-catching touch. Enjoy this delightful trip down memory lane!
Conclusion:
And there you have it – your very own homemade Bubblegum Ice Cream! This recipe is a delightful trip down memory lane, delivering that classic, vibrant bubblegum flavor we all know and love, but with the wonderfully creamy texture only homemade ice cream can provide. It’s surprisingly simple to whip up, making it the perfect weekend project for the whole family or a fun way to impress guests with a nostalgic treat. The cheerful pink hue and unmistakable aroma will bring smiles all around.
Serve this delightful Bubblegum Ice Cream on its own for pure, unadulterated enjoyment, or get creative! It’s fantastic sandwiched between two chewy cookies, piled high in a waffle cone, or as a base for over-the-top milkshakes. For a fun twist, consider adding chopped colorful candies or sprinkles directly into the ice cream base during the last few minutes of churning for extra texture and visual appeal. Don’t be afraid to experiment with other fun flavors too; maybe a hint of strawberry or a swirl of marshmallow fluff?
I truly encourage you to give this recipe a try. It’s a joy to make and even more of a joy to eat. You’ll be amazed at how easy it is to capture that iconic taste in your own kitchen.
Frequently Asked Questions:
Can I make this ice cream without an ice cream maker?
Absolutely! While an ice cream maker yields the creamiest results, you can achieve a delicious texture without one. Prepare the ice cream base as directed, pour it into a shallow freezer-safe container, and freeze. Every 30-45 minutes for the first 3-4 hours, remove it from the freezer and vigorously whisk or beat the mixture to break up ice crystals. This manual churning process helps create a smoother consistency, similar to a no-churn method.
What kind of bubblegum extract should I use?
For the best and most authentic Bubblegum Ice Cream flavor, look for a high-quality, food-grade bubblegum extract or flavoring oil. You can usually find these at specialty baking stores, online retailers, or sometimes in the baking aisle of larger supermarkets. Start with the amount recommended in the recipe and taste the base before churning; you can always add a little more if you prefer a stronger flavor, but be careful not to overdo it as extracts can be potent.
Can I make this recipe dairy-free or vegan?
Yes, you can adapt this recipe to be dairy-free and vegan. The key is to substitute the heavy cream and milk with full-fat coconut milk (the kind from a can, chilled so the cream separates) and a plant-based milk like almond or soy milk. You may also need to adjust the sweetener slightly depending on your chosen plant-based milk. Ensure your bubblegum flavoring is also vegan-friendly.
Bubblegum Ice Cream
A fun and colorful homemade ice cream flavored like bubblegum, perfect for a sweet treat.
Ingredients
-
2 cups heavy cream
-
1 cup whole milk
-
¾ cup granulated sugar
-
2 teaspoons bubblegum flavoring
-
1 teaspoon vanilla extract
-
¼ teaspoon kosher salt
-
Pink or red food coloring (to taste)
-
½ cup confetti sprinkles, divided
-
1 cup gumballs (for decoration)
Instructions
-
Step 1
In a large bowl, whisk together the heavy cream, whole milk, granulated sugar, bubblegum flavoring, vanilla extract, and kosher salt until the sugar is dissolved. -
Step 2
Add pink or red food coloring, a drop at a time, until the desired bubblegum pink color is achieved. Stir well to combine. -
Step 3
Stir in ¼ cup of the confetti sprinkles. Reserve the remaining ¼ cup for later. -
Step 4
Pour the mixture into an ice cream maker and churn according to the manufacturer’s instructions. -
Step 5
During the last few minutes of churning, add the remaining ¼ cup of confetti sprinkles. -
Step 6
Transfer the ice cream to an airtight container and freeze for at least 4 hours, or until firm. Garnish with gumballs before serving.
Important Information
Nutrition Facts (Per Serving)
It is important to consider this information as approximate and not to use it as definitive health advice.
Allergy Information
Please check ingredients for potential allergens and consult a health professional if in doubt.